13.2. Setup in Moodle
You can set up Mahara in two different ways for use in Moodle:
General setup on the site level to make it easier for teachers as they won’t require the technical details
Manual setup on the course level
All screenshots were made with Moodle 3.5.
13.2.1. Preconfigure LTI for all courses to use
Go to Site administration → Plugins → Activity modules → Manage activities → Edit preconfigured tool
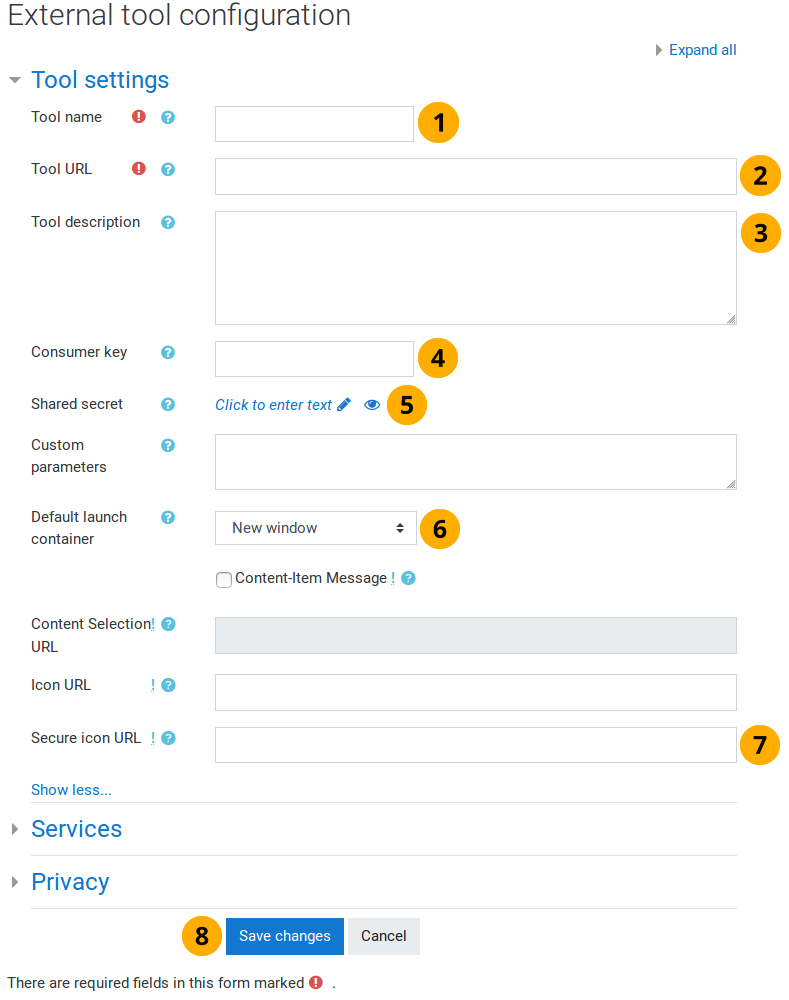
Configure Moodle to connect to Mahara
Tool name: Give a name that your teachers will recognize.
Tool URL: Provide the launch URL. It consists of the base URL of your Mahara site and the following added to the end of it:
/webservice/rest/server.php?wsfunction=module_lti_launchTool description: This field is optional. Providing a description will help your teachers to identify the tool more easily.
Consumer key: Paste the consumer key from Mahara for the LTI connection that you set up earlier.
Shared secret: Paste the consumer secret from Mahara for the LTI connection that you set up earlier.
Default launch container: Choose „New window“ or „Existing window“. Do not choose to embed Mahara. That will not work as you are not allowed to embed Mahara into other websites. Furthermore, it will reduce the space that you have available to work in Mahara.
Secure icon URL: If you don’t want to display the regular Moodle icon for external tools, you can provide a link to your favorite icon. It is recommended that you provide one that sits on your Mahara site and has the dimensions needed by Moodle for best results.
Click the Save changes button to accept the configuration or the Cancel button if you want to abort setting up the tool.
Bemerkung
You do not have to make changes to any of the other settings on the page.
13.2.2. Use a preconfigured Mahara site in a course
If Mahara was already set up as external tool on the site level in Moodle, a teacher only needs to select it when adding the „External tool“ activity in Moodle.
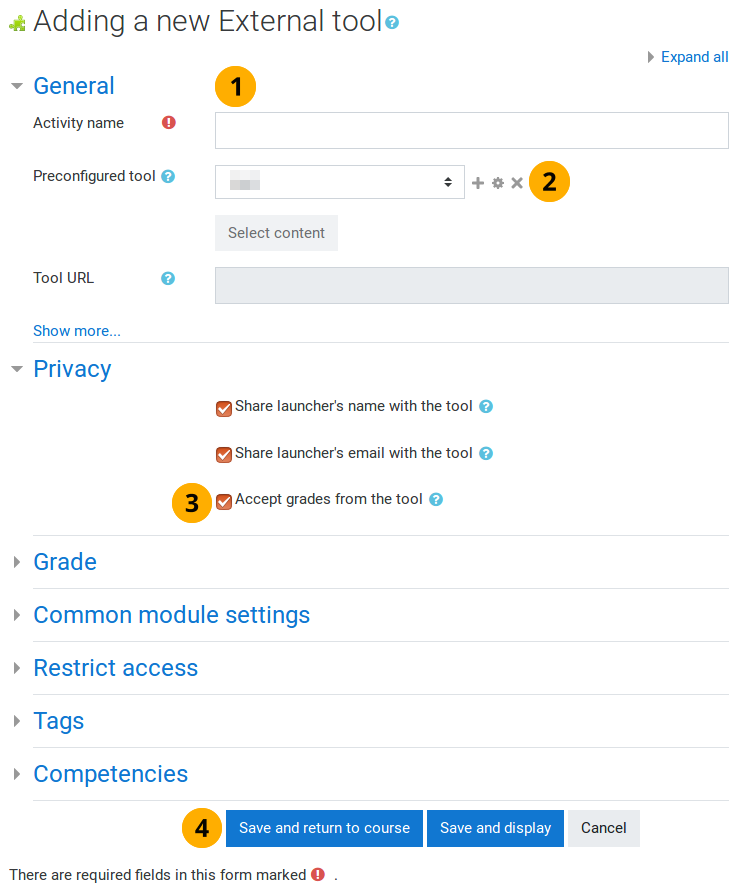
Choose a preconfigured Mahara instance in Moodle
Activity name: Give your activity a title.
Preconfigured tool: Select your Mahara instance from the drop-down menu. It may not be called „Mahara“. Certain fields are not editable when you choose this option as they are determined by the existing site-wide configuration.
Bemerkung
Click the Show more… link if you want to make some additional changes.
Privacy: Tick the option „Accept grades from the tool“ if you want to be able to use the activity for the submission of a portfolio.
Click the Save and return to course button to be taken back to your course page, click the Save and display button to launch into Mahara immediately, or click the Cancel button to abort adding Mahara to your course as activity.
13.2.3. Configure Mahara in a course activity manually
You can set up the connection to Mahara also on the activity level in Moodle without having preconfigured it first on the site level. This can be beneficial if your course is the only one connecting to a specific Mahara site that other courses should not have access to.
If everyone should have access to the same Mahara site, setting up a preconfiguration on the site level is advised though.
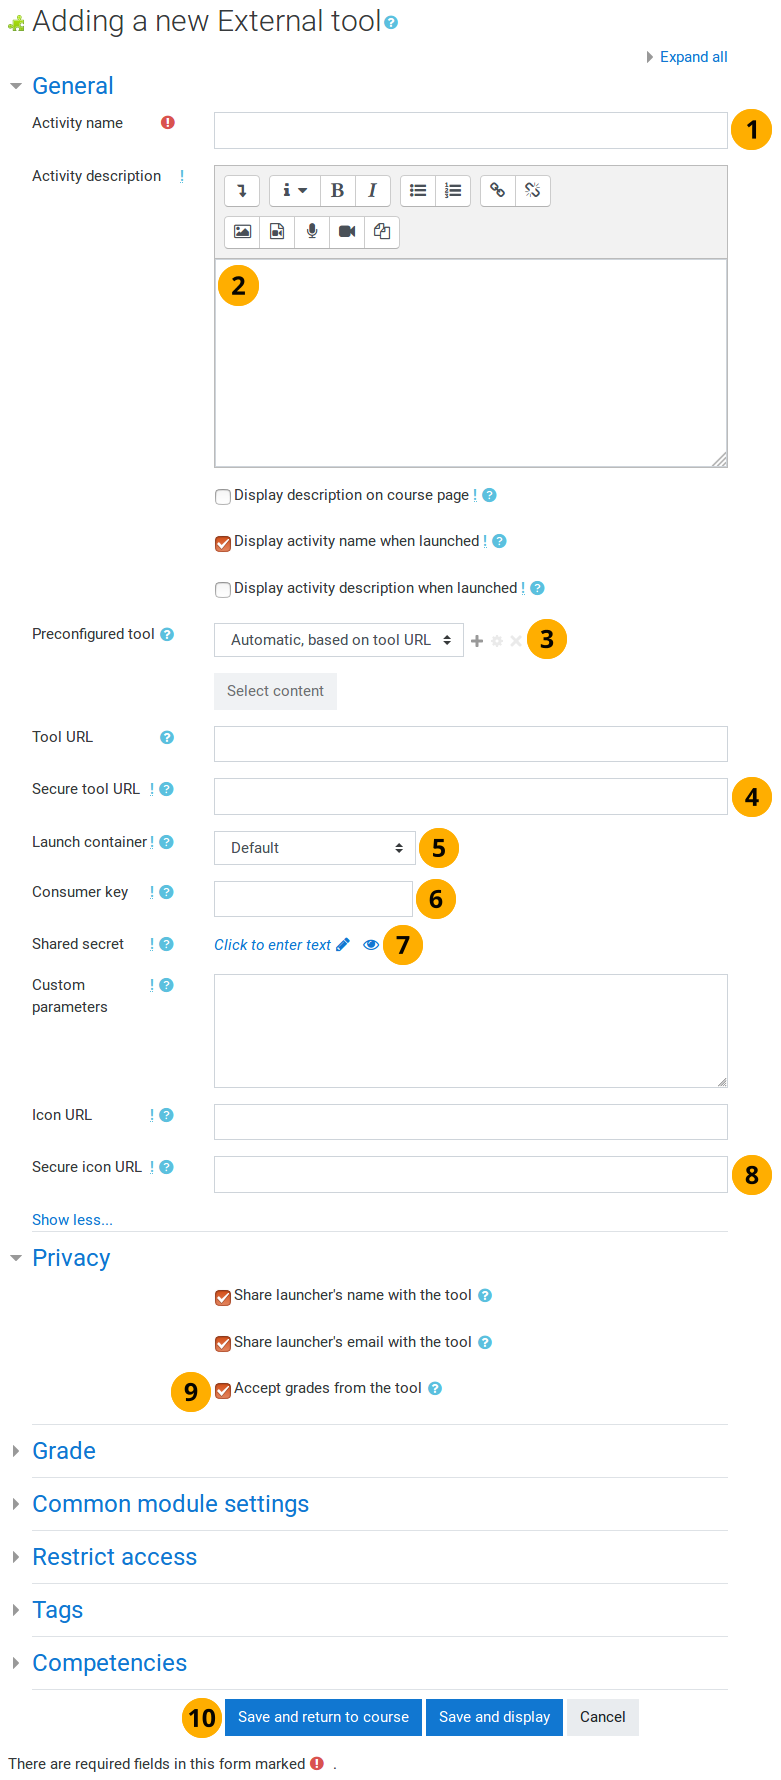
Set up Mahara as external tool in a Moodle course
Activity name: Give your activity a title.
Activity description: Provide a description of your activity. This field is optional.
Preconfigured tool: Select „Automatic, based on tool URL“.
Secure tool URL: Provide the launch URL. It consists of the base URL of your Mahara site and the following added to the end of it:
/webservice/rest/server.php?wsfunction=module_lti_launchBemerkung
You could use the „Tool URL“ field, but since web services in Mahara only work over SSL (unless you have a developer instance), choosing the „Secure tool URL“ is recommended.
Launch container: Choose „New window“ or „Existing window“. Do not choose to embed Mahara. That will not work as you are not allowed to embed Mahara into other websites. Furthermore, it will reduce the space that you have available to work in Mahara.
Consumer key: Paste the consumer key from Mahara for the LTI connection that you set up earlier.
Shared secret: Paste the consumer secret from Mahara for the LTI connection that you set up earlier.
Secure icon URL: If you don’t want to display the regular Moodle icon for external tools, you can provide a link to your favorite icon. It is recommended that you provide one that sits on your Mahara site and has the dimensions needed by Moodle for best results.
Privacy: Tick the option „Accept grades from the tool“ if you want to be able to use the activity for the submission of a portfolio.
Click the Save and return to course button to be taken back to your course page, click the Save and display button to launch into Mahara immediately, or click the Cancel button to abort adding Mahara to your course as activity.
Bemerkung
You do not have to make changes to any of the other settings on the page.
13.2.4. Set up an assignment in Moodle
Select to add the External Tool activity in Moodle.
During the setup ensure that you tick the check box next to „Accept grades from the tool“ under „Privacy“. If you don’t tick this check box, you can only authenticate to Mahara but not select a portfolio for submission.
Click the activity name to finalize the assessment settings. Learners are not able to use the activity until these settings have been saved.