11.9.3. SmartEvidence editor
Administration menu → Extensions → SmartEvidence → Editor
You can set up your SmartEvidence framework file directly in the site administration in Mahara.
This feature is experimental and the first iteration of the editor implementation. We want to make it available to the community already for feedback and future changes.
It is still possible to upload SmartEvidence competency framework files that you created earlier.
11.9.3.1. Edit, copy, or start from scratch
Create a SmartEvidence framework with the editor
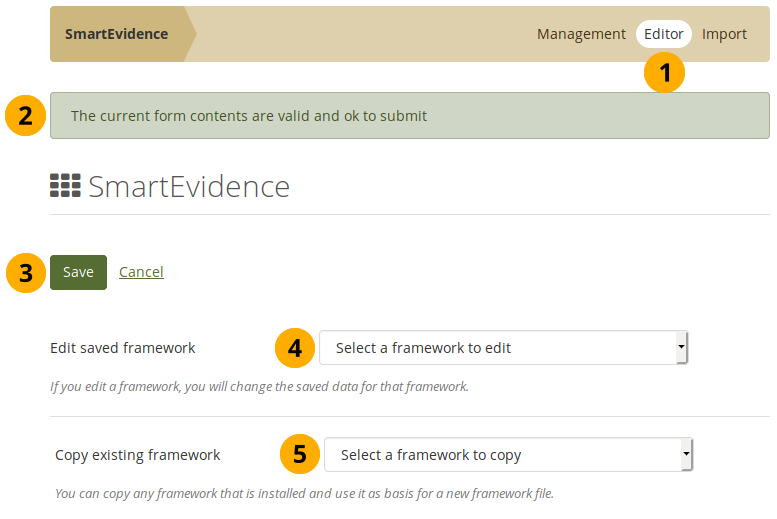
Click the Editor link to go to the screen where you can create a SmartEvidence framework.
A JSON validator runs in the background and informs you of the current state of the form. If there were any issues, you would be alerted to them.
Click the Save button to keep changes you’ve made or click Cancel.
You can edit an existing framework and make changes. This is only possible if the framework is inactive.
You can copy an existing framework and make changes to the copy. The framework that you copy can be active or inactive.
Once you’ve selected whether you want to edit or copy a framework, the original data is displayed in the form automatically. You can also start from scratch without needing to copy or edit a framework that already exists on Mahara.
Siehe auch
If you want to edit a framework that exists in a .matrix file, you can import that framework, set it to ‚inactive‘ and then edit it here in the editor.
11.9.3.2. Basic framework information
Basic framework information
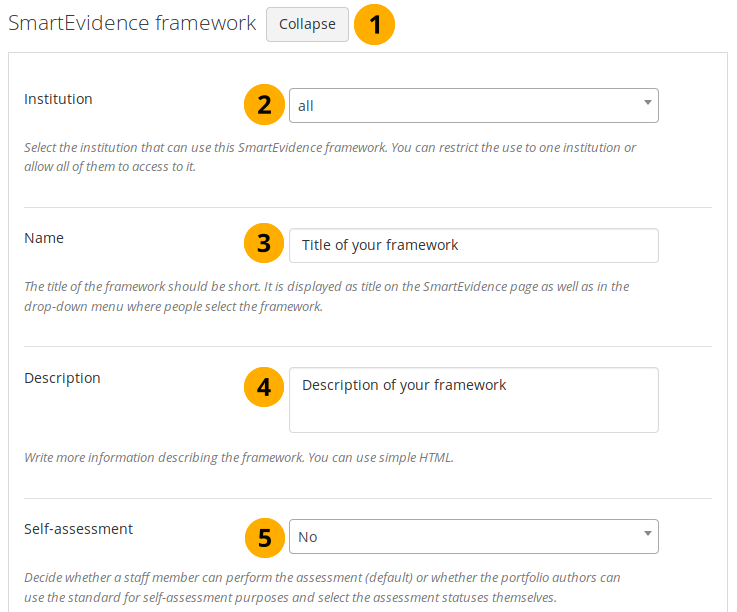
Click the Collapse button to hide all framework details. Click the Expand button to see all details again.
Institution: Select the institution for which the framework shall be available. If you select ‚all‘, every institution that has SmartEvidence enabled can work with this framework.
Name: Give your framework a title. Keep it short and unique as it is displayed as page title as well as in the drop-down menu on the collection’s edit screen when selecting a framework.
Description: You can enter a description that is displayed on the SmartEvidence page above the matrix in a collection. You can use simple HTML, e.g. links and font effects.
Self-assessment: Determine whether people can self-assess their competencies or whether the competencies can only be assessed by somebody else.
Click the Save button at the top or bottom of the page to keep your changes or click Cancel to abort the action.
Warnung
Be careful with the changes you make. There is no backup file to which you can go back to restore the original state of a framework.
11.9.3.3. Evidence statuses
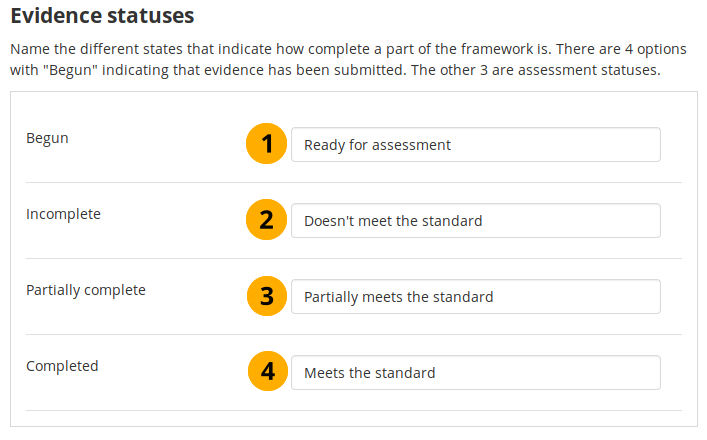
Currently, there are four evidence statuses that can be used in an evidence map: begun, incomplete, partially complete, and completed. You can decide what words are used for these statuses in the framework that you set up. For example, this allows you to set up frameworks in different languages.
Framework statuses
Begun: This status indicates that the portfolio author has left an annotation and that the evidence is ready for assessment. The icon used in the matrix is a white circle with a blue outline .
Incomplete: This assessment status shows that the evidence does not meet the evidence criteria. It usually means major rework is required. The indicator symbol in the matrix is a white cross on red background .
Partially complete: This status is used when the evidence meets some of the criteria for which it was added. The icon used is a yellow half-moon .
Completed: The assessor uses this status when the evidence meets the criteria. The indicator icon is a white checkmark on green background .
Click the Save button at the top or bottom of the page to keep your changes or click Cancel to abort the action.
11.9.3.4. Standards
Create the categories in which your framework is divided. You can assign individual standard elements and sub-elements to these categories. You must have at least one standard category.
Set up the standards in a framework
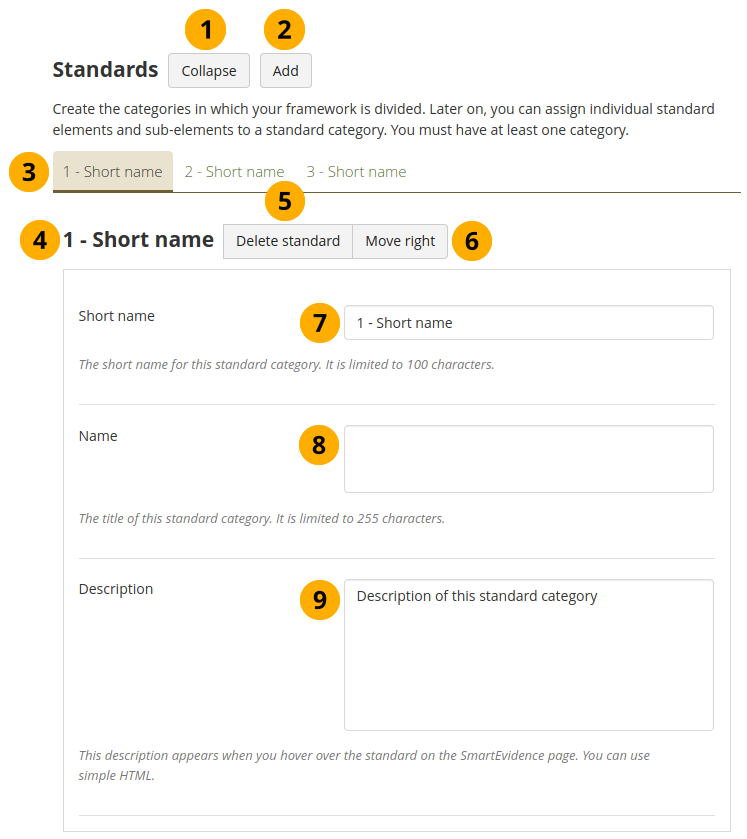
Click the Collapse button to collapse this section. Click the Expand button to expand it again.
Click the Add button to create a new standard category. A new category is added to the end of the list.
All standards that are currently available are listed. The active one, i.e. the one for which details are displayed below, is highlighted. The standards are displayed in the matrix in the order in which they are listed here. You can move individual standards left or right when you selected them to change their order.
The title of the active standard category is displayed.
Click the Delete standard button to delete this particular standard.
Bemerkung
 When you delete a standard and there are standard elements associated with it, they are going to be deleted as well.
Click the Move right button to reposition this standard. There is also the Move left button that is displayed when it is possible to move a standard higher.
Short name: Each standard needs a short name, e.g. a number or a summary of the full title. The short name is mandatory and a maximum of 100 characters long.
Name: Title of the standard. It is mandatory and a maximum of 255 characters long.
Description: The description is optional and is displayed when you hover over the name of the standard (touch-click on mobile).
Click the Save button at the top or bottom of the page to keep your changes or click Cancel to abort the action.
Bemerkung
You do not enter a ‚standard ID‘ as you do when creating the matrix file. Mahara keeps track of the position of the standard when you move it to the left or right. The database is updated accordingly.
11.9.3.5. Standard elements
Set up the individual standard elements, i.e. competencies to which content can be aligned. The standard elements can be put into a hierarchical order with the help of the ‚Parent ID‘.
Bemerkung
At the moment, standard elements are listed horizontally one after the other without breaks between individual standards.
The numbering is the internal Mahara numbering. If you wish your standard elements to be numbered, please put your numbers into the short name and / or name for the standard elements.

Set up the standards in a framework
Click the Collapse button to collapse this section. Click the Expand button to expand it again.
Click the Add button to create a new standard element. A new standard element is added to the end of the list.
Click the Delete all button to delete all standard elements you have set up.
All standard elements that are currently available are listed. The active one, i.e. the one for which details are displayed below, is highlighted. The standard elements are displayed in the matrix in the order in which they are listed here. You can move individual standard elements left or right when you selected them to change their order.
The title of the active standard element is displayed.
Click the Delete standard element button to delete this particular standard element.
Bemerkung
When you delete a standard element, and it is a parent of other standard elements, they are going to be deleted as well.Click the Move right button to reposition this standard element. There is also the Move left button that is displayed when it is possible to move a standard element higher.
Short name: Each standard element needs a short name, e.g. a number or a summary of the full title. The short name is mandatory and a maximum of 100 characters long.
Name: Title of the standard element. It is mandatory and a maximum of 255 characters long.
Description: The description is optional and is displayed when you hover over the name of the standard element (touch-click on mobile).
Standard ID: Choose the standard to which you want to associate this standard element.
Bemerkung
The position of the standard element in the horizontal list of all elements determines where in the hierarchy it is positioned within a standard.
Parent ID: Select the standard element that is one level higher than the current standard element you are editing if the current element shall be a sub-element to another. You only see the standard elements for the standard that you selected in the Standard ID field.
Click the Save button at the top or bottom of the page to keep your changes or click Cancel to abort the action.