4.10. Blogs
Main menu → Create → Journals
The Journal is a tool with which you can record your thoughts and experiences online. By adding your journal or individual posts of it to a page you can allow others to place feedback and comments on it. Thus, you can create a dialogue with your audience.
Per default, everyone has one journal available. You can also have multiple journals.
Blogübersicht mit Blogeinträgen
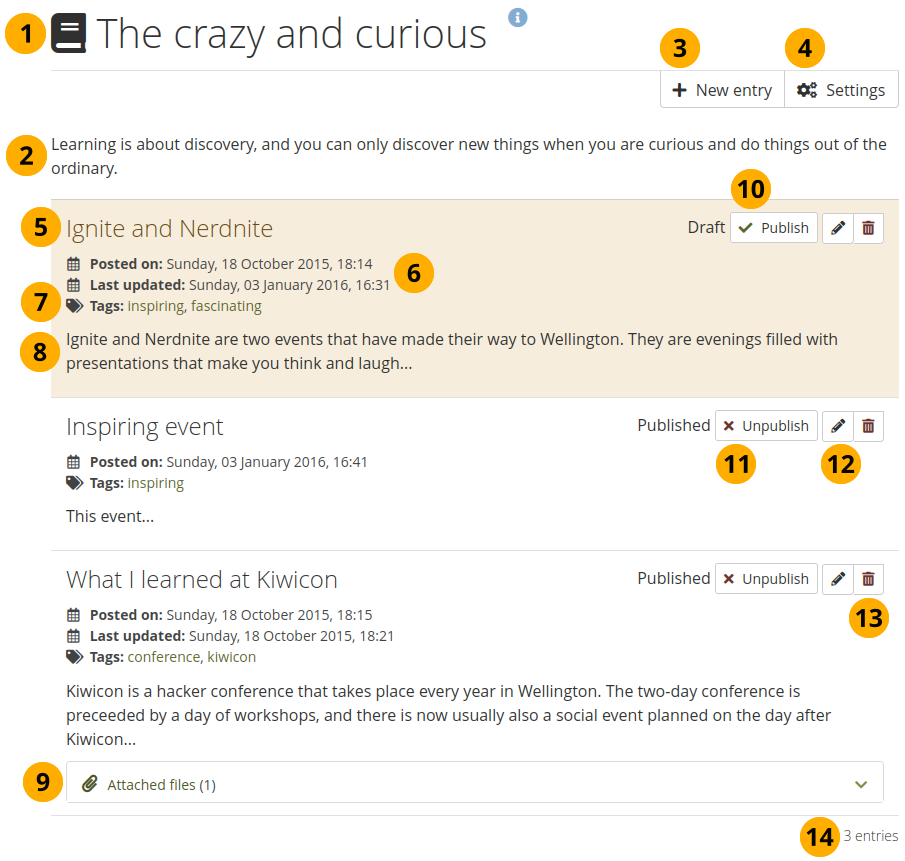
Blogtitel
Blogbeschreibung (optional)
Klicken Sie auf den Neuer Eintrag-Button, um einen neuen Eintrag im Blog zu erstellen.
Klicken Sie auf den Einstellungen-Button, um Einstellungen für einen Blog zu ändern (siehe unten)
Titel des Blogeintrags
Creation date of the journal entry. If you updated the entry, that date and time is also shown.
Schlagwörter, die mit dem Blogeintag assoziiert werden
Beginn des Blogeintrags
You can view any files you attached to an entry.
If a journal entry is labelled Draft, only you can view it. You can then click the Publish button to publish this entry to your journal for others to see when it is included in a page.
Bemerkung
Wenn Sie einen Blog herausbringen, machen Sie diesen nicht automatisch für andere zugänglich oder veröffentlichen diesen im Internet. Der Blog oder der Blogeintrag muss erst in eine Ansicht gestellt werden, die dann mit anderen geteilt wird.
If a journal entry is labelled Published, you can click the Unpublish button to revert it back to draft status.
Klicken Sie auf den Bearbeiten-Button , um Änderungen am Blogeintrag vorzunehmen.
Klicken Sie auf den Löschen-Button , um einen Blogeintrag zu löschen.
Anzahl der Einträge in Ihrem Blog
4.10.1. Ändern Sie Ihre Blogeinstellungen
Sie können den Titel Ihres Standardblogs (und aller anderen, wenn Sie diese Option aktiviert haben) ändern und eine Beschreibung sowie Schlagworte hinzufügen.
Blogeinstellungen
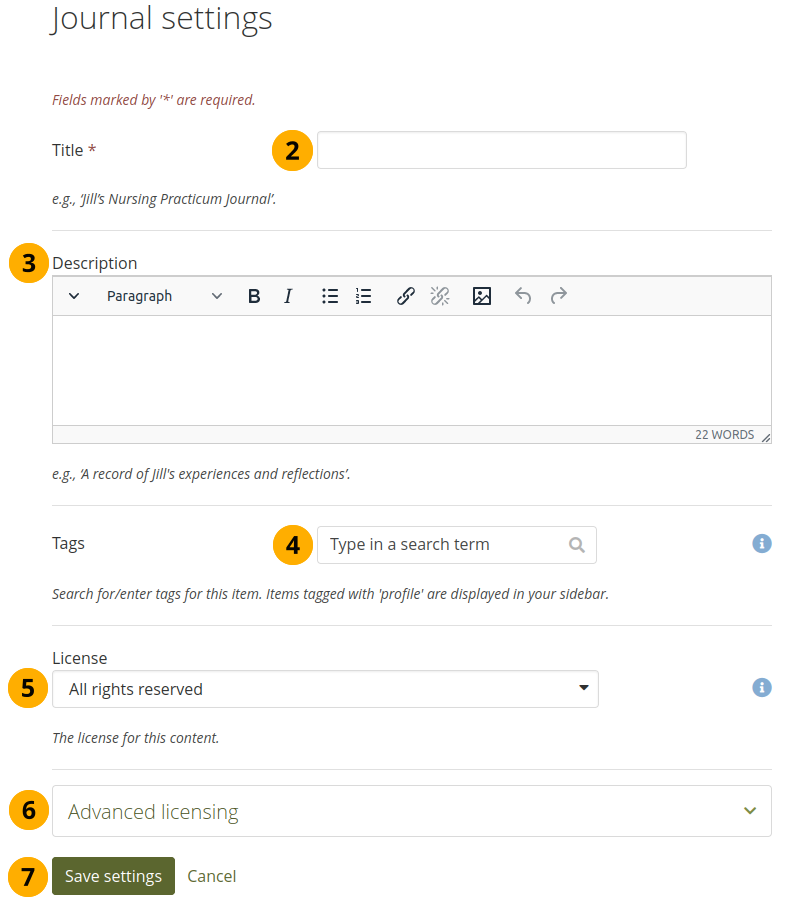
Klicken Sie auf den Einstellungen-Button für Ihren Blog.
Titel: Ändern Sie den Titel des Blogs. Dies ist ein Pflichtfeld.
Beschreibung: Fügen Sie eine Beschreibung zu Ihrem Blog hinzu. Sie können den Text auch formatieren.
Tags: Add tags to your journal for easier searching later on. You can choose from your existing tags by starting to type a letter and then selecting the tag you want to use. You can also type a new tag, and it is added to your list of tags.
Siehe auch
You can find more information on how to use the tag selector in the ‚Tags‘ section.
License: You see this field if the site administrator turned on license metadata. Choose the license for the journal. You can set your default license in your account settings.
Advanced licensing: You see this option if the site administrator turned on license metadata. If you click it, you see two additional license fields, ‚Licensor‘ and ‚Original URL‘, that you can fill in if this in not your own journal.
Klicken Sie auf den Einstellungen speichern-Button zum bestätigen oder auf Abbrechen, um die Veränderungen nicht zu übernehmen.
4.10.2. Einen Blogeintrag einfügen
Alle Blogeinträge, die Sie erstellen, sind solange privat bis Sie sie in einer Ansicht anzeigen lassen. Das Veröffentlichen eines Blogs oder Blogeintrags ist ein dreiteiliger Prozess:
Schreiben Sie Ihren Eintrag und speichern Sie ihn ab.
In einer Ansicht, die Ihren Absichten am besten entspricht, wählen Sie einen der Blöcke für Blogs
Geben Sie denjenigen Zugriff, die die Ansicht sehen sollen.
Tragen Sie einen neuen Beitrag in Ihrem Blog wie folgt ein.
Blogeintrag
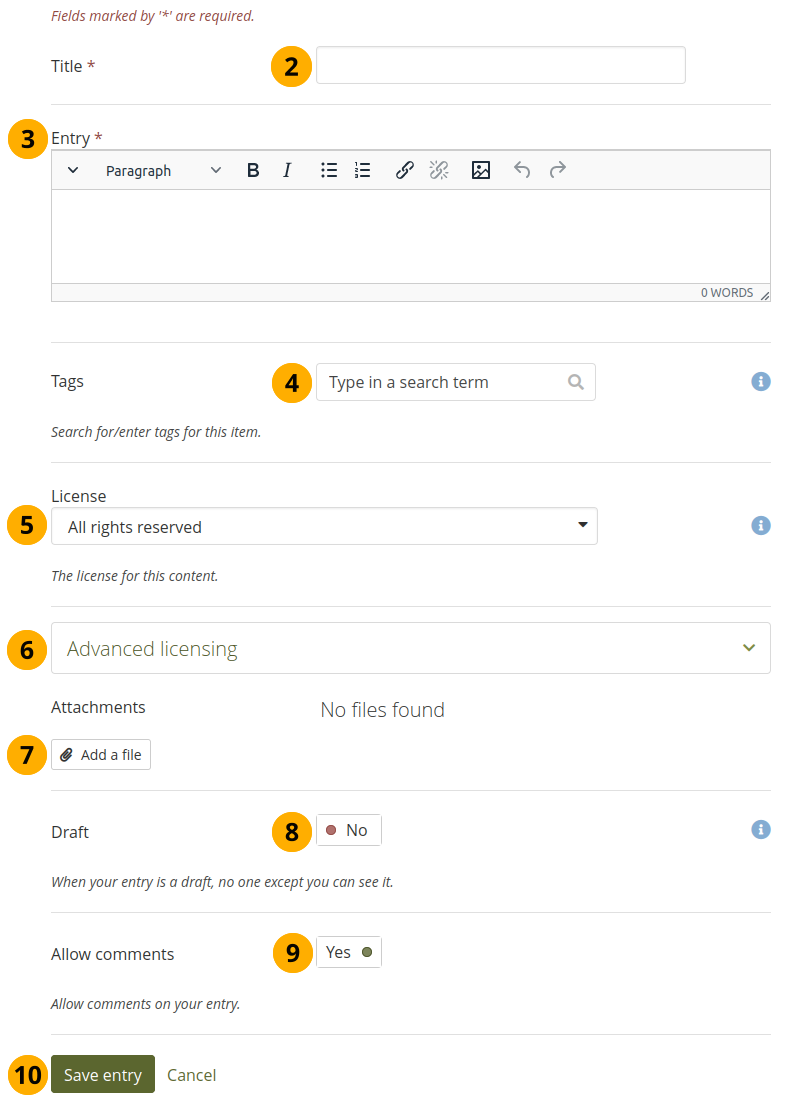
Klicken Sie im Blog auf Neuer Eintrag.
Titel: Tragen Sie einen Titel für den Beitrag ein, der ausdrückt worüber Sie schreiben. Dieses Feld ist ein Pflichtfeld.
Eintrag: Fügen Sie hier Ihren Text ein und ergänzen Sie evtl. Bilder. Der Editor hilft Ihnen, den Beitrag gut lesbar zu gestalten. Dieses Feld muss ausgefült werden.
Tags: Add tags to your journal for easier searching later on. You can choose from your existing tags by starting to type a letter and then selecting the tag you want to use. You can also type a new tag, and it is added to your list of tags.
Siehe auch
You can find more information on how to use the tag selector in the ‚Tags‘ section.
License: You see this field if the site administrator turned on license metadata. Choose the license for the journal entry. You can set your default license in your account settings.
Advanced licensing: You see this option if the site administrator turned on license metadata. If you click it, you see two additional license fields, ‚Licensor‘ and ‚Original URL‘, that you can fill in if this in not your own journal entry.
Anhänge: Fügen Sie einen oder mehrere Anhänge an Ihren Beitrag, z.B. PDF-Dateien zum Inhalt des Beitrags oder Bilder. Sie können Dateien aus Ihrem Dateibereich verwenden oder neu hochladen.
Entwurf: Kennzeichnen Sie Ihren Eintrag als Entwurf wenn es noch nicht fertig ist. Dies ist nützlich wenn Ihr Blog bereits veröffentlicht wurde, dieser einzelne Eintrag aber noch nicht für andere sichtbar sein soll. Sie selber können den Eintrag sehen, andere nicht.
Allow comments: Change the status of the switch box to ‚Yes‘ if you want to receive comments on the journal entry.
Klicken Sie auf den Speichern-Button zum Sichern des Eintrags oder Abbrechen um die Änderungen/Eingaben nicht zu speichern.
4.10.3. Fügen Sie Ihrem Blogeintrag ein Bild hinzu
Bemerkung
Please refer to the section ‚Insert an image into text‘ for more information.
4.10.4. Fügen Sie eine Datei als Anhang an den Blogeintrag.
Wenn Sie eine Datei direkt an einen Blogeintrag hängen, können andere den Anhang sehen wenn sie auf den Blogeintrag zugreifen können.
Anhänge für Blogeinträge
Click the Add a file button and in the pop-up click on the file name to select the file(s) from your Files area that you wish to attach.
Bemerkung
You can click anywhere in the space around the file that you want to add as an attachment to select it for your journal entry.
Alternativ können Sie Dateien auch direkt hochladen.
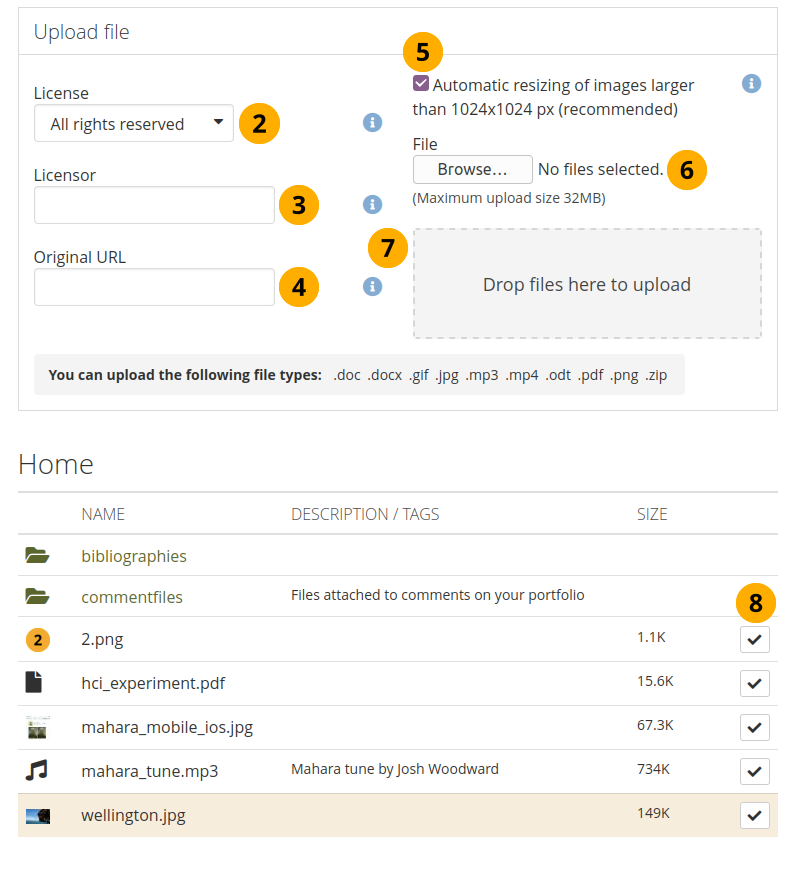
License: You see this field if the site administrator turned on license metadata. Choose the license for the artefact that you are uploading. You can set your default license in your account settings.
Licensor: You see this field if the site administrator turned on license metadata. If you are uploading a file that somebody else created, you can attribut the work to them here and provide their name for example.
Original URL: You see this field if the site administrator turned on license metadata. If you are uploading somebody else’s file, provide a link to the original Internet address so that others can go there and view the original file.
Wenn Sie wollen, können Ihre hochgeladenen Dateien automatisch in der Größe angepasst werden. Dies erfolgt sofern sie größer (Breite oder Höhe) sind, als vorgeschlagen. Die Funktion ist nur verfügbar wenn die Administration sie eingeschaltet hat.
Klicken Sie auf den Durchsuchen-Button, um eine Datei auf Ihrem Computer zum Upload auszuwählen.
Instead of clicking the Browse button to upload files, you can drag and drop files from your computer directly onto the ‚drop zone‘. You must still observe the maximum file size upload for each file and the maximum total file size cannot be exceeded either.
If you already uploaded the file that you want to attach, you can click into the row of the file or click the Select button . The file is then attached to the entry.
Click anywhere on the page or press the ESC key to return to your journal entry.
If you attached a file that you do not wish to attach any more, you can click the Remove button to take it off your list of attachments.
Once you are done, you can click the Save button to save the changes to your journal entry.
Bemerkung
You do not need to attach an image in order to display it in your journal entry. You can insert it.
4.10.5. Arbeiten mit mehreren Blogs
If you wish to use more than one journal, e.g. to put your writing into categories for making all posts from one category available in a page without having to select each journal entry, you can go to your Settings and set the switch box for Multiple journals to ‚Yes‘.
Mehrere Blogs wurden freigeschaltet
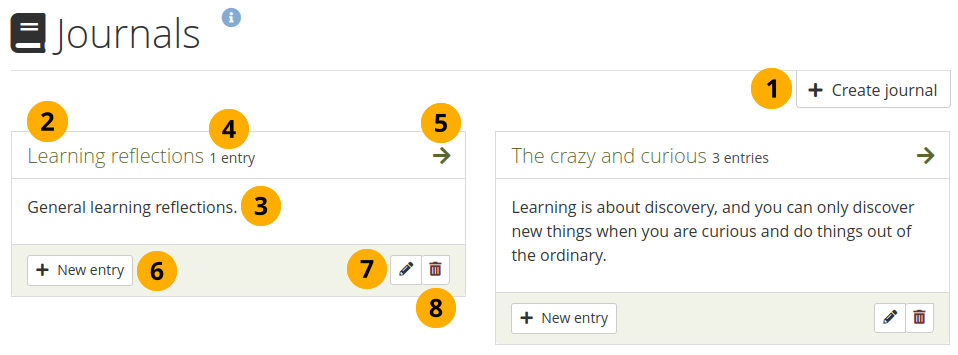
Wenn Sie mehrere Blogs führen können, klicken Sie auf den Blog erstellen-Button, um einen neuen Blog anzulegen.
All your journals are listed on Main menu → Create → Journals with their titles. The titles link through to the individual journals.
You can see the description of the journal.
Sie sehen die Zahl der Einträge in jedem Blog.
Click the Arrow icon to be taken to the journal and see all journal entries.
Klicken Sie auf den Neuen Eintrag-Button, um einen neuen Eintrag direkt von dieser Seite zu erstellen.
Click the Edit button to make changes to your journal title, description or tags.
Klicken Sie auf den Löschen-Button , um den Blog mit allen Einträgen zu löschen.
Warnung
Wenn Sie auf den Löschen-Button klicken, erhalten Sie eine Bestätigungsnachricht ob Sie diesen Blog wirklich löschen wollen oder nicht. Wenn Sie den Blog oder den Eintrag in einer Ansicht benutzt haben, teilt Mahara Ihnen dies mit, sodass Sie entscheiden können ob Sie den Blog löschen wollen oder nicht. Wenn Sie einmal mit dem Löschen des Blogs einverstanden sind, werden Ihr Blog und dessen ganzer Inhalt permanent gelöscht.