19.2. Send a portfolio to a similarity checking tool
mahara_submission_generate_view_for_plagiarism_test
You can send portfolios submitted to Moodle and Tōtara to the similarity / plagiarism checking tool Ouriginal. The basic idea is to create an export file of the submitted portfolio that only contains files that the similarity checker can understand, i.e. leave out media files that it is not checking, so that the export file is kept as small as possible. The resulting Zip file is then sent to the LMS where it is forwarded to the similarity checker for processing. The report is available through the LMS assignment.
To use this feature, additional functionality is required in the Moodle plugins Mahara assignment submission (web services edition) and Ouriginal.
Note
Catalyst IT Europe was the developer for the changes to the Moodle plugins and will have more information on when the updates will be publicly available.
This page describes the setup required in Mahara to set up the necessary web services connections once the Moodle end has been configured.
19.2.1. Set up service group and access token
The following steps assume that you are at Administration menu → Web services → Configuration.
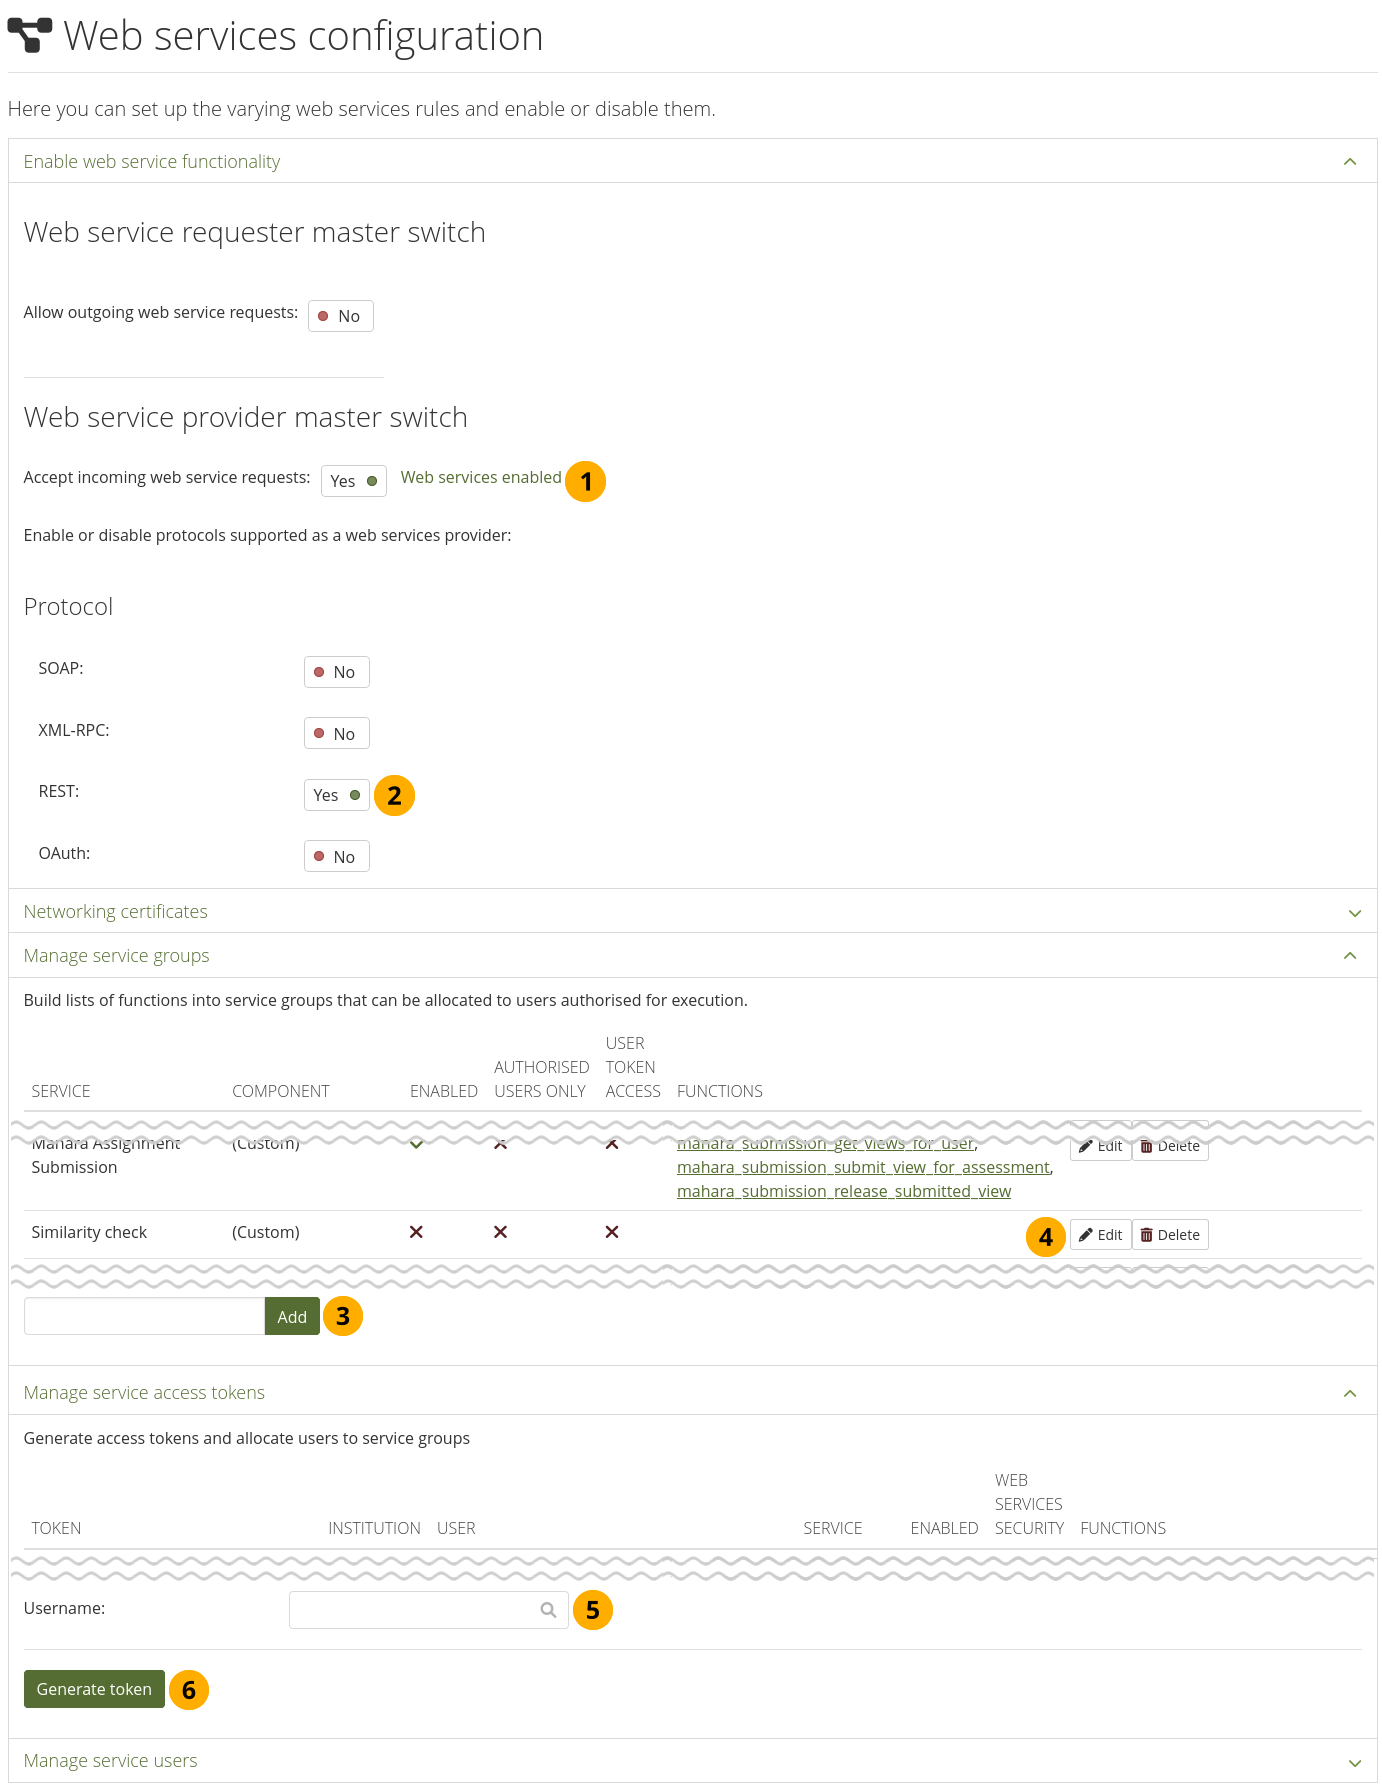
Set up service group and access token
Accept incoming web service requests: Set to ‘Yes’.
Protocol REST: Set to ‘Yes’.
In ‘Managed service groups’, add a new service group and give it a name.
Once that has been added, click the Edit button to assign the web service. See the steps below.
In ‘Manage service access tokens’, enter the username for the account that should be the owner of the token and select it.
Click the Generate token button.
Note
It is recommended that you set up a specific account for your web services connection rather than using an existing administrator account as some web services require a session and thus could log you out. That way, you can also restrict the permissions that the web services account has.
In this case, the account only needs to be in the institution in which you want to use the web service as no administrative tasks need to be performed.
19.2.2. Configure service group
Configure the service group to select the correct web service.
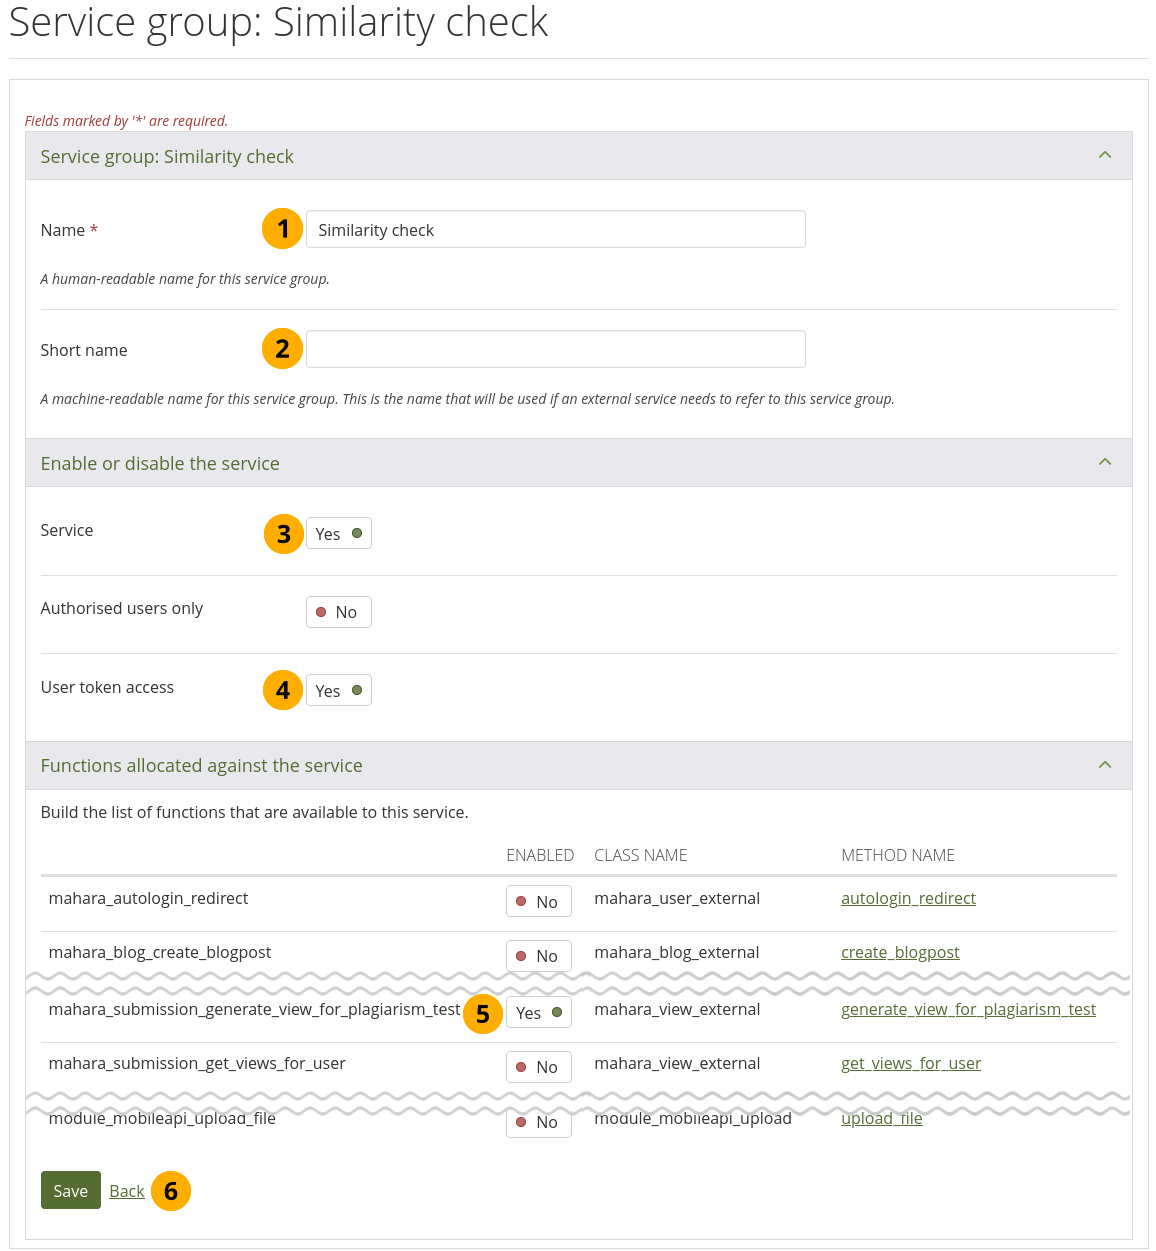
Configure the service group
Name: The name you had given earlier is displayed. You can change it. It is a mandatory field.
Short name: You can give your group a short name. This field is optional.
Service: Set to ‘Yes’.
User token access: Set to ‘Yes’.
Function mahara_submission_generate_view_for_plagiarism_test: Set to ‘Yes’.
Click the Save button to save your changes and then return to the web services overview page.
19.2.3. Configure the access token
Configure the access token to associate the correct service group.
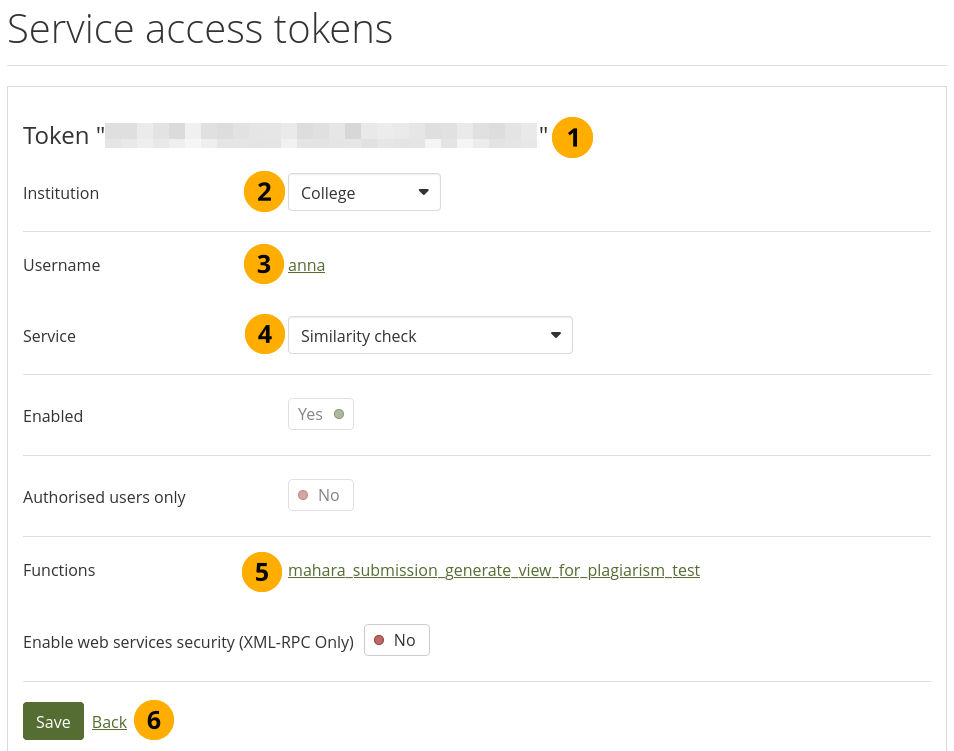
Configure the access token
The token is displayed.
Institution: Select the institution in which you want to use the token.
Username: The account that is associated with the token. It needs to be an account in the institution.
Note
This account does not need to have administrator permissions.
Service: Select your previously created service group name.
Functions: Verify that the correct function is displayed. If it is not, go back to the service group and check your setup.
Click the Save button to save your changes and then return to the web services overview page.