21.3. Editor context menu
When you see the visual editor, you can access often used functionalities via the context menu when items are highlighted.
21.3.1. Context menu for text
When you highlight text, the context menu gives you access to commonly used formatting options without needing to open more menu bars if the option is not already visible in the top menu bar.
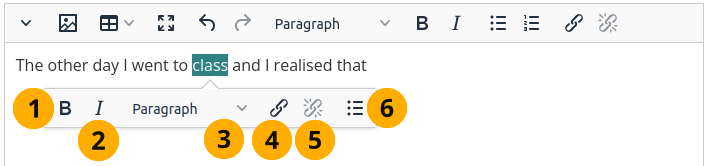
The context menu visible when you highlight text
The letter B indicates that you can format the text as bold.
The letter I indicates that you can turn text into italics.
Click the Formatting drop-down menu to change the paragraph formatting.
Click the Link icon to link the text to a web page.
When you linked text but don’t want it linked any more, click the Unlink icon.
Click the Bullet list icon to turn the paragraph into a bulleted list item.
21.3.2. Context menu for an image
When you select an image, you can decide its alignment in the content block: left, centre, or right.
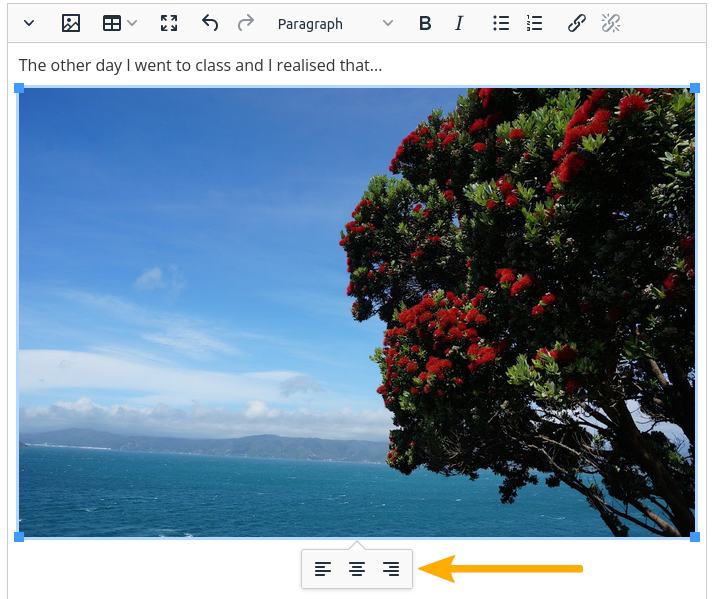
The context menu visible when you highlight an image
21.3.3. Context menu for a table
When you create or edit a table, the context menu offers often used actions for quick access.
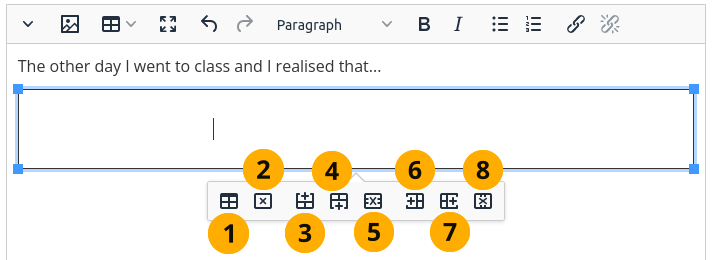
The context menu visible when you highlight a table
Click the Table properties icon to change general settings of the table.
Click the Delete table icon to remove the entire table.
Click the Insert row before icon to add a row above the row in which the cursor is at the moment.
Click the Insert row after icon to add a row below the row where you have the cursor.
Click the Delete row icon to delete the row in which the cursor is.
Click the Insert column before icon to add a column before the one in which the cursor is.
Click the Insert column after icon to add a column after the one in which the cursor is.
Click the Delete column icon to delete the column in which the cursor is.