19.2. ポートフォリオを類似性チェックツールに送信する
mahara_submission_generate_view_for_plagiarism_test
You can send portfolios submitted to Moodle and Tōtara to the similarity / plagiarism checking tool Ouriginal. The basic idea is to create an export file of the submitted portfolio that only contains files that the similarity checker can understand, i.e. leave out media files that it is not checking, so that the export file is kept as small as possible. The resulting Zip file is then sent to the LMS where it is forwarded to the similarity checker for processing. The report is available through the LMS assignment.
To use this feature, additional functionality is required in the Moodle plugins Mahara assignment submission (web services edition) and Ouriginal.
注釈
Catalyst IT Europe was the developer for the changes to the Moodle plugins and will have more information on when the updates will be publicly available.
This page describes the setup required in Mahara to set up the necessary web services connections once the Moodle end has been configured.
19.2.1. サービスグループおよびアクセストークンをセットアップする
The following steps assume that you are at Administration menu → Web services → Configuration.

サービスグループおよびアクセストークンをセットアップする
Accept incoming web service requests: Set to 『Yes』.
プロトコルREST: 「Yes」に設定してください。
In 『Managed service groups』, add a new service group and give it a name.
Once that has been added, click the Edit button to assign the web service. See the steps below.
In 『Manage service access tokens』, enter the username for the account that should be the owner of the token and select it.
トークンを生成する ボタンをクリックしてください。
注釈
It is recommended that you set up a specific account for your web services connection rather than using an existing administrator account as some web services require a session and thus could log you out. That way, you can also restrict the permissions that the web services account has.
この場合、管理作業の必要がないため、アカウントはウェブサービスを利用したいインスティテューションにあるものだけで問題ありあません。
19.2.2. サービスグループを設定する
正しいWebサービスを選択するためにサービスグループを設定してください。
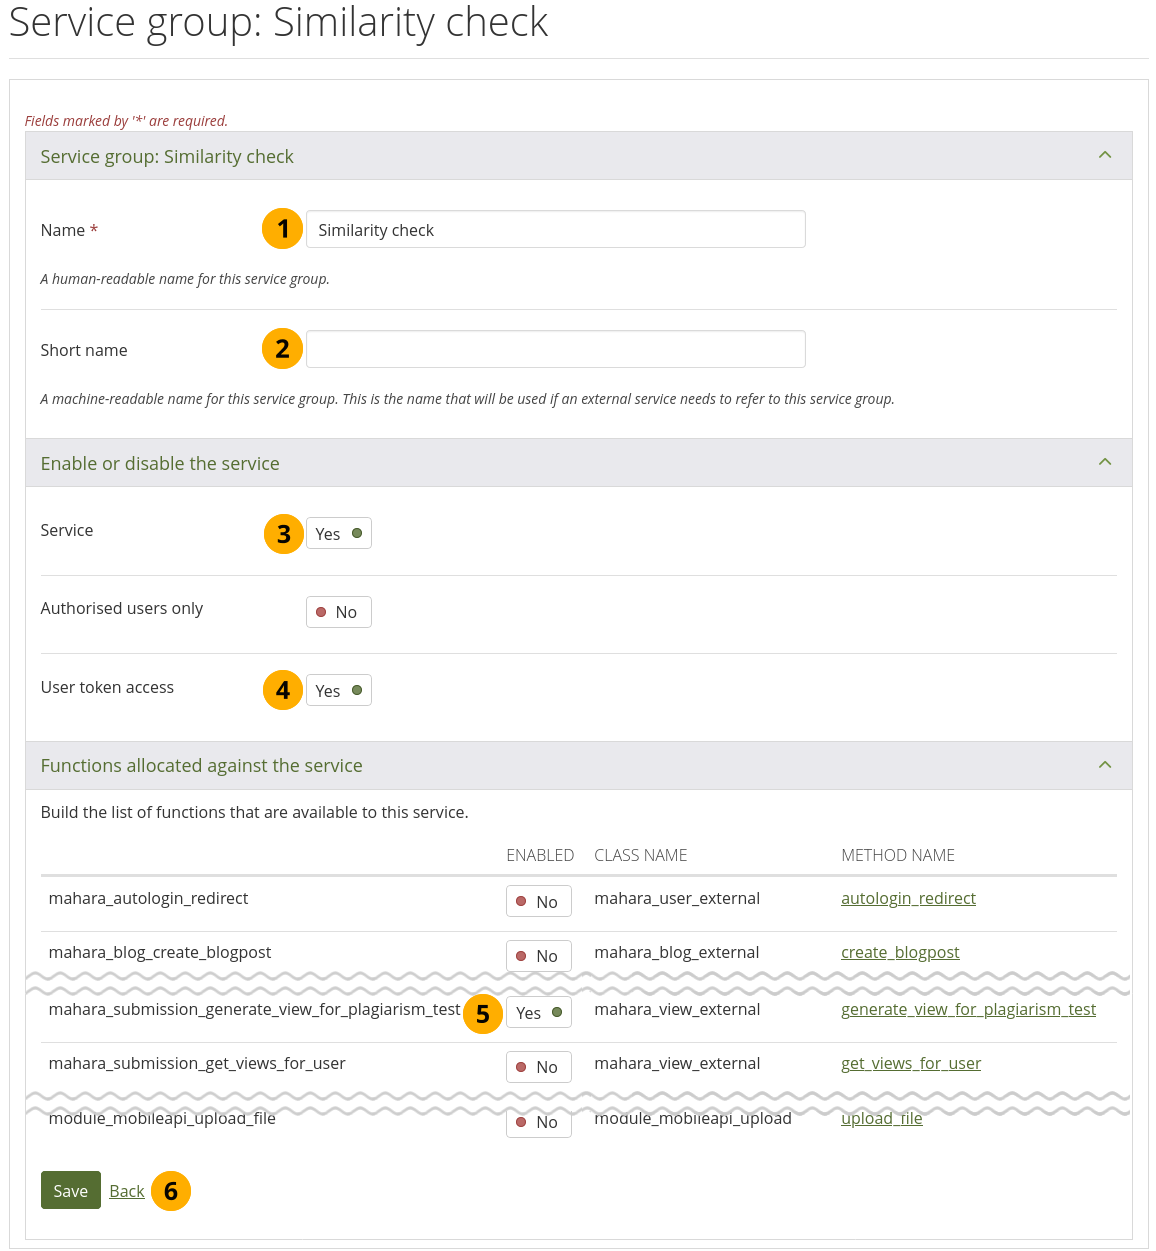
サービスグループを設定する
名称: あなたが先ほど付けた名称が表示されます。あなたは名称を変更できます。このフィールドは必須です。
省略名: あなたのグループに省略名を設定できます。このフィールドは任意です。
サービス: 「Yes」に設定してください。
ユーザトークンアクセス: 「Yes」に設定してください。
関数 mahara_submission_generate_view_for_plagiarism_test: 「Yes」に設定してください。
あなたの変更を 保存 ボタンをクリックして保存してウェブサービス概要ページに戻ります。
19.2.3. アクセストークンを設定する
正しいサービスグループを関連付けるためにアクセストークンを設定します。
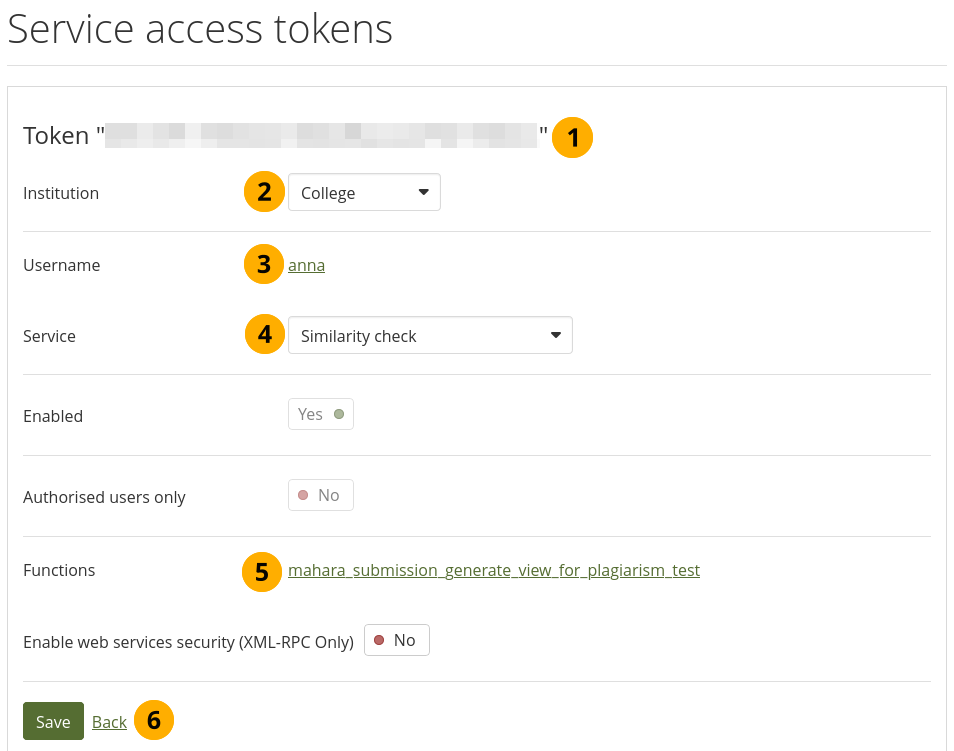
アクセストークンを設定する
トークンが表示されます。
インスティテューション: あなたがトークンを使用したいインスティテューションを選択してください。
ユーザ名: トークンに関連付けられたアカウントです。インスティテューションのアカウントである必要があります。
注釈
このアカウントには管理者パーミッションは必要ではありません。
サービス: あなたが以前作成したサービスグループ名を選択してください。
機能: 正しい機能が表示されているか確認してください。表示されていない場合、サービスグループに戻って、あなたのセットアップを確認してください。
あなたの変更を 保存 ボタンをクリックして保存してウェブサービス概要ページに戻ります。