3.4. Journal
Content → Journal
The Journal is a tool with which you can record your thoughts and experiences online. By adding your journal or individual posts of it to a page you can allow other users to place feedback and comments on it. Thus, you can create a dialogue with your audience.
Per default, every user has one journal available.
Tip
If you wish to use more journals, e.g. to put your writing into categories for making all posts from one category available in a page without having to select each journal entry, you can go to your Settings and select Enable multiple journals.
Notitie
 If you already have multiple journals enabled, you do not see this option on your Settings unless you have deleted all journals but one.
3.4.1. Change your journal settings
You can change the title of your default journal (and all others if you have enabled multiple journals) and add a description as well as tags.
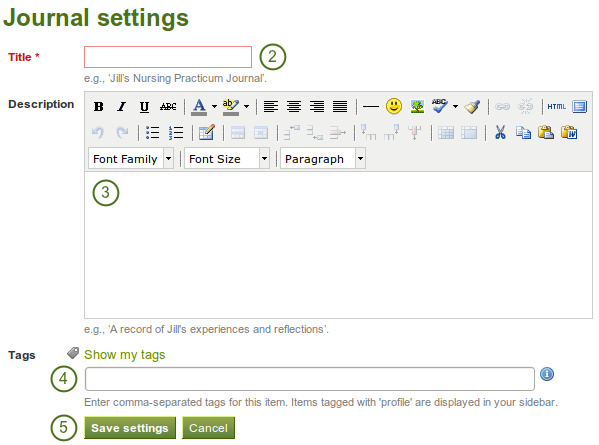
Journal settings
- Click on the Settings button for your journal.
- Change the title.
- Add a description for your journal. You can format it as you wish.
- Add tags to your journal for easier searching later on. You can choose from tags that you have already used and / or enter new ones. Separate each tag with a comma. You may also choose tags from the ones that you have created previously by clicking on Show my tags.
- Click Save Settings.
3.4.2. Add a journal entry
All journal entries you make are private to you until you put them into a page. Thus, the publishing of a journal / journal entry is a three-step process:
- You write your entry and save it.
- In a page, you choose either the block for making the entire journal visible or just one post from a journal.
- You give those who shall see that page access to it.
Post your journal entry by following the steps below.
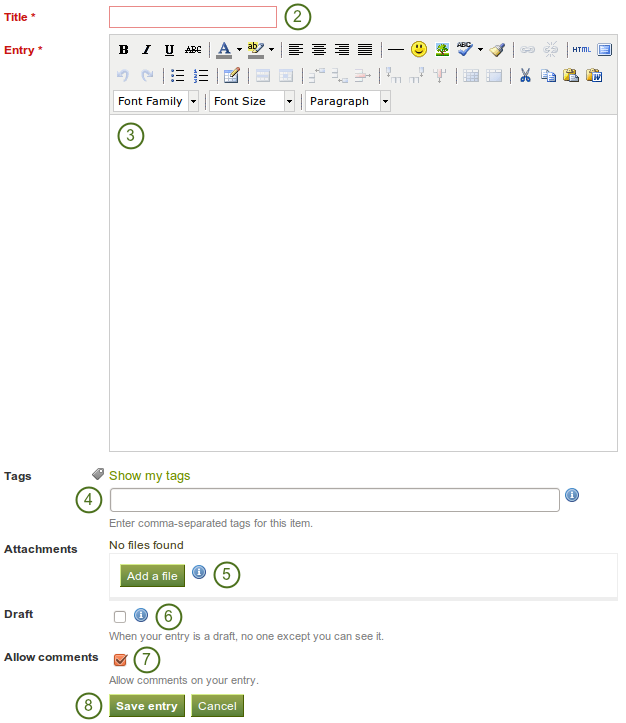
Journal entry
- In your journal, click on New entry.
- Title: Provide a title for your journal entry that expresses what you are writing about. This field is mandatory.
- Entry: You must also write some text, add pictures etc. The visual editor helps you format your journal entry. This field is mandatory.
- Tags: Add tags to your entry to find it more easily later on. You can choose from tags that you have already used and / or enter new ones. Separate each tag with a comma. You may also choose tags from the ones that you have created previously by clicking on Show my tags.
- Attachments: Add an attachment or more to your journal entry, e.g. PDF files associated with it or images. You can add files either from your files area or upload new ones directly onto your journal entry.
- Draft: Mark your entry as draft if you have not yet finished it. This is especially helpful if you have published your journal in a page, but do not want anybody to read this particular entry (yet). It is always visible to you, but not others.
- Allow comments: Check this box if you want to receive comments on the journal entry.
- Click the Save button to save your entry.
3.4.3. Add a file as attachment to a journal entry
When you attach files directly to a journal entry, others can see them whenever they have access to the journal entry.
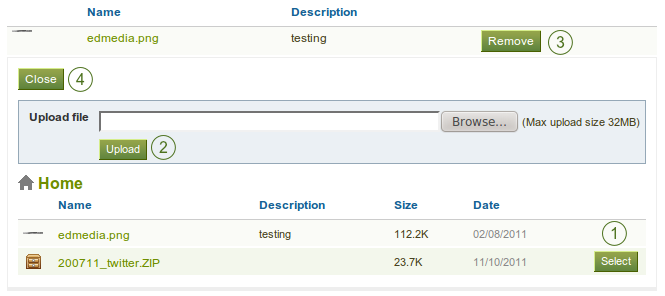
Attachments for journal entries
- Click on the Add a file button and then Select the file(s) from your Files area that you wish to attach.
- Alternatively, you can Upload additional files.
- If you attached a file that you do not wish to attach anymore, you can Remove it.
- Once you are done, you can click the Close button.
3.4.4. Add an image to a journal entry
You can add images to your journal entry in two ways:
- Link to the image that is available elsewhere online.
- Use an image that you have on Mahara.
3.4.4.1. Link to an image online
Images that are freely accessible online are easy to add to a journal entry. However, make sure that you have the permission to use this image in your portfolio.
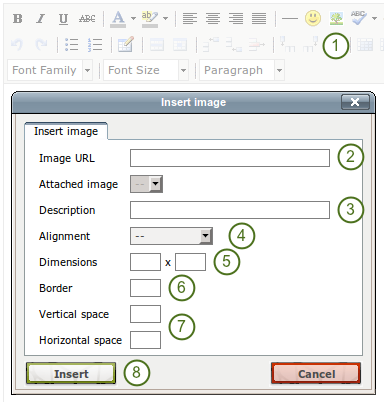
Link an external image in a journal post
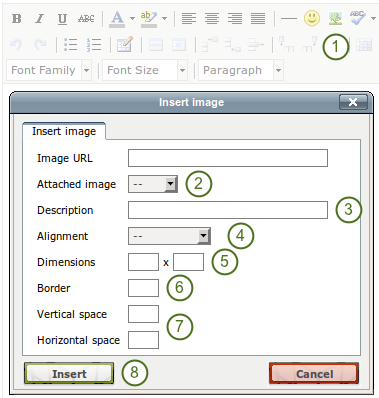
- Go to the visual editor and click on the Image button
 .
. - Image URL: Paste or type the image URL into this field. It must start with http:// or https://.
- Description: Provide a brief description for your image.
- Alignment: Select the alignment of the image in relation to the text.
- Dimensions: Change the size of your image. If the image is recognised correctly, you have the image’s dimensions displayed.
- Border: Add a simple black border to your image if you wish to do so.
- Vertical / Horizontal space: Add more space around the image by adding a number in Vertical space and / or Horizontal space.
- Click the Insert button. Alternatively, click the Cancel button if you want to abort inserting the image.
Notitie
The dimensions are given in pixel. The first value is for the width and the second one for the height. Only change one of the dimensions and delete the value from the second to retain the original proportions of the image.
If you are not happy with how the image looks in your journal entry, select it (it will get little square handles) and click on the Image button again to make adjustments.
3.4.4.2. Add an image from Mahara
Link an external image in a journal post
- Go to the visual editor and click on the Image button .
- Attached image: Select the image that you wish to display. You must have had it attached to the journal entry in order to see it here.
- Description: Provide a brief description for your image.
- Alignment: Select the alignment of the image in relation to the text.
- Dimensions: Change the size of your image. If the image is recognised correctly, you have the image’s dimensions displayed.
- Border: Add a simple black border to your image if you wish to do so.
- Vertical / Horizontal space: Add more space around the image by adding a number in Vertical space and / or Horizontal space.
- Click the Insert button. Alternatively, click the Cancel button if you want to abort inserting the image.
If you are not happy with the alignment or the dimensions of the image in your journal entry, select it and click on the Image button again to make adjustments.