3.5. Résumé
Content → Résumé
The résumé plugin allows you to create an online résumé / curriculum vitae. You can either publish your entire résumé or individual components of it in your portfolio.
3.5.1. Introduction
Content → Résumé → Introduction
In the introduction you can write a Cover letter and also provide some Personal information.
3.5.1.1. Write your cover letter
The visual editor allows you to write and format your résumé. There is also a spellchecker installed which will check for any misspelt words once you click the Spellcheck button  .
.
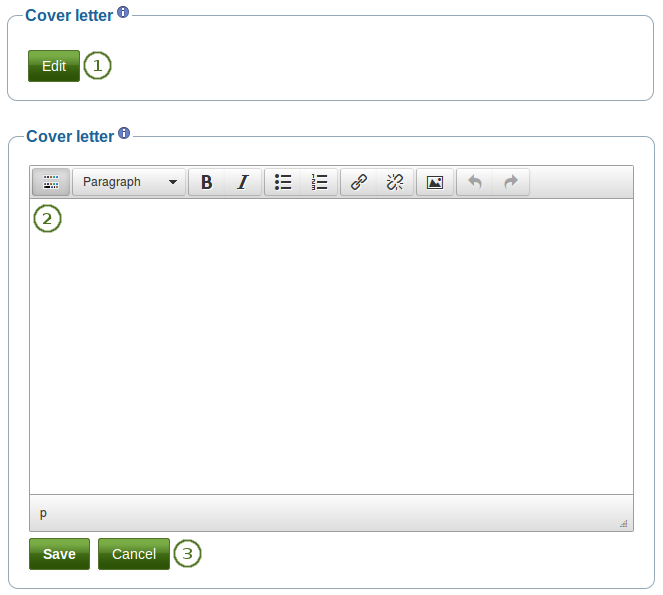
Write your cover letter
- Go to Content → Résumé → Introduction and click the Edit button in the Cover letter section to enter the edit mode for the cover letter.
- Write your cover letter.
- Click the Save button below the editor window when you are happy with your cover letter to save it for future use, or click the Cancel button to abort your changes.
Notitie
If you write your cover letter or any other text in Microsoft Word instead of directly in the editor in Mahara, please use the Paste from Word button  to strip out most of the formatting code that Word puts into a document but can interfere online.
3.5.1.2. Provide personal information
None of the fields under Personal information are required. You can choose to include as much or as little information as you wish. Most fields are free form fields.
Notitie
Mahara is being used around the world. Therefore, some information here or later on in the résumé do not apply to you. If you do not need them, you do not have to fill in the fields.
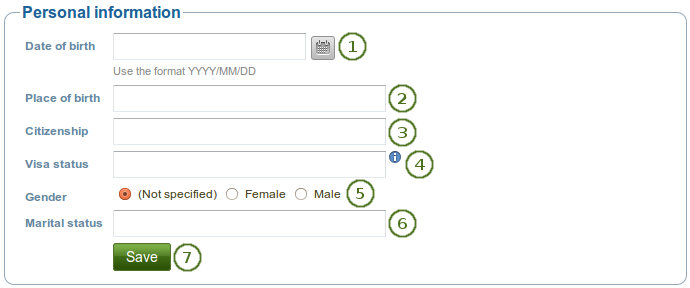
Add personal information to your résumé
- Date of birth: Either choose your date of birth via the calendar icon
 or enter it in the format YYYY/MM/DD, e.g. 1978/01/30 when you want to say that you were born on 30 January 1978.
 - Place of birth: Enter your place of birth. You can also enter the country you were born in.
- Citizenship: Fill it in as it is shown in your passport.
- Visa status: As employment laws vary between countries, you may wish to include your work or travel visa status within your résumé where relevant.
- Gender: Select the one that applies to you.
- (Not specified): Select this option if you do not want to identify with any of the other genders.
- Female: Select this option if you identify as a woman.
- Male: Select this option if you identify as a man.
- Marital status: Provide it if it is relevant.
- Click the Save button when you want to keep that information.
Notitie
None of the fields in the Personal information are required. You do not need to provide any of that information if it is not required in your portfolio. Decide wisely, which of the above information you want to make available to others.
3.5.2. Education and employment
Content → Résumé → Education and employment
This part of the résumé allows you to create a record of your academic and professional qualifications as well as your work experience.
3.5.2.1. Education history
You can enter as many qualifications for your education history as you want.
Enter your education history one qualification a time
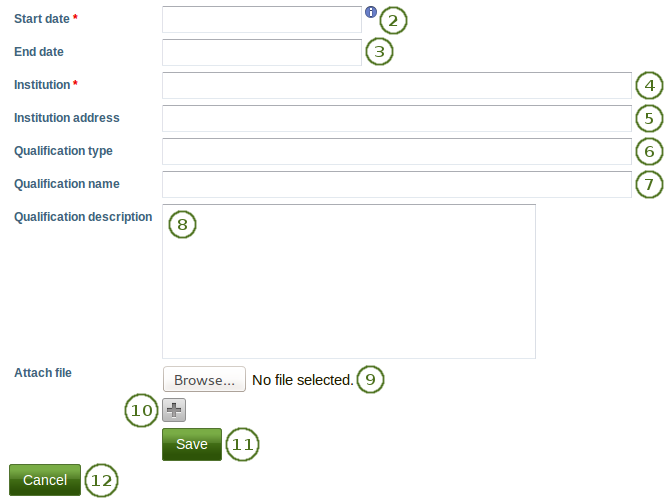
Click the Add button to start a new entry.
Start date: Provide the date for starting your qualification. This field is mandatory.
End date: You can fill in an end date for your qualification.
Notitie
You can enter the dates any which way you want. It is not a calendar date field because different résumés require different date formats.
Institution: Enter the institution at which you worked on your qualification. This field is mandatory.
Institution address: You can provide the address for your institution.
Qualification type: Enter your qualification type if you wish.
Qualification name: You can enter the name of the qualification you were / are earning.
Qualification description: You can provide more details about your qualification, e.g. minor subjects, final grade gained etc.
Attach file: Attach a file as evidence of your qualification. Click the Browse button to select a file from your computer.
Click the Add button
 to attach more files.
Click the Save button to save your entry.
Click the Cancel button to abort your changes.
Notitie
You can add a file only once. If you need to attach it to another item as well, you must upload the file again.
When you edit your entry, you can attach additional files or remove files as you would do on the File(s) to download block.
When you have filled in all your qualifications in your education history, you can re-arrange the individual items if necessary.
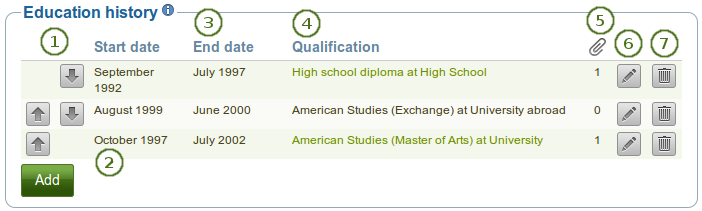
Interpreting the Education history table
- Use the up and down arrows

 to change the order of the individual items.
 - Start date: The start date is displayed as you entered it.
- End date: The end date is displayed as you entered it.
- Qualification: Your qualification along with the institution is shown.
- Attachments
 : This column displays the number of attachments you have per item.
 - Use the Edit button
 to make changes to an entry.
 - Use the Delete button
 to delete an entry.
3.5.2.2. Employment history
You can enter as many jobs to your employment history as you wish.
Enter your employment history one position a time
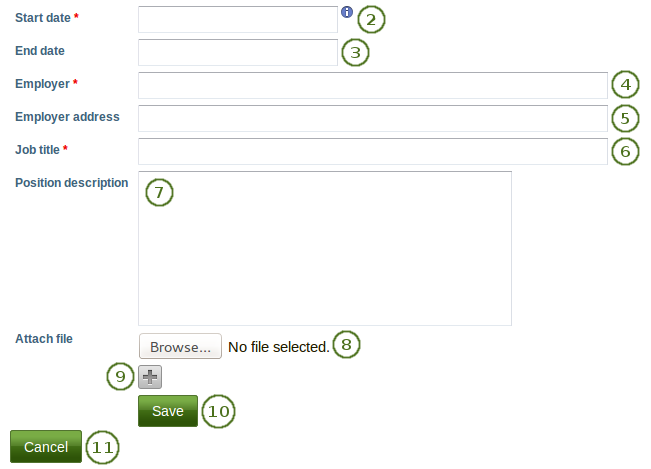
Click the Add button to start a new entry.
Start date: Provide the date for starting your job. This field is mandatory.
End date: You can fill in an end date for your job.
Notitie
You can enter the dates any which way you want. It is not a calendar date field because different résumés require different date formats.
Employer: Enter the employer at which you worked. This field is mandatory.
Employer address: You can provide the address for your employer.
Job title: Enter the title that you held. This field is mandatory.
Position description: You can provide more details about your position, e.g. your primary tasks etc.
Attach file: Attach a file as evidence of your work. Click the Browse button to select a file from your computer.
Click the Add button
to attach more files.Click the Save button to save your entry.
Click the Cancel button to abort your changes.
Notitie
You can add a file only once. If you need to attach it to another item as well, you must upload the file again.
When you edit your entry, you can attach additional files or remove files as you would do on the File(s) to download block.
When you have filled in all your job positions in your employment history, you can re-arrange the individual items if necessary.
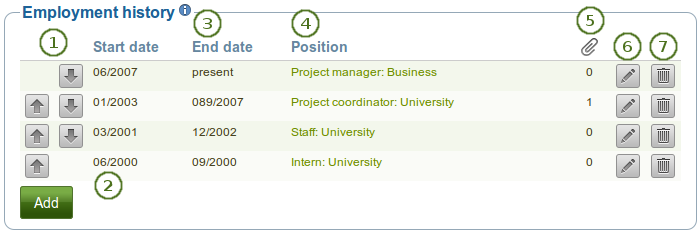
Interpreting the Employment history table
- Use the up and down arrows to change the order of the individual items.
- Start date: The start date is displayed as you entered it.
- End date: The end date is displayed as you entered it.
- Position: Your position along with the employer is shown.
- Attachments : This column displays the number of attachments you have per item.
- Use the Edit button to make changes to an entry.
- Use the Delete button to delete an entry.
3.5.3. Achievements
Content → Résumé → Achievements
In Achievements you can collect information on:
- certifications, accreditations and awards, e.g. Chartered Accountant, Registered Nurse, Award for Best Actress
- books and publications
- professional membership, e.g. in the American Philosophical Society
The process of adding, editing and moving entries is similar to the process for Education and employment.
3.5.3.1. Certifications, accreditations and awards
Certifications, accreditations and awards provided in the résumé
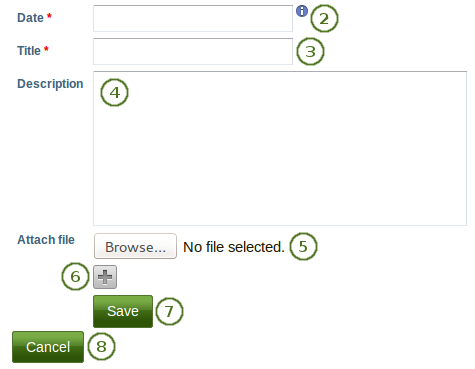
- Click the Add button to start a new entry.
- Date: Provide a date when received your certificate, accreditation or award. This field is mandatory.
- Title: Enter the title of your certification, accreditation or award. This field is mandatory.
- Description: You can provide more details on your certification, accreditation or award.
- Attach file: Attach a file as evidence of your certification, accreditation or award. Click the Browse button to select a file from your computer.
- Click the Add button to attach more files.
- Click the Save button to save your entry.
- Click the Cancel button to abort your changes.
Notitie
You can add a file only once. If you need to attach it to another item as well, you must upload the file again.
When you edit your entry, you can attach additional files or remove files as you would do on the File(s) to download block.
When you have filled in all your certifications, accreditations and awards, you can re-arrange the individual items if necessary.
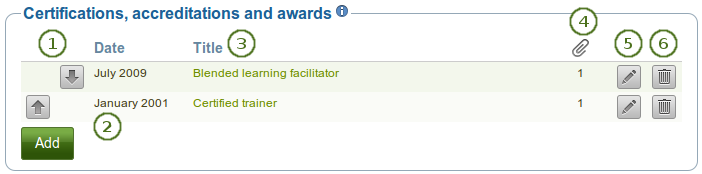
Interpreting the Certifications, accreditations and awards table
- Use the up and down arrows to change the order of the individual items.
- Date: The date when you received your certification, accreditation or award is displayed.
- Title: The title of your certification, accreditation or award is shown.
- Attachments : This column displays the number of attachments you have per item.
- Use the Edit button to make changes to an entry.
- Use the Delete button to delete an entry.
3.5.3.2. Books and publications

Books and publications provided in the résumé
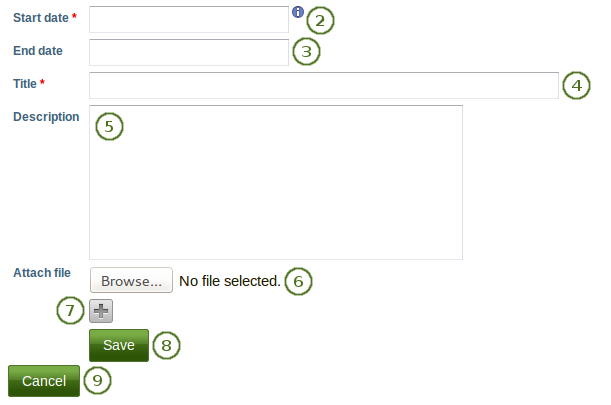
- Click the Add button to start a new entry.
- Date: Provide a date for your publication. This field is mandatory.
- Title: Enter the title of the journal or book in which your contribution appeared. This field is mandatory.
- Contribution: Enter the title of your contribution. This field is mandatory.
- Details of your contribution: You can provide more details about your contribution, e.g. the full bibliographic reference.
- Attach file: Attach a file as evidence of your contribution, e.g. the PDF of the article. Click the Browse button to select a file from your computer.
- Click the Add button to attach more files.
- URL: Enter the URL under which your publication is accessible.
- Click the Save button to save your entry.
- Click the Cancel button to abort your changes.
Notitie
You can add a file only once. If you need to attach it to another item as well, you must upload the file again.
When you edit your entry, you can attach additional files or remove files as you would do on the File(s) to download block.
When you have filled in all your publications, you can re-arrange the individual items if necessary.
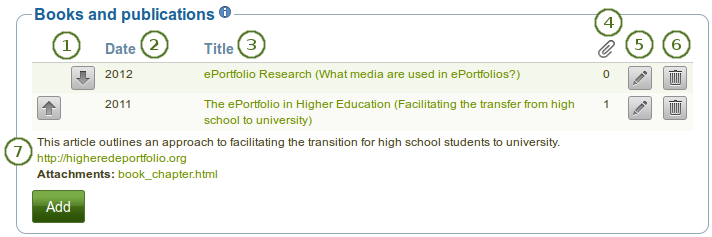
Interpreting the Books and publications table
- Use the up and down arrows to change the order of the individual items.
- Date: The date you provided for your publication is displayed.
- Title: The title of the journal or book in which your contribution appeared is shown along with the title of your contribution.
- Attachments : This column displays the number of attachments you have per item.
- Use the Edit button to make changes to an entry.
- Use the Delete button to delete an entry.
- When you click the title, you will see further information about your publication:
- Any details about your publication are displayed.
- The URL you provided for your publication.
- Any attachments you uploaded to your publication.
3.5.3.3. Professional memberships
Professional memberships provided in the résumé
- Click the Add button to start a new entry.
- Start date: Provide the date for joining the organisation. This field is mandatory.
- End date: You can fill in an end date if you left the organisation.
- Title: Enter the title of the organisation. This field is mandatory.
- Description: You can enter additional information about your membership.
- Attach file: Attach a file as evidence of your membership. Click the Browse button to select a file from your computer.
- Click the Add button to attach more files.
- Click the Save button to save your entry.
- Click the Cancel button to abort your changes.
Notitie
You can add a file only once. If you need to attach it to another item as well, you must upload the file again.
When you edit your entry, you can attach additional files or remove files as you would do on the File(s) to download block.
When you have filled in all your memberships, you can re-arrange the individual items if necessary.
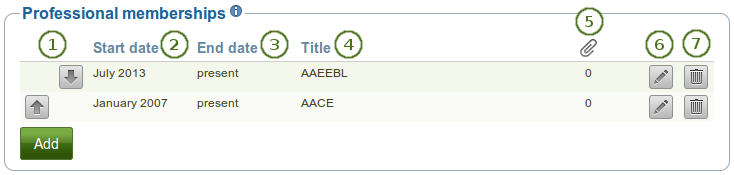
Interpreting the Professional memberships table
- Use the up and down arrows to change the order of the individual items.
- Start date: The start date is displayed as you entered it.
- End date: The end date is displayed as you entered it.
- Title: The title of the organisation is displayed. If you entered additional information, you can click the link and display it.
- Attachments : This column displays the number of attachments you have per item.
- Use the Edit button to make changes to an entry.
- Use the Delete button to delete an entry.
3.5.4. Goals and skills
Content → Résumé → Goals and skills
3.5.4.1. Goals
The Goals area is divided into three sections:
- Personal goals
- Academic goals
- Career goals
Personal or career goals are often provided in a résumé for employers to understand how a particular role might suit your ambitions.
You can use the academic goals section to describe achievements you are seeking in your programme of study.
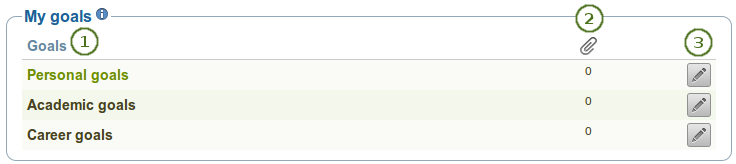
Writing down goals for use in portfolio pages
- The three different goals areas are displayed. If you already filled in goals, there will be a link for you to click and see them. The areas where you have not yet provided goals are not linked.
- Attachments : This column displays the number of attachments you have per item.
- Click the Edit button to enter a goal in one of the three goals areas.
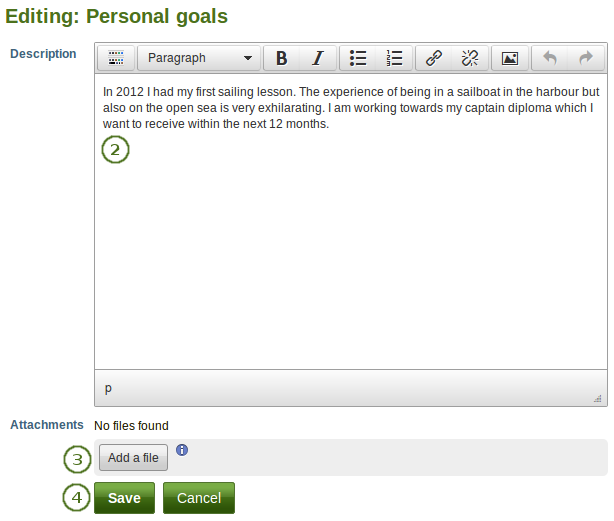
Enter a goal
Click the Edit button
to enter a goal in one of the three goals areas.Write down your goal(s). You can come back at any time and edit them.
Attach file: Click the Attach a file button to upload a file or attach one from your Files area.
Notitie
When you edit your entry, you can attach additional files or remove files as you would do on the File(s) to download block.
Click the Save button to keep your changes or click the Cancel button to abort.
3.5.4.2. Skills
The Skills area is divided into three sections:
- Personal skills
- Academic skills
- Work skills
You may include skills that you add here in your portfolio pages.
Employers are always interested in what skills you can bring to a role. You can use this section to display the attributes that you would bring to a collaborative community or working group.
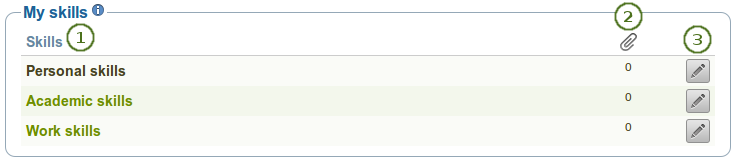
Skills section
- The three different skills areas are displayed. If you already filled in skills, there will be a link for you to click and see them. The areas where you have not yet provided skills are not linked.
- Attachments : This column displays the number of attachments you have per item.
- Click the Edit button to enter skills in one of the three skills areas.
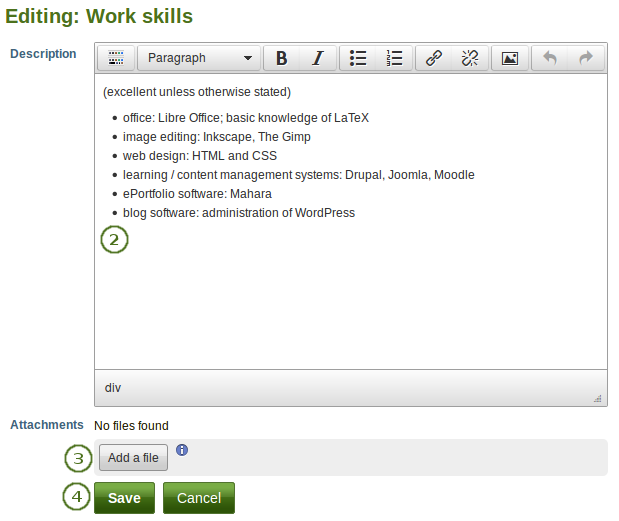
Enter skills
Click the Edit button
to enter skills in one of the three skills areas.Write down your skills. You can come back at any time and edit them.
Attach file: Click the Attach a file button to upload a file or attach one from your Files area.
Notitie
When you edit your entry, you can attach additional files or remove files as you would do on the File(s) to download block.
Click the Save button to keep your changes or click the Cancel button to abort.
3.5.5. Interests
Content → Résumé → Interests
The Interests section allows you to list your personal and / or professional interests. This might include your hobbies, sporting activities, volunteer work, areas of research and expertise etc. Listing your interests will help employers form a better picture of who you are and what you would bring to their organisation.
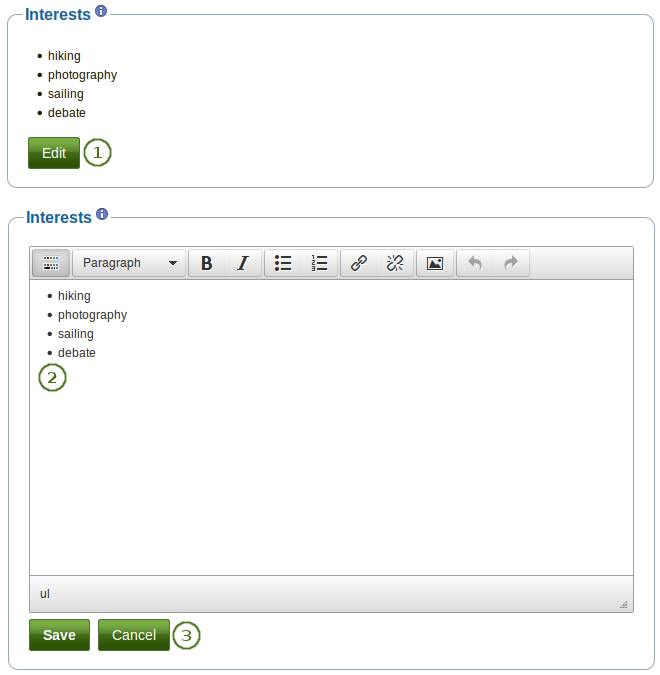
Example of interests for a résumé
- Click the Edit button to enter your interests.
- Write down your interests. You can come back at any time and edit them.
- Click the Save button to keep your changes or click the Cancel button to abort.
3.5.6. License
Content → Résumé → License
Like other artefacts, you can select a license for your résumé.
Notitie
At the moment, you cannot display that license information on a portfolio page, but it is stored for future use when the functionality is expanded.
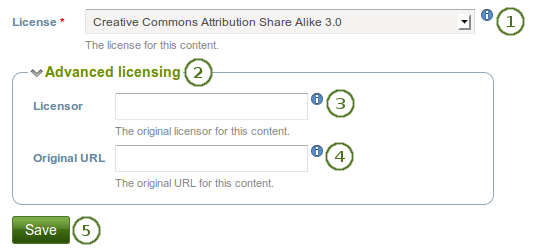
Provide a license for your résumé
- License: You see this field if the site administrator turned on license metadata. Choose the license for your résumé. You can set your default license in your account settings.
- Click the Advanced licensing link to see more options.
- Licensor: You see this field if the site administrator turned on license metadata. If you created the résumé of someone else, you can attribut the work to them here and provide their name for example.
- Original URL: You see this field if the site administrator turned on license metadata. If the résumé had been posted somewhere else before, provide a link to the original Internet address so that others can go there and view the original résumé.
- Click the Save button to keep your changes.