5.2. Page editor
The page editor is important in Mahara because it allows you to compose your portfolio pages. It consists of a large number of components:
Editor navigation
Content chooser
Page layout area
5.2.1. Editor navigation
 The page edit buttons were consolidated in Mahara 17.10. Now all settings, i.e. title, description, tags, layout, and skins, are found on the Settings page. When you click the Share button, you can only change the sharing options for the current page (or collection if the page is part of one).

Page editor navigation bar
Display page: Preview your page to see how others, who have access to it, would see it. You can also use the Display page button at the bottom of the page.
Edit: Place your content on a page. See content chooser, individual content blocks and page layout area.
Settings: Add and modify page settings like title and description, layout, and skin.
Share: Decide who shall have access to your page. See “Edit access” for more details.
5.2.2. Edit layout
The layout editor is very flexible and allows you to design your layout not only in columns but also in rows. You can decide how many columns each row shall have and how each row shall differ.
Notitie
Be careful when choosing 4 or more columns. Your portfolio page may look very good on your big 21” screen, but a user looking at it on a notebook or tablet may not have the same experience. In most cases, up to 3 columns is the best choice.
5.2.2.1. Choose a basic layout
Edit the overall layout of a page by choosing the number of columns and rows
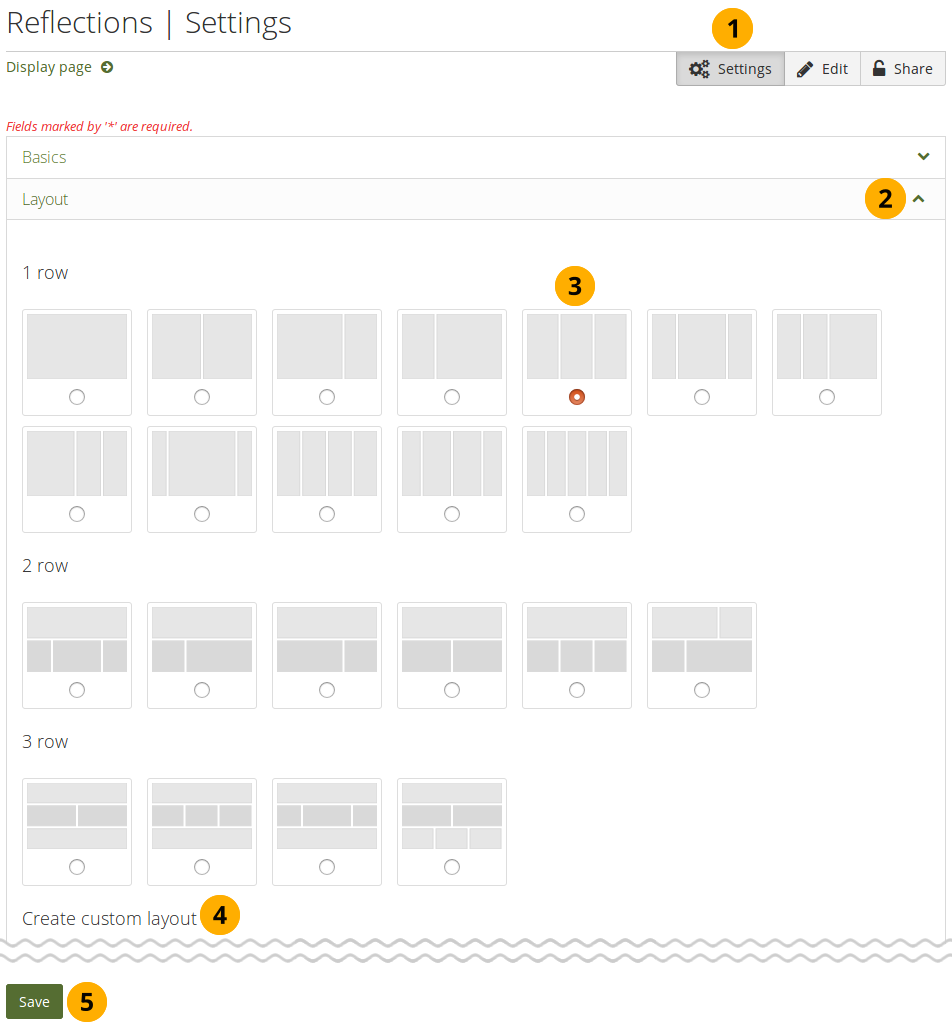
Click the Settings button.
Notitie
When you work on a small screen, the text on the button is removed and you only see the icon.
Layout: Click the icon in the Layout panel and the panel content will be visible. If you want to close the panel, click the icon. You can change the layout at any time. When you reduce the number of columns, your blocks simply move to the first column. You can then move them around to their correct position (see page layout area).
Click the radio button below a layout that you want to use.
Create custom layout: If you don’t like any of the built-in layouts, you can create your own in this section.
Click the Save button to save your layout choice.
Notitie
You can add or remove columns directly in the page layout area when you enable the Show controls to add and remove columns when editing a page setting in your account options.

You can use the Add and Remove buttons for quick changes to the layout when you have enabled them.
5.2.2.2. Create a custom layout
You can set up your own custom layout under Create custom layout where you can be more precise in how many rows and what sort of column width you’d like to have.
Custom layout options
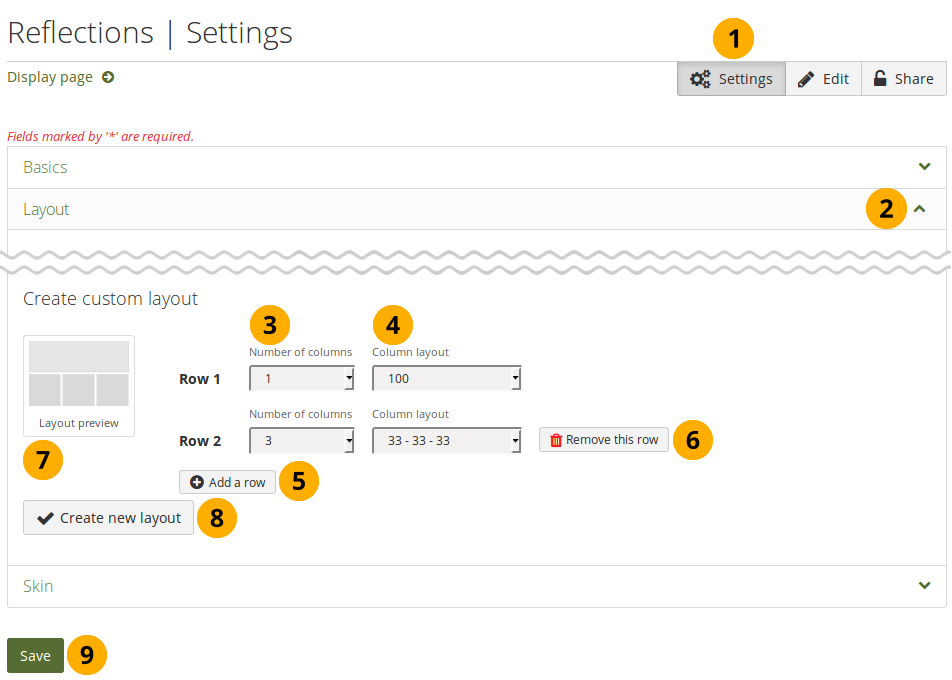
Click the Settings button.
Layout: Click the icon in the Layout panel and the panel content will be visible. If you want to close the panel, click the icon. In the Create custom layout section…
Number of columns: Choose the number of columns that you want to display in a particular row. You can choose up to 5 columns.
Column layout: Choose the percentages for the distribution of your columns in the row that you are editing.
Click the Add a row button to add more rows with a different column layout. You can create up to 6 rows.
Click the Demove this row button to remove a row if you do not want it in your layout anymore.
Layout preview: You can see what your layout is going to look like.
Click the Create new layout button to generate your new page layout. You can use it in all your pages.
Click the Save button to return to the content editor.
Notitie
You can add more than one block to a row. The blocks will then be placed underneath each other in the column that you have chosen. If you wish to change the block layout, you can always add another row that has the same or a different column distribution.
5.2.3. Content chooser
All different types of content as well as blocks that pull in external content into a portfolio page are accessible via the content chooser.
The content chooser is available on the left-hand side of a page when you are in the edit mode. It does not scroll. Thus, it makes it easy to add content items also further down on the page.
All content items are accessible in the content chooser
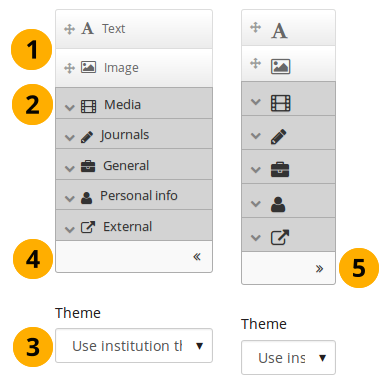
You can select the Text or the Image block directly as these are two of the more frequently used content items.
Notitie
You may see additional or different blocks in this list of frequently used content items as it is up to the administrator of the site that you use which blocks to display here. There is an API available to make adding different items easier.
You can access all other content items via the individual panels:
Media: holds blocks for files that can be displayed as links, in folders or in the case of images and videos directly in the page
Journals: various content blocks which allow you to place journals / journal entries into a page
General: content items that are of a general nature
Personal info: choose profile information or your résumé to display in a block
External: contains blocks to place RSS feeds, external media or GoogleApps documents etc. into a page
Zie ook
The functionality of each block that you can use in your portfolio pages and in group pages is outlined in the section on the individual artefact blocks.
Theme: You may be able to choose a theme for your portfolio page. If that is the case, you see the Theme drop-down menu. That allows you to select a theme in which that page is displayed to others who view your portfolio page.
Zie ook
The site administrator must allow page themes in the site’s user settings for this option to be available.
Click the arrow pointing to the left to reduce the size of the content chooser. Only the icons will be displayed giving you more space on a page.
Click the arrow pointing to the right to show the block descriptions in the content chooser.
Notitie
The content chooser is displayed per default only with its icons shown on small devices to maximize the screen size that is available to edit a page.
5.2.4. Page layout area
The page layout area is the place where you arrange all your content items for display in a portfolio page. You should know the following about this area:
All content is placed into it by dragging and dropping blocks into this space.
Notitie
If you use only a keyboard to navigate Mahara, you can place blocks using that.
The content is arranged as a series of continuous blocks per column. You can also align it vertically in rows if you wish.
You can re-arrange blocks by clicking their headings and dragging and dropping them.
You can change the settings of a block by clicking its Configure button .
Changes to the layout and arrangment of blocks are saved automatically. As soon as you made saved changes inside blocks, they are also visible to any visitor of your page.
Drag a block into the page layout area and configure its settings
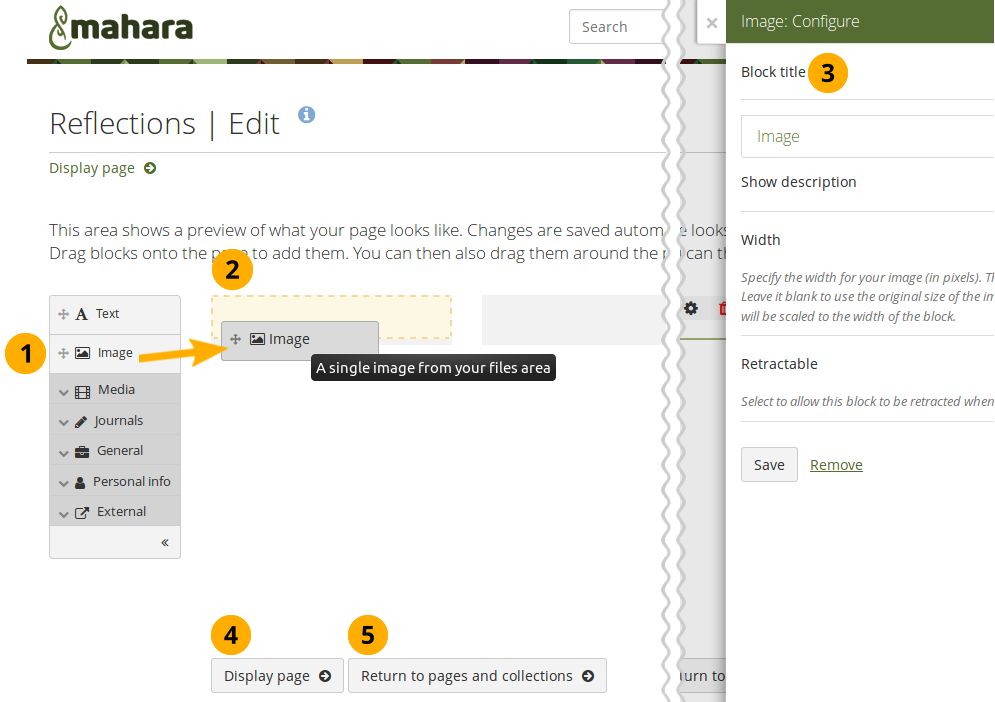
Click on the block of the content item that you want to include in your page and drag it into the page layout area.
Notitie
If you navigate the site with a keyboard or long-click on the block, you see a pop-up modal in which you can choose the position of the block.
When you see the dotted rectangle, drop the block into it to put it onto your page.
Follow the on-screen instructions on choosing the specific content item you wish to display. Please refer to the content block section for more information on each block’s settings.
Zie ook
Please refer to the section edit layout to learn how to change the number of columns and rows on a page and make certain columns wider than others.
Click the Display page button to view your page without the editing tools.
- Click the Return to pages and collections button to go back to the overview page for your portfolios.
5.2.5. Edit access
The Edit access screen is displayed for the selected page. You can only select the sharing options for the page that you are editing (and the collection if the page is in a collection).
You can set a secret URL immediately rather than having to provide a secret URL separately from the other sharing options.
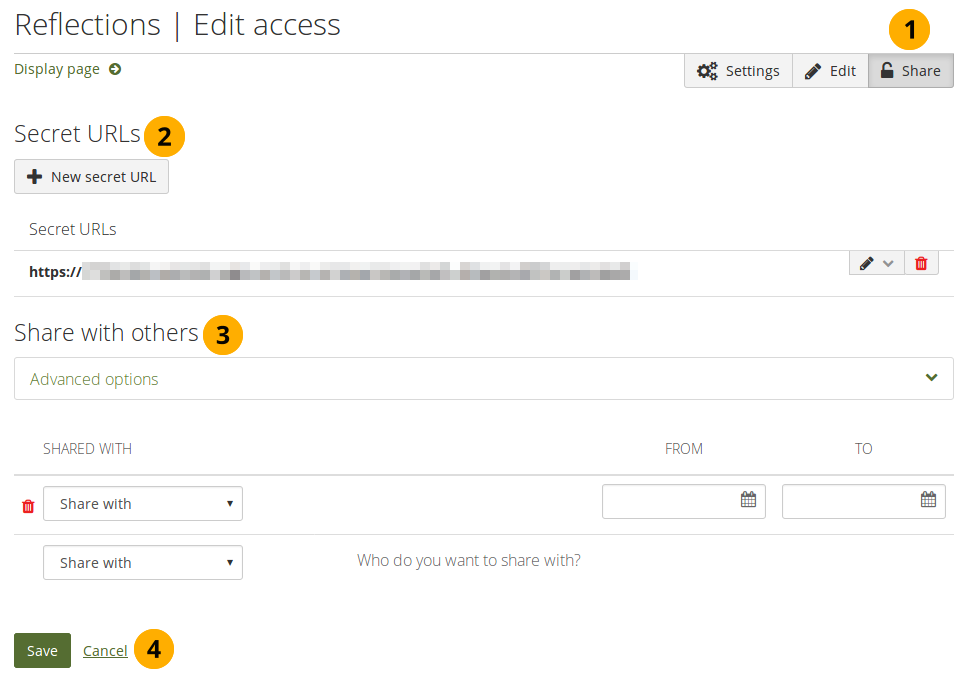
Edit access for the page you are editing
Click the Share button.
Secret URLs: Give your page a secret URL. For all available options, check out how to set up a secret URL.
Share with others: You can share your page with people who have an account on the site.