13.4. Setup in Blackboard
You can set up the connection to Mahara via LTI through the built-in ‘Basic LTI Tools’ in Blackboard.
An administrator needs to set up an LTI tool before it can be added to a course.
13.4.1. Set up a building block
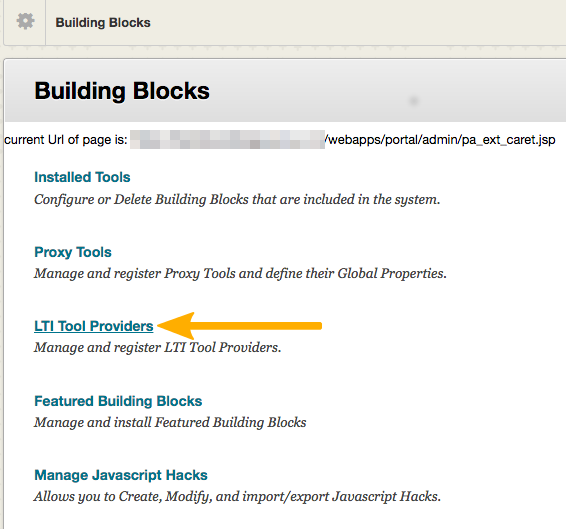
Choose to set up an LTI tool
When you are in the Building Blocks area, select LTI Tool Providers to start setting up the connection to Mahara.
On the next screen, click the Register Provider Domain button.
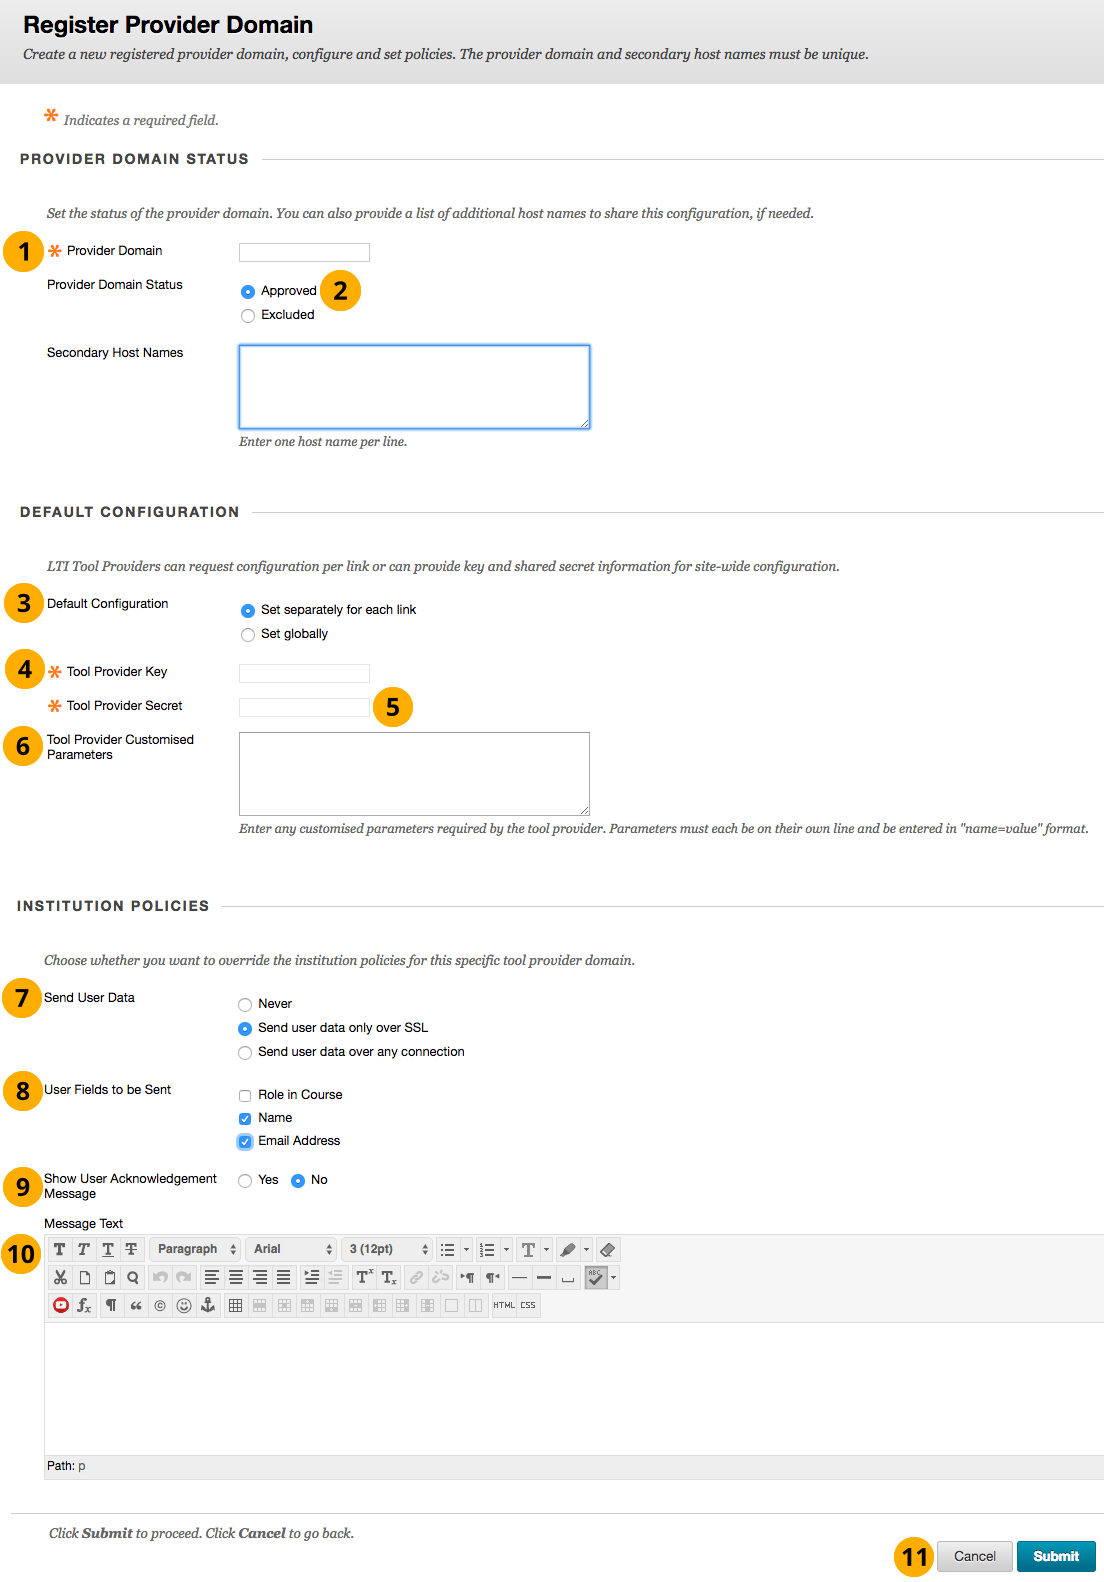
Register the LTI provider
Provider Domain: Enter the URL of your Mahara site.
Provider Domain Status: If you want to use the LTI connection, you should select ‘Approved’.
Default Configuration: You can decide whether to provide a separate configuration for each instance in which you want to use LTI in a course or set it globally.
Set separately for each link: Use this option if you want to connect to different institutions in one Mahara instance. Note that you will need to provide the consumer key and secret each time you want to add an LTI building block to a course.
Set globally: Use this option when everyone shall enter the same institution in Mahara. You do not need to provide the consumer key and secret when a link to Mahara is added in a course as it is set here.
Tool Provider Key: Paste the consumer key from Mahara for the LTI connection that you set up earlier.
Tool Provider Secret: Paste the consumer secret from Mahara for the LTI connection that you set up earlier.
Tool Provider Customised Parameters: Enter the following parameter:
wsfunction=module_lti_launch.Send User Data: Decide how you want to send personal data to Mahara:
Never: No personal data is sent.
Send user data only over SSL: Personal data is sent encrypted. This option is the preferred option for production sites. The web services in Mahara require that an SSL connection is established unless you are connection to a site that is not in production mode.
Send user data over any connection: You can choose this option because web services in Mahara require an SSL connection when in production mode. This option is useful for testing purposes as your testing instance may not have an SSL certificate.
User Fields to be Sent: Select, which account fields you want to send across to Mahara.
Role in Course: Currently, Mahara ignores this field.
Name: The first name and last name are sent to Mahara.
Email Address: The email address of the person clicking the LTI link is sent to Mahara.
Show User Acknowledgement Message: You can require anyone clicking the link to acknowledge that they are getting set up on Mahara. This can be useful if you want to provide a special message upon logging in.
Message Text: Enter the text for the ‘User Acknowledgement Message’.
Click the Submit button to continue or click the Cancel button to abort the changes.
13.4.2. Manage the placement of the building block
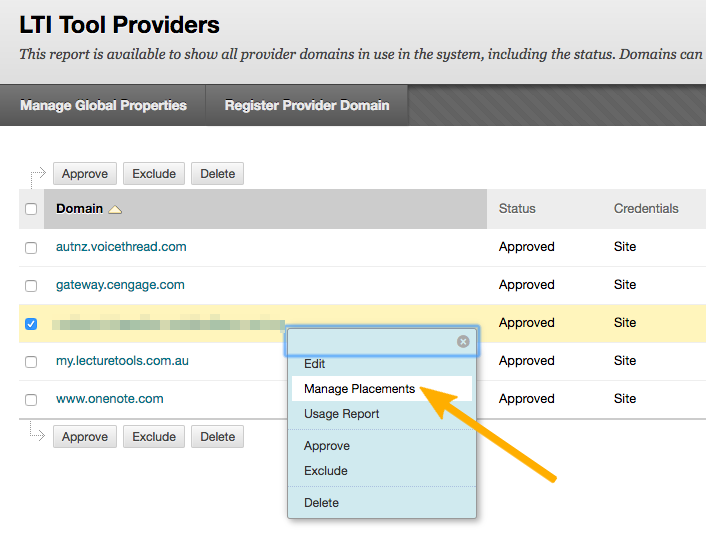
Manage the placement of the LTI connection
When you are back on the LTI Tool Providers screen, make a right mouse click on the Mahara URL and select Manage Placements in order to create a placement for your courses. On the following screen, click the Create Placement link.
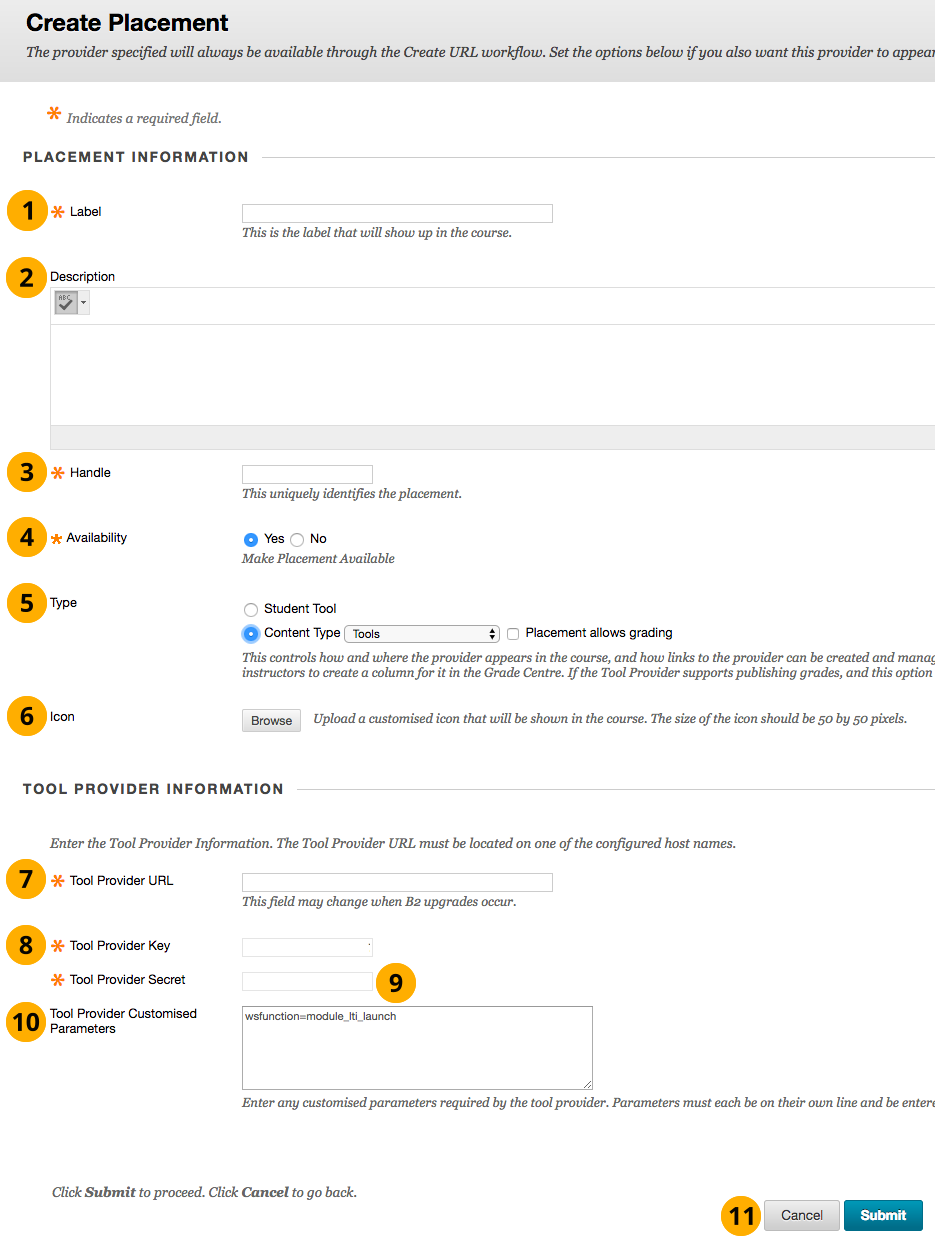
Create a placement for the LTI connection
Label: Give your connection a name that is displayed to students and teachers in the course.
Description: You can enter a description for the connection.
Handle: Give the placement a unique name. It does not appear in the course navigation.
Availability: Choose to make the placement available or not. If you select ‘No’, you can prepare the placement, but your students will not see it.
Type: The type decides how students can interact with the tool. Choose ‘Content Type’ and select the ‘Tools’ option.
Icon: You can upload a custom icon for the placement to identify it. The icon needs to have the dimensions 50 x 50 pixels.
Tool Provider URL: Enter the URL of your Mahara site.
Tool Provider Key: Paste the consumer key from Mahara for the LTI connection that you set up earlier.
Tool Provider Secret: Paste the consumer secret from Mahara for the LTI connection that you set up earlier.
Tool Provider Customised Parameters: Enter the following parameter:
wsfunction=module_lti_launch.Click the Submit button to continue or click the Cancel button to abort the changes.
13.4.3. Add the placement to a course
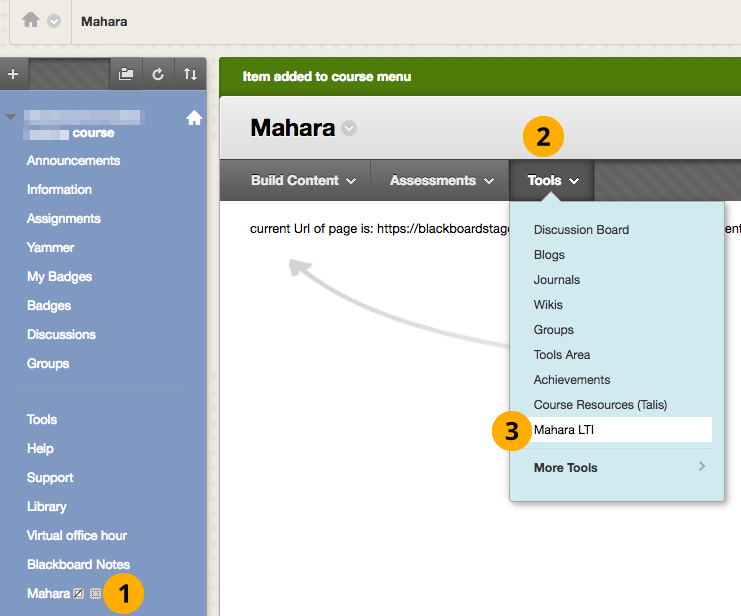
Select the placement in your course
Click the ‘Mahara’ placement in your course navigation.
Click the Tools button.
Select the Mahara LTI tool. Note: You may have given it a different name than is displayed here.
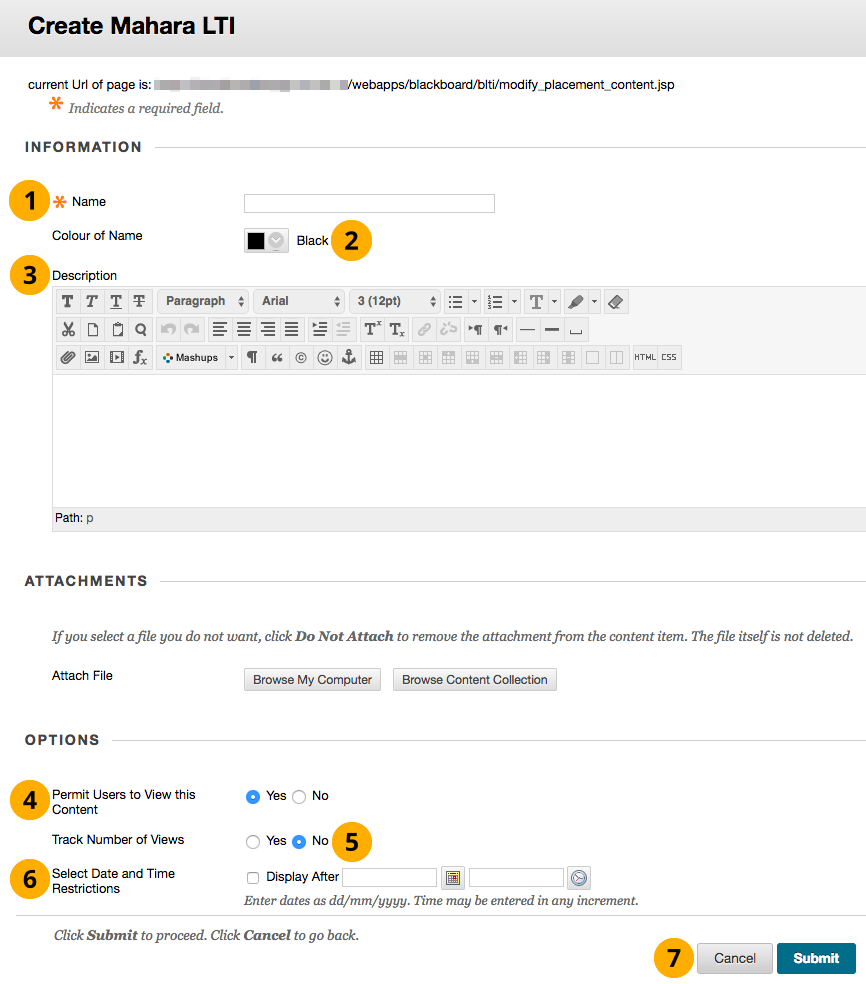
Finalize the settings for the course link
Name: You can change the default name if you want to display a different one.
Colour of Name: Choose the color of the link in the course.
Description: Enter a description if you like that is displayed to the students and teachers in the course.
Permit Users to View this Content: Decide whether students and teachers can see the link in the course.
Track Number of Views: Decide whether you want to include the clicking of the link in your reporting.
Select Date and Time Restrictions: Enter a date and time if you want to make the link available automatically at a specific time.
Click the Submit button to continue or click the Cancel button to abort the changes.
Your link is now ready to be used. Students and teachers in the course can log into Mahara via it.