10.5. Groups
Administration → Groups
In the Groups menu of the administration site administrators can:
Add administrators to groups
Delete groups
Manage group categories
Add and update groups in bulk
Add and update group membership in bulk
In the Groups menu of the administration institution administrators can:
Add and update groups in bulk
Add and update group membership in bulk
10.5.1. Administer groups
Administration → Groups → Administer groups
Note
Administer groups is only accessible by site administrators.
You see an overview of all the groups on the site.

Administer groups
Search: Enter your search term, i.e. a part of the group name. The default text in the field shows you in which institution context you perform your search.
Use the drop-down arrow to choose a single institution in which to search for your group.
Click the Search button to start your search.
Group name: The table is sorted alphabetically according to the group name. The group names are linked for easy access to their group homepages.
Short name: The group’s short name is displayed. Every group has a short name and can be managed via a CSV file in bulk.
Note
In Mahara 16.10 all groups, also those created manually, received a short name and are associated with an institution in order to allow for their management via CSV file. That data is also added to existing groups.
Members: Number of group members in each group.
Administrators: Number of group administrators per group.
Group type: Overview of whether and how users can join this group.
Standard: Group consists of members and administrators.
Course: Group consists of members, tutors and administrators.
Open: Anybody can join the group without administrator approval.
Request: Users can request to join the group. The administrator receives a notification.
Controlled: Users cannot leave the group. Only the administrator can remove them. This is best suited for course groups.
Group category: Display of the group category that is associated with this group.
Visibility: Overview of who has access to this group - members or the public.
Click the Manage button to change the group file quota or to add or remove group administrators.
Click the Export group membership in CSV format button to receive a CSV file with information about all members. You can use that file to make changes to the group membership and upload it again.
Click the Copy button to duplicate a group. The group’s files, journals, pages, collections and group settings are copied. Group membership and forums are not copied.
Click the Delete button to delete a group.
Warning
When you delete a group, all its content - forum posts, files and pages - will be deleted permanently and cannot be restored.
Export groups in CSV format: Click this link to generate a CSV file with which you can change group settings in bulk.
Note
All groups shown on the page are exported rather than all groups so you can target which groups to export.
10.5.1.1. Group file quota
You can specify a default group file quota in Plugins. This allows you to limit the file space that each group can take up. Here you can update the file quota for just one group.
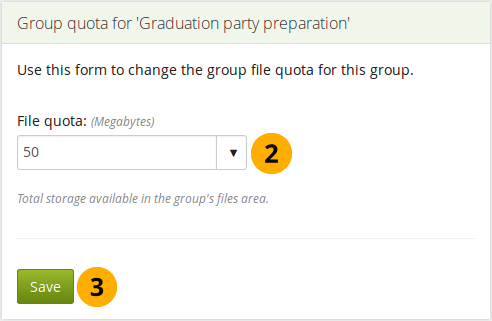
Change the group file quota
Click the Manage button next to a group on the Administer groups page.
File quota: Change the file quota that this particular group can have.
Click the Save button to save your change.
10.5.1.2. Add or remove administrators
Add to or remove administrators from a group by clicking the Manage button next to a group on the Administer groups page.
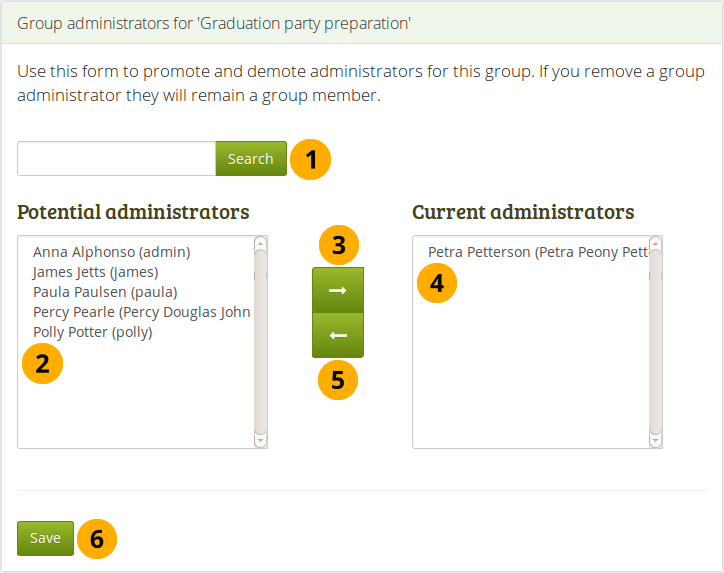
Add or remove group administrators
Search: If you have too many users on your site and you cannot see the users you want, you can search for them here.
Potential administrators: Select the users you wish to make group administrators. You can select multiple users at once using
CtrlandShiftclick.Add the potential group administrators to the right-hand side - Current administrators - by clicking the right-arrow button .
Current administrators: If you want to remove an existing or accidentally added group administrator, you can remove the user from the list on the right-hand side by clicking on the user.
Then click the left-arrow button , and the user is removed from the list.
When you have chosen all members you wish to make group administrators, click the Save button.
Note
You can also double-click a name and it will be moved to the other side.
10.5.2. Group categories
Administration → Groups → Group categories
Note
Group categories is only accessible by site administrators.
Group categories help you filter your groups more easily on the My groups and Find groups pages. A group administrator can always assign one group category to a group if categories are enabled.
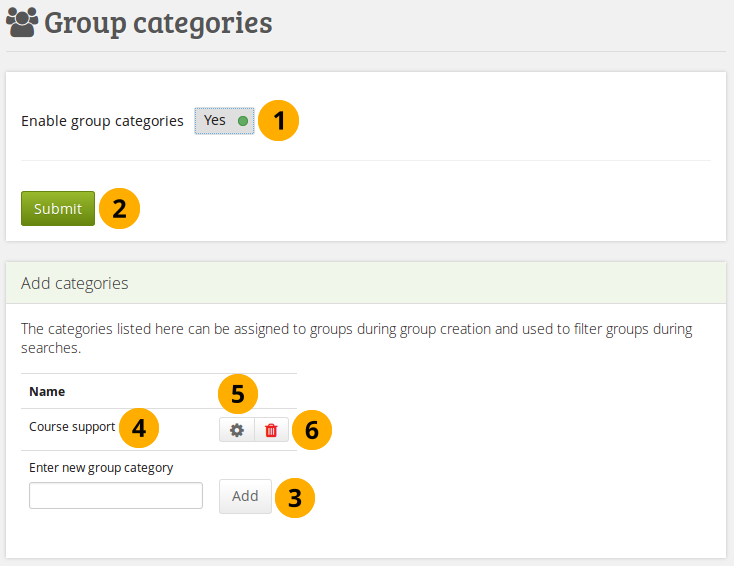
Manage group categories
Enable group categories: Switch to “Yes” to enable group categories for the entire site.
Click the Submit button to save your choice.
Create a new group category by typing its name and then clicking the Add button.
Name: Existing group categories are listed.
Edit a group category name by clicking the Edit button , change the name and then click the Update button. If you want to abort the action, click the Cancel button.
Click the Delete button to permanently delete this group category.
Note
Group categories are not hierarchical and are available to everybody on the site. Any user who can create groups can assign a group category when the feature has been enabled.
10.5.3. Archived submissions
Administration → Groups → Archived submissions
When group administrators or tutors release portfolios in groups that allow the archiving of submitted pages, these submissions will be displayed here so you can download them easily. They are also placed on the server in a central location for bulk download directly from the server.
See also
This feature requires that cron runs.
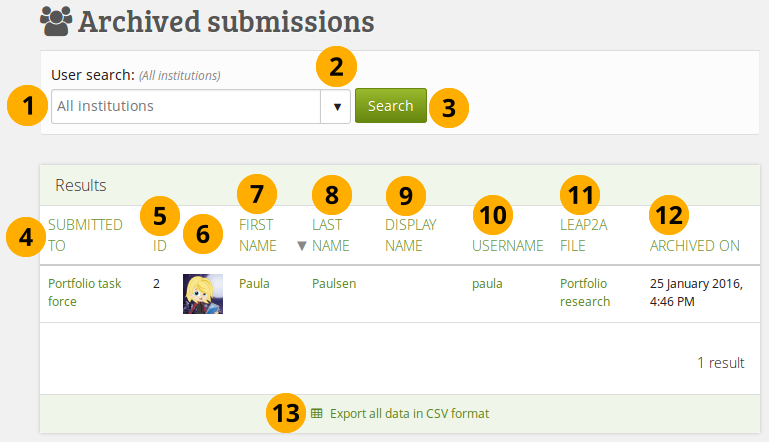
Review archived submissions
Search: Enter your search term. The default text in the field shows you in which institution context you perform your search. Type the name, display name, username or email address or any partial thereof you wish to search for in the search field. If you turned on the exact search, you need to provide the correct name or email address and not a partial one.
Use the drop-down arrow to choose a single institution in which to search for your user.
Click the Search button to start your search.
Submitted to: This column shows the group to which a particular page or collection was submitted to. You can click the group name in order to go to it directly. If the group was deleted, the submission is still available, but the group name is not linked anymore. It has its deletion date displayed.
ID: The ID of the archive file on the server for easy access when you download the data as CSV file.
The profile picture of the user is displayed.
First name: Displays the first name of the user. This is the default column for sorting results.
Note
Click on the other headings of the table that are links to sort the table differently.
Last name: Displays the last name of the user.
Display name: Shows the display name of the user.
Username: Clicking on the username, you are taken to the user’s administration settings page instead of their profile page as you would with the other names.
Leap2A file: Brief description of what has been archived.
Archived on: Date and time when the archive was made.
Click the Export all data in CSV format link to download data about the archived submissions. The CSV file contains the following information:
Username
First name
Last name
Display name
Email address
Group name to which the portfolio was submitted
ID
Title of the submitted portfolio
Path on disk where the archive is stored
Note
All submissions are stored in the “submission” folder in your Mahara data directory on the server. Then, each user has a subdirectory and therein are all submissions of this user.
File name
Time when the archive was made
10.5.4. Add and update groups by CSV
Administration → Groups → Add groups by CSV
Note
Both site and institution administrators can add and update groups by CSV file.
You can create multiple groups at once by uploading basic information about them via a CSV file.
Add and update groups by CSV
Create a CSV file that contains at a minimum the fields
shortname,displayname,roles.Note
Mahara also accepts CSV files that have a semicolon as separator instead of a comma.
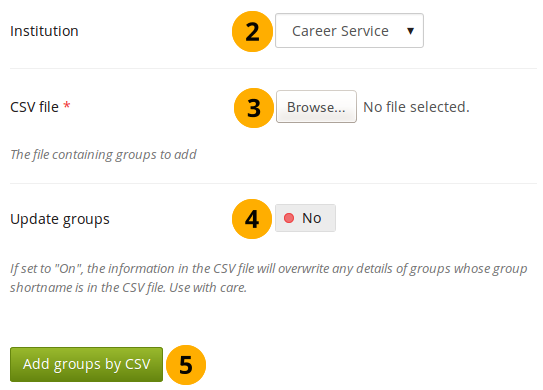
Institution: Choose the institution for which you want to create the groups. This is just for internal administrative purposes so that institution administrators do not overwrite each other’s groups.
CSV file: Choose the CSV file from your computer that contains the groups.
Update groups: Switch to “Yes” if you are updating already existing groups.
Note
If you do not have your CSV file anymore, you can download it from the Administer groups screen, make the necessary changes and upload it.
Click the Add groups by CSV button to make the changes.
Here is a full list of all the possible fields that you can specify:
allowarchives: Decide whether you want to allow portfolios that have been submitted to the group to be archived automatically.
Note
This option only works when you also allow submitpages.
controlled: Group administrators can add users to the group without their consent, and members cannot leave the group.
description: Brief description about the purpose of this group.
displayname: The group name that appears around the site.
editroles: You can choose which roles will be allowed to create and edit content owned by the group. If your group contains only members and administrators, then “Group administrators” and “Everyone except members” are identical. These edit permissions will also be used by default for new group files. Permissions can be changed on individual files in the group files area.
all: everyone in the group
notmembers: everyone except members in a course group that has tutors and administrators
admin: only group administrators
hidden: Choose to not list this group on the Find groups page.
hidemembers: Choose to hide group members from non-members.
hidemembersfrommembers: Choose to hide group members from everybody but the group administrator.
invitefriends: Choose to allow group members to invite their friends to the group.
open: Allow users to join the group without approval from the group administrator.
public: Allow people who are not logged in to view this group including the forums.
quota: Define the group file quota.
request: Allow users to send membership requests to group administrators.
roles: Choose to have a course or standard group. The roles in these group types are:
course: member, tutor, administrator
standard: member, administrator
shortname: This is the name used to identify this group in the database. It is also used to identify the group when you add or update its members by CSV.
Note
The group shortname needs to be lowercase.
submitpages: Choose to allow the submission of pages and collections to this group. If you create a course group, this setting is automatically chosen.
suggestfriends: Allow group members to send their friends a recommendation to join this group.
usersautoadded: Choose to have all new users on the site added to the group automatically.
Note
For fields that require a Yes / No value, you need to put a numeric value into the CSV file:
No = 0
Yes = 1

Sample CSV file for a group upload
When you look at your CSV file in a text editor and not a spreadsheet software, the above sample file looks like this:
"shortname","displayname","roles","usersautoadded","public","hidemembersfrommembers""public","Public group","standard",0,1,1"course","Course group","course",1,0,010.5.5. Update group members by CSV
Administration → Groups → Update group members by CSV
Note
Both site and institution administrators can add and update group members by CSV file.

Update group members by CSV
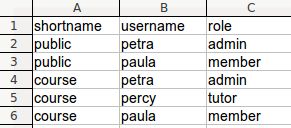
Create a CSV file that contains the following fields:
shortname,username,rolein the first row. The short name is the group short name that you used to set up the group. Add the users that should become members of these groups. You can check their usernames on the User search page.Note
If you have many groups and could easily lose the overview, create one CSV file per group.
You can export the current group membership from the Administer groups screen and remove the fields that you do not need for the upload. The extra fields were added to give more context around the users.
Institution: Choose the institution in which the groups were created.
Note
You can only update group membership by CSV of users who belong to the institution in which you created the groups by CSV. All other users must be added manually.
CSV file: Choose the CSV file from your computer that contains the group members mapped to groups.
Click the Update group members by CSV button to add to or remove members from the groups that you have specified.
Warning
If you manually added users to a group whose members you want to update via CSV file, these users will be removed from that group when you update the group membership and do not have them listed in the CSV file. Thus, be careful once you have added users manually.
Always leave at least one administrator in a group.
Sample CSV file for updating group membership
When you look at your CSV file in a text editor and not a spreadsheet software, the above sample file looks like this:
"shortname","username","role""public","petra","admin""public","paula","member""course","petra","admin""course","percy","tutor""course","paula","member"Note
Mahara also accepts CSV files that have a semicolon as separator instead of a comma.