
5.2. Ansicht bearbeiten
Die Ansichtenbearbeitung in Mahara ist wichtig, sie erlaubt Ihnen die Portfolioansicht zu gestalten. Sie besteht aus einer umfangreichen Reihe von Komponenten.
Navigation des Editors
Inhaltsauswahl
Ansichtenlayout
5.2.1. Navigation des Editors

Ansichtsseitenwechsler
Display page: Preview your page to see how others, who have access to it, would see it. You can also use the Display page button at the bottom of the page.
Edit: Place your content on a page. See content chooser, individual content blocks and page layout area.
Settings: Add and modify page settings like title and description, layout, and skin.
Share: Decide who shall have access to your page (or collection if the page is part of one). See „Edit access“ for more details.
5.2.2. Layout bearbeiten
The layout editor is very flexible and allows you to design your layout not only in columns but also in rows. You can decide how many columns each row shall have and how each row shall differ.
Note
Seien Sie vorsichtig wenn Sie vier oder mehr Spalten auswählen. Ihre Portfolioansicht mag auf einem 21“ Bildschirm sehr gut aussehen. Auf einem Notebook oder Tablet wird es jedoch zu Darstellungsproblemen kommen. In den meisten Fällen sind maximal drei Spalten eine gute Entscheidung.
5.2.2.1. Choose a basic layout
Bearbeiten Sie das gesamte Layout Ihrer Ansicht durch Festlegung der Anzahl von Spalten und Zeilen.
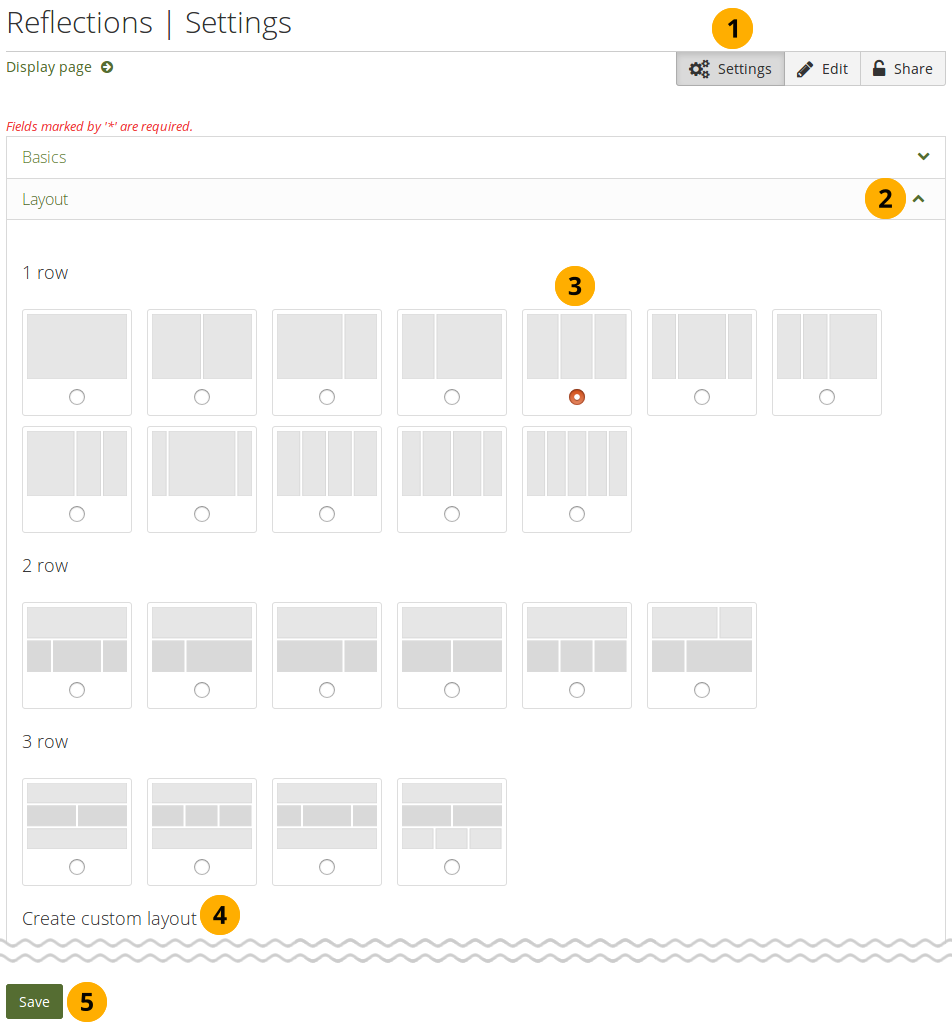
Click the Settings button.
Note
When you work on a small screen, the text on the button is removed and you only see the icon.
Layout: Click the icon in the Layout panel and the panel content will be visible. If you want to close the panel, click the icon. You can change the layout at any time. When you reduce the number of columns, your blocks simply move to the first column. You can then move them around to their correct position (see page layout area).
Click the radio button below a layout that you want to use.
Create custom layout: If you don’t like any of the built-in layouts, you can create your own in this section.
Klicken Sie auf den Speichern-Button, um das ausgewählte Layout zu speichern.
Note
Sie können Spalten direkt im Ansichtenlayout entfernen oder hinzufügen, wenn Sie die Option Anzeige von Buttons im Bearbeitungsmodus zum Hinzufügen und Löschen der Spalten in den Einstellungen Ihrer Accountoptionen aktivieren.

Sie können die Hinzufügen- und Entfernen-Buttons nutzen, um das Layout schnell anzupassen, sofern dies aktiv ist.
5.2.2.2. Create a custom layout
You can set up your own custom layout under Create custom layout where you can be more precise in how many rows and what sort of column width you’d like to have.
Custom layout options
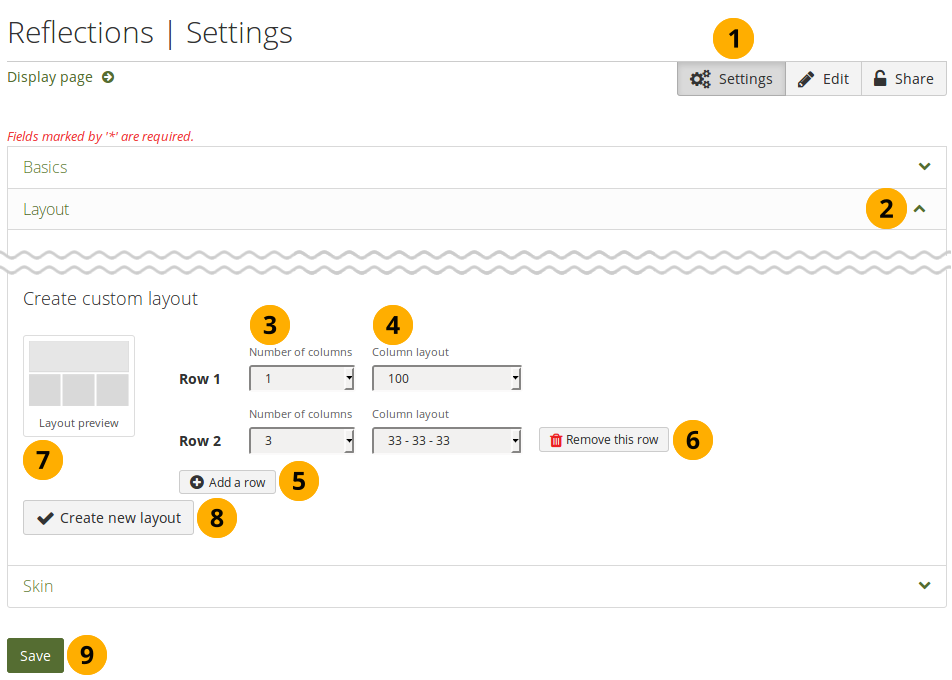
Click the Settings button.
Layout: Click the icon in the Layout panel and the panel content will be visible. If you want to close the panel, click the icon. In the Create custom layout section…
Number of columns: Choose the number of columns that you want to display in a particular row. You can choose up to 5 columns.
Column layout: Choose the percentages for the distribution of your columns in the row that you are editing.
Click the Add a row button to add more rows with a different column layout. You can create up to 6 rows.
Click the Demove this row button to remove a row if you do not want it in your layout anymore.
Layout preview: You can see what your layout is going to look like.
Click the Create new layout button to generate your new page layout. You can use it in all your pages.
Klicken Sie auf den Speichern-Button, um zur Inhaltsbearbeitung zurückzukehren.
Note
You can add more than one block to a row. The blocks will then be placed underneath each other in the column that you have chosen. If you wish to change the block layout, you can always add another row that has the same or a different column distribution.
5.2.3. Inhaltsauswahl
Alle Contentarten und und Blöcke, die externen Content einbinden können, finden Sie im ‚Contentauswähler‘.
Der Content-Auswähler steht im Editiermodus an der linken Seite zur Verfügung. Er scrollt auf der Seite mit und ist daher immer verfügbar. Sie können also auch dann darauf zugreifen wenn Sie am unteren Ende einer Ansicht arbeiten wollen.
Alle Inhalte sind über die Contentauswahl erreichbar.
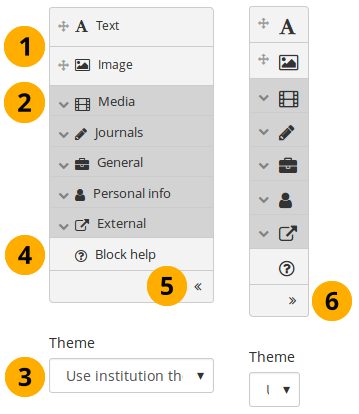
Sie können den Text- oder Bild-Block direkt auswählen, da sie sehr häufig genutzt werden.
Note
You may see additional or different blocks in this list of frequently used content items as it is up to the administrator of the site that you use which blocks to display here. There is an API available to make adding different items easier.
Sie können alle anderen Contentarten über ihre eigenen Schaltflächen einbinden:
Medien: der Block für Dateien, die als Links in Ordnern oder im Fall von Bildern und Videos direkt angezeigt werden.
Blogs: verschiedene Inhaltsblöcke, die Ihnen erlauben, Blöcke oder Blockeinträge in eine Ansicht einzufügen.
Allgemein: Contenteinträge allgemeiner Art
Persönliche Informationen: Wählen Sie persönliche Profilinformationen oder Biografieeinträge zur Anzeige im Block.
Extern: enthält Blöcke zur Einbindung von RSS Feeds, externer Medien oder Google Apps Dokumente in einer Ansicht.
See also
The functionality of each block that you can use in your portfolio pages and in group pages is outlined in the section on the individual artefact blocks.
Theme: You may be able to choose a theme for your portfolio page. If that is the case, you see the Theme drop-down menu. That allows you to select a theme in which that page is displayed to others who view your portfolio page.
See also
The site administrator must allow page themes in the site’s user settings for this option to be available.
 Click the Block help icon to be taken to the user manual’s block section for the version of Mahara that you are using.
Klicken Sie den Pfeil nach links , um die Größe des Content-Wählers zu verringern. Dann werden nur die Icons angezeigt, damit Sie mehr Platz in Ihrer Ansicht haben.
Klicken Sie auf den Pfeil nach rechts , um die Block-Beschreibungen des Content-Auswählers mitanzuzeigen.
Note
Der Contentwähler wird bei schmalen Bildschirmen zunächst nur mit den Icons dargestellt, um möglichst viel Platz für die Inhaltsbearbeitung nutzen zu können.
5.2.4. Ansichtenlayout
Der Ansichtenlayout-Bereich ist der Ort an dem Sie Ihren Content auf einer Ansichtsseite anordnen. Sie sollten hier überfolgendes wissen:
All content is placed into it by dragging and dropping blocks into this space.
Note
If you use only a keyboard to navigate Mahara, you can place blocks using that.
Der Inhalt wird über Blöcke in den Spalten angelegt. Jede Spalte kann mehrere Blöcke enthalten, die untereinander angeordnet werden. Sie können diese auch zeilenweise anlegen.
You can re-arrange blocks by clicking their headings and dragging and dropping them.
Sie können die Einstellungen für einen Block durch Anklicken des Konfiguration-Buttons ändern.
Changes to the layout and arrangment of blocks are saved automatically. As soon as you made saved changes inside blocks, they are also visible to any visitor of your page.
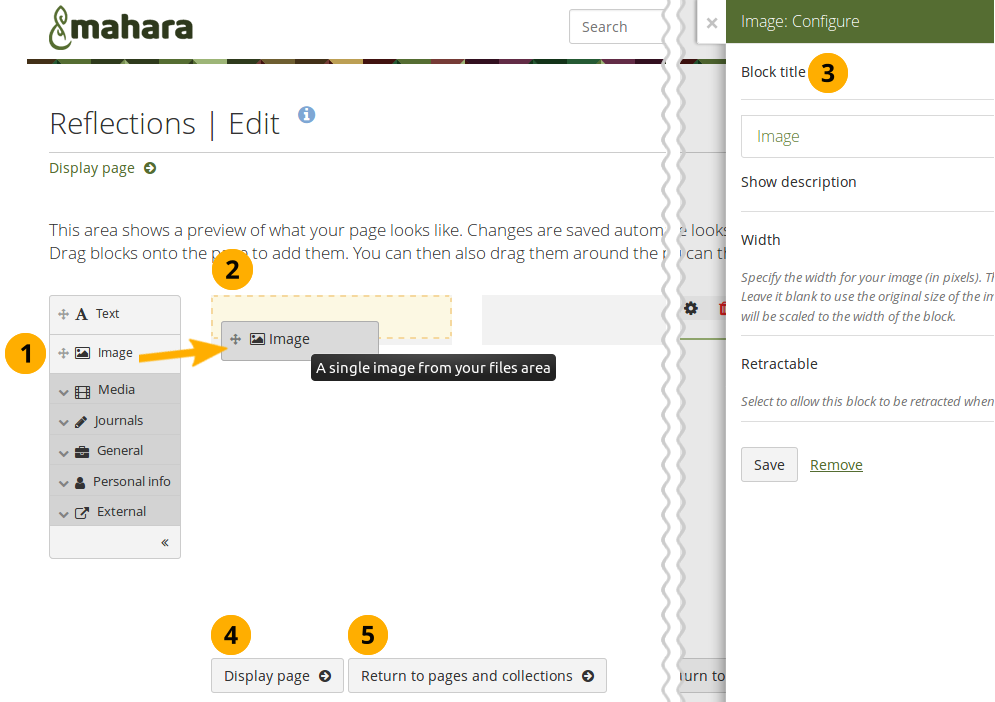
Ziehen Sie einen Block mit der Maus in den Layout-Bereich der Ansicht und konfigurieren Sie die Einstellungen.
Klicken Sie auf den Block für den Inhalt, den Sie einfügen wollen und ziehen Sie ihn in die Ansicht.
Note
If you navigate the site with a keyboard or long-click on the block, you see a pop-up modal in which you can choose the position of the block.
Wenn Sie das gepunktete Rechteck sehen, lassen Sie den Block los, damit er an dieser Stelle in Ihre Ansicht eingefügt wird.
Folgen Sie den Hinweise auf dem Bildschirm bei der Auswahl des gewünschten Inhalts. Weitere Informationen finden Sie im Content-Block-Abschnitt zu den einzelnen Einstellungen.
See also
Please refer to the section edit layout to learn how to change the number of columns and rows on a page and make certain columns wider than others.
Click the Display page button to view your page without the editing tools.
Click the Return to pages and collections button to go back to the overview page for your portfolios.
5.2.5. Edit access
The Edit access screen is displayed for the selected page. You can only select the sharing options for the page that you are editing (and the collection if the page is in a collection).
You can set a secret URL immediately rather than having to provide a secret URL separately from the other sharing options.
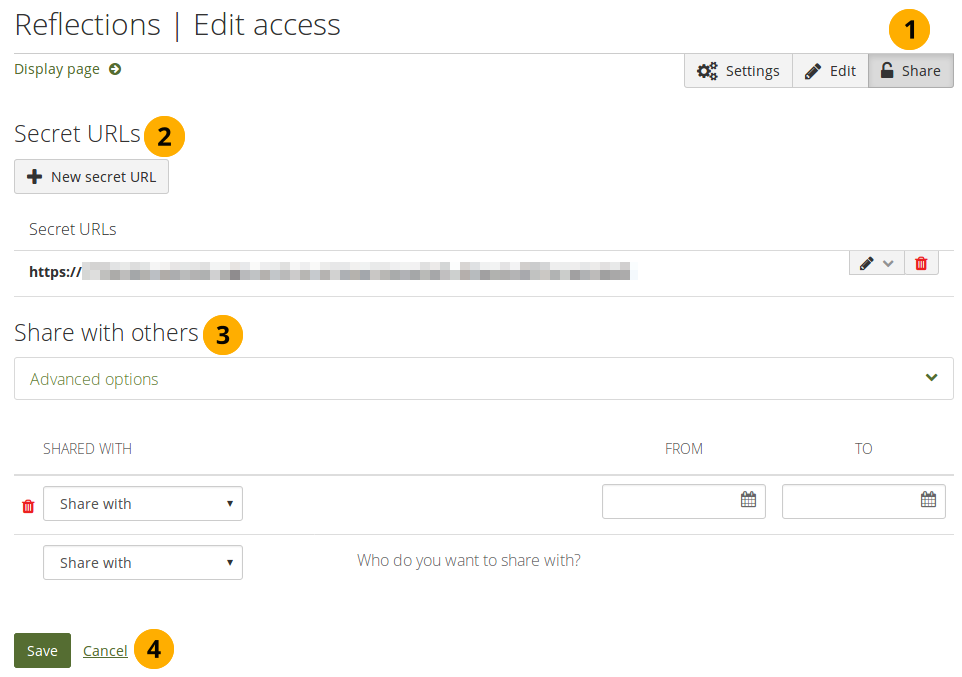
Edit access for the page you are editing
Click the Share button.
Secret URLs: Give your page a secret URL. For all available options, check out how to set up a secret URL.
Share with others: You can share your page with people who have an account on the site.