8.7. Institution membership
You can see in which institution(s) you are a member. You may be able to leave your current institution and join other institutions if they allow self-registration. If you cannot leave your institution, you must ask your institution administrator to remove you.
Warning
Leaving an institution does not mean that your account is deleted. You keep your content and portfolio pages when you move from one institution to another as long as you have your account. Institution administrators should not delete your account when they want to remove you from their institution.
8.7.1. Current institution
Account menu → Settings → Institution membership → Current institution
On this page you see your current status of institution membership and actions you can take.
Check on your institution membership
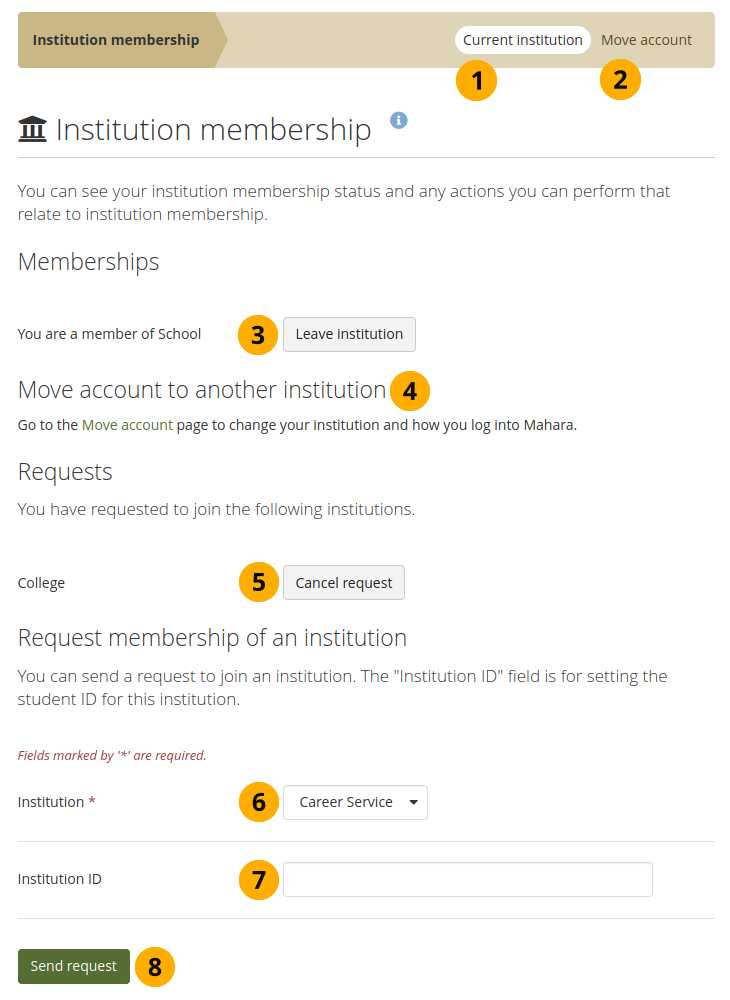
Current institution: Navigation tab where you can see your current membership.
Move account: You can move your account to an institution with single sign-on set up on your own.
Memberships: Here you see to which institution(s) you belong. Click the Leave institution button to remove yourself from an institution.
Note
If you do not see this button next to an institution, you cannot remove yourself but must ask an institution administrator to do so.
You can move your account to another institution by clicking the Move account tab in the navigation bar.
Requests: If you already requested membership in an institution, it will be listed here. You must wait for an institution administrator to approve your request. If you wish to cancel a request, click the Cancel request button.
Request membership of an institution: Choose the institution from the drop-down menu that you wish to join.
Note
You only see institutions that allow self-registration.
You can provide an ID if you have one for this institution, but that is optional.
Click the Send request button, and the institution administrator is notified of your request and will deal with it.
8.7.2. Move account
Account menu → Settings → Institution membership → Move account
You can move your account from the current institution into another one by yourself, when the intaking institution has single sign-on set up. That account move does not require an administrator to intervene.
8.7.2.1. Select the institution to move to
You can only move your account if there is more than one institution on the site and if at least one of them has single sign-on set up via SAML.

Select the institution to move to
Make sure you are on the Move account tab.
Select the institution to which you want to move from the drop-down menu.
Note
Only institutions that have SSO set up via SAML are displayed.
Click the Send request button to confirm your action or click Cancel to abort.
You are asked to log into the IdP to verify the account details for your access to that institution. An email is sent to you with a link to confirm within 30 minutes that you want to move your account.
Note
If you do not confirm within 30 minutes, you can try it again.
8.7.2.2. Confirm your account move
You need to confirm your account move to ensure that the correct account is moved.
Confirm your account move
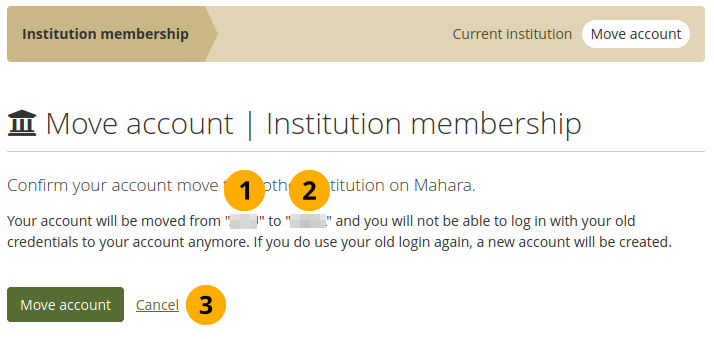
When you click the link in the email to confirm your account move, you see the institution from which you want to move.
The institution to which you wnat to move is listed as well.
Click the Move account button to finalise your account move to the new institution. If you do not wish to move your account after all, you can click Cancel.