13.1. Open Badges
Open Badges is Mozilla’s open source answer for showing recognition of skills and competencies online. Moodle 2.5 became a badge issuer in May 2013 and Mahara will become a badge displayer in the future. For the time being, however, there are two ways of displaying your Open Badges:
- Have the plugin Open Badge Displayer installed (available since 8 August 2013).
- Use an iframe. This method is not recommended any longer as there is no verification of the email address and you could essentially display someone else’s badges.
See also
This tip was first published in the blog post “Open Badges in Mahara: The quick way” by Kristina D.C. Hoeppner.
13.1.1. Create a collection of badges
Go to your Mozilla Backpack. You must have already pushed at least one badge to it to complete the following steps.
Note
You will need to create a Persona account in order to use the Mozilla Backpack. Increasingly, you can connect with Persona to websites. You can also use it as authentication method in Mahara.
Click the Collection navigation item to enter your badge collection area.
Drag one of your badges onto a (new) collection space.
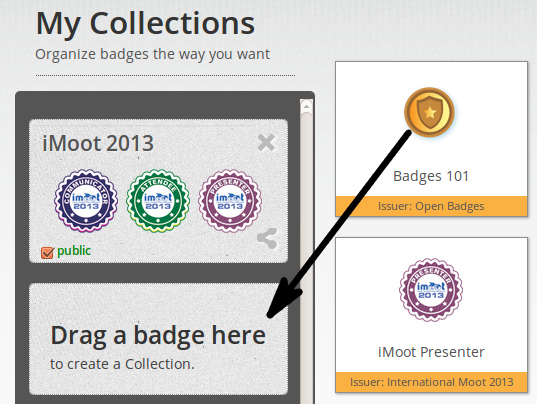
Drag a badge onto a new collection space
Give your new collection a title by clicking onto “New collection” and typing your title.
Tick the check box public so others can see your badges.
Click the Share icon. You will be taken to a page where you can see all the badges in the collection that you created.
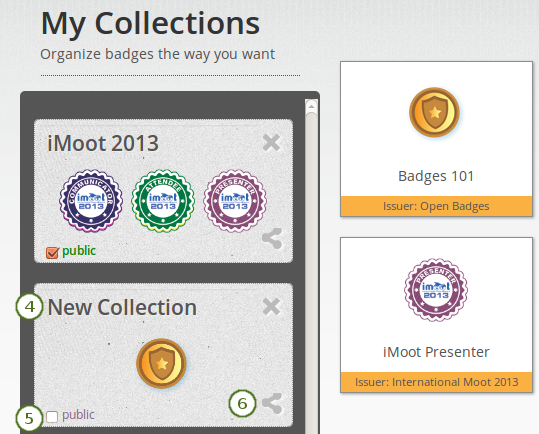
Create a new collection
13.1.2. Select the badge collection in Mahara
Note
Follow this step if you have the Open Badge Displayer installed.
- Create a page in your portfolio or edit an existing portfolio page where you want to display your badge collection.
- Drag the Open badges block onto your page. This block is only available when you have the plugin installed.
- Select the badge collection that you want to display.
- Give your block a title.
- Save your changes. Your badge collection is now visible in your page.
Note
If you do not have the “Open Badge Displayer” plugin installed, you can follow these next steps.
13.1.3. Generate an iframe for your badge collection
Copy the URL of your public collection.
Create an iframe around it so you can embed it into a Mahara page.
See also
You can use the Online iFrame generator for example to create your iFrame easily. Or you can copy this iframe code and replace the URL with your own.
<iframe src=”http://backpack.openbadges.org/share/da6db5b196b80bb3fda3d3e89a552028/” style=”border:0px #FFFFFF none;” scrolling=”no” frameborder=”1″ marginheight=”0px” marginwidth=”0px” height=”800px” width=”800px”></iframe>Copy the entire iframe code.
13.1.4. Embed your badge collection in a Mahara page
Create a page in your portfolio and set the layout to 1 column.
Note
For the next steps to work, your site administrator must have added
backpack.openbadges.org/shareto the list of allowed iFrame sources. If this URL changes, your site administrator will have to correct it so your badges can still be displayed.Once other badges backpacks become available, each will need to be added as allowed iframe if you store badges there.
Drag the External content block onto your page.
Paste your iframe into the URL or embed code field.
Give your block a title.
Save your changes. Your badge collection is now embedded in your page.