8.1. Preferences
User menu → Settings → Preferences
The account preferences of a user can be accessed via the Preferences page in the User menu → Settings in the top navigation area of a page.

Access the Preferences page
8.1.1. Neues Passwort
You can change your Mahara password on the Preferences page.
Bemerkung
If you do not see this section on your Preferences page, you cannot change your password. Your login and password are managed elsewhere. This is the case if your institution has set up single sign-on for example. If you want to change your password in such a case but don’t know where, please contact your institution administrators. They will be able to tell you where you can change your password.

Ändern Sie Ihr Passwort
Derzeitiges Kennwort: Geben Sie Ihr aktuelles Kennwort ein.
Neues Kennwort: Geben Sie neues Kennwort ein.
The password strength indicator shows how strong your password is in relation to the password policy.
The minimum requirements for the password are mentioned in the help text.
Kennwort bestätigen: Geben Sie Ihr neues Kennwort ein zweites Mal ein, um Tippfehler auszuschließen.
Machen Sie weitere Anpassungen wenn Sie dies wünschen.
Klicken Sie auf den Speichern-Button am Fuß der Seite.
Ihr Passwort muß mindestens sechs Zeichen lang sein. Passwörter beachten die Groß- und Kleinschreibung und dürfen nicht mit dem Nutzernamen identisch sein.
8.1.2. Benutzername ändern
You need a username to log in to Mahara. If your account is not managed by single-sign on or another authentication method, you see this box with your current username in it. You can change your username at any time.
You will be asked to enter your account password to complete the change.
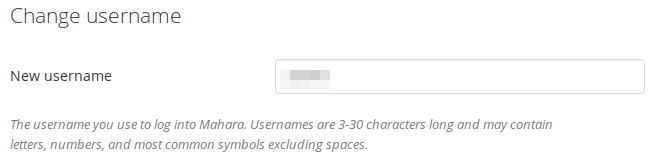
Ändern Sie Ihren Benutzernamen
Bemerkung
Nutzernamen sind 3-30 Zeichen lang und können Buchstaben, Zahlen und einige Sonderzeichen enthalten. Leerzeichen sind nicht möglich.
8.1.3. URL in Profil ändern
Bemerkung
Die Möglichkeit zum Ändern der „Profil-URL“ sehen Sie nur wenn die Funktion lesbare URLs von der Site-Administration aktiviert und Ihnen das Recht zur Änderrung gegeben wurde.
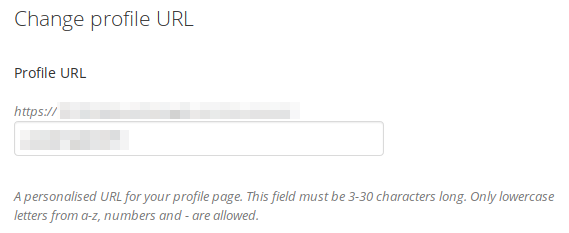
URL in Profil ändern
Sofern Sie diese Möglichkeit haben, können Sie einen einfach merkbaren Link zu Ihrer Profilseite festlegen. Voreingestellt ist Ihr Nutzername. Sie können ihn auf Wunsch jedoch ändern. Der Eintrag muss zwischen drei und dreißig Zeichen lang sein. Sie können nur Kleinbuchstaben, Ziffern und Bindestriche (-) verwenden.
Your profile page is then accessible via the URL https://url-to-your-mahara-site/user/your-chosen-name. For example: https://mahara-university.org/user/paula.
Warnung
Though you can change the URL to your profile page or any other portfolio page at any point, you shouldn’t do that because people who already know the URL to your page will not be able to access it anymore after you have changed it.
The original, internal Mahara URL, e.g. https://mahara-university.org/user/view.php?id=123 will still work.
8.1.4. Allgemeine Accounteinstellungen
Die Allgemeinen Acount-Optionen sind für alle Nutzer sichtbar. Das ist unabhängig davon, ob Nutzername und Passwort hier geändert werden können. Einige Optionen erfordern eine vorherige Aktivierung durch den Site-Administrator.
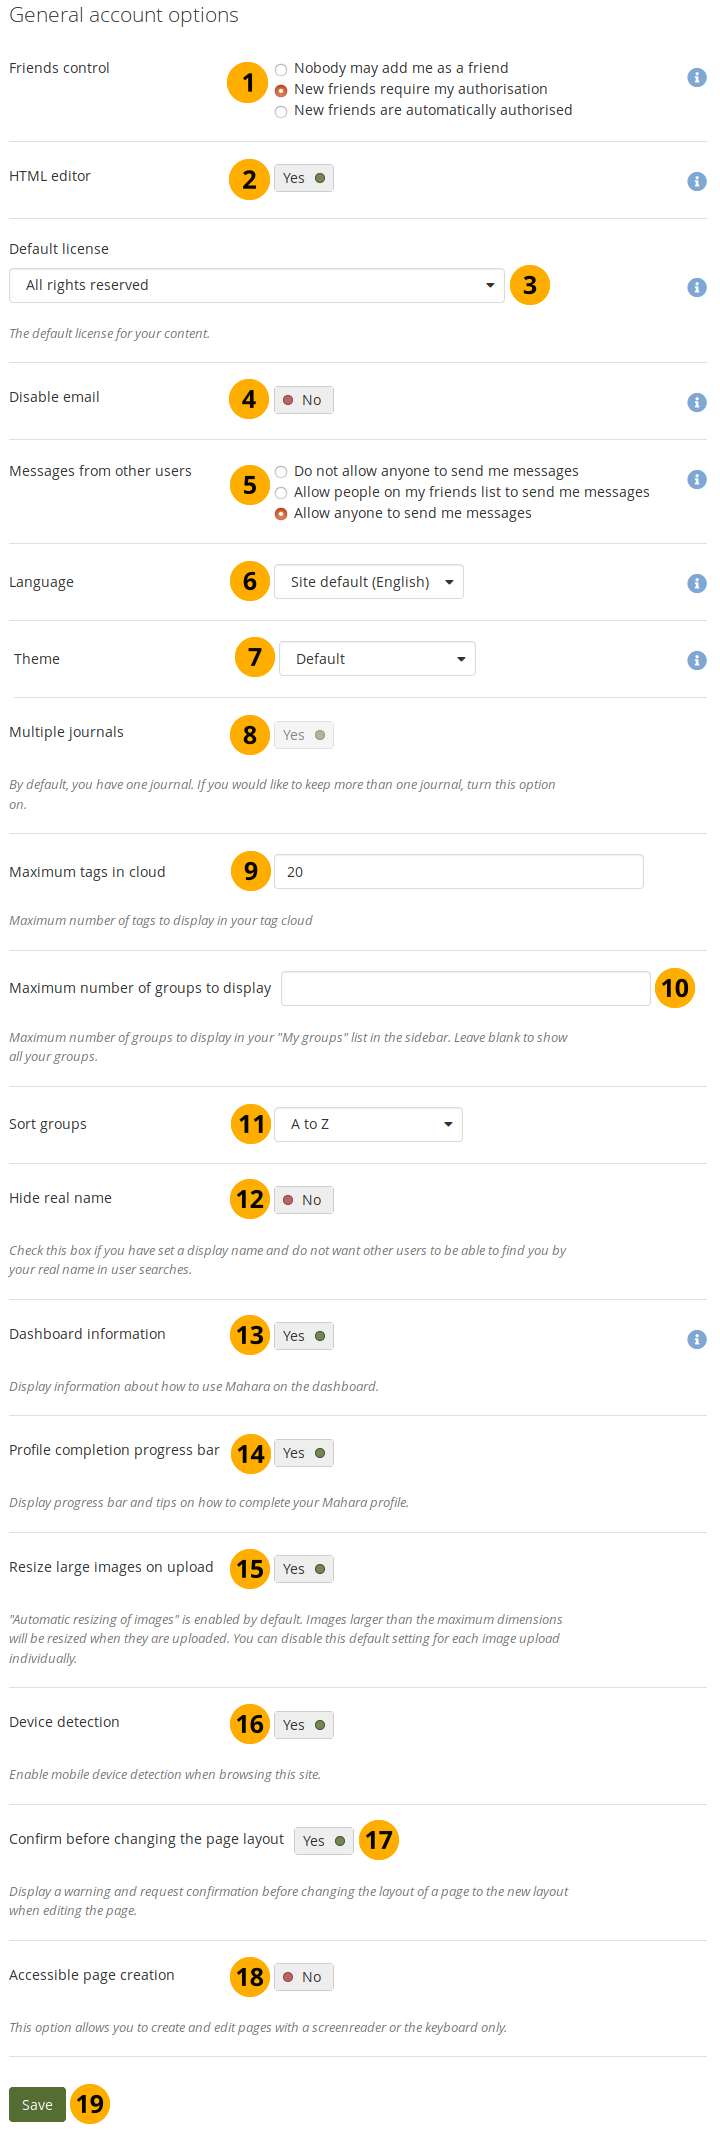
Prüfen und ändern Sie Ihre allgemeinen Accountoptionen
Friends control: Choose whether other users may add you to their friends list. If you are added to a friends list, the owner of that list is added to yours as well. When you remove someone from your friends list, you are also removed from their list automatically. Your settings options are:
Niemand kann mich als Kontakt eintragen: Andere Nutzer sehen keine Möglichkeit eine Kontaktanfrage an Sie zu erstellen..
Neue Kontakte müssen von mir bestätigt werden: Bevor jemand Sie auf seine Kontaktliste setzen kann, ist Ihre Zustimmung erforderlich.
Neue Kontaktanfragen werden automatisch bestätigt: Sie akzeptieren alle Kontaktanfragen hiermit automatisch.
HTML editor: An HTML editor is available for use in some sections of the site. This is known as a ‚What you see is what you get‘ (WYSIWYG) editor. It allows you to apply formatting to your text like in a word processor. If the editor is turned off, you can only enter plain text without any formatting like making text bold or colorising your text. If you do not have this option, the site administrator may have disabled it.
Default license: If the site administrator enabled License metadata in the general site settings, you can select your default license for your content that you create or upload. The default setting is „All rights reserved“, which means that you reserve all copyright.
Sie können in dem Drop-down-Menu eine Lizenz auswählen, die für Ihre Inhalte und den Einsatzzweck am Besten geeignet ist. Wenn Sie ein Artefakt einer anderen Person hochladen, das unter einer anderen Lizenz veröffentlicht wurde, können Sie diese Lizenz auswählen. Wenn der Siteadministrator individuelle Lizenzen zulässt, können Sie mit der Menuoption „Andere Lizenz (URL eingeben)“ auf eine andere Lizensierungsform verlinken.
Bemerkung
Wenn Sie sich nicht sicher sind, welche Lizenzoption Sie wählen sollen, klären Sie es in Ihrer Institution ab. Sie können auch einen Juristen als Fachmann befragen.
If you are a member of multiple institutions and choose „Use institution default“, you will not be able to select the institution whose license you want to make the default one. One will be chosen by the system randomly.
Disable email: Use this setting to stop the site from sending you emails. It is advised that you generally regulate what is sent via email and what is not in the notification settings.
Warnung
If you disable your email address, you cannot reset your password as that requires the sending of an email. You will have to contact an administrator and have your password reset.
Messages from other users: Use this setting to choose who you wish to receive messages from. Use the notification settings area to decide how you will receive these messages. Your options are:
Mir keine Benachrichtigungen zusenden: Andere Nutzer/innen können mir keinen Benachrichtigungen zusenden.
Mitgliedern meiner Kontaktliste Benachrichtigungen erlauben: Nur Personen, die zuvor auf der Kontaktliste eingetragen wurden, können mir Benachrichtigungen zusenden.
Jedem erlauben mir Benachrichtigungen zuzusenden: Jeder, unabhängig ob er auf der Kontaktliste eingetragen ist oder nicht, kann mir Benachrichtigungen zusenden.
Bemerkung
Diese Restriktionen gelten nicht für Nutzer mit ‚Administrations-‘ oder ‚Mitarbeiterrechten‘.
Sprache: Wenn Ihre Mahara-Instanz mehrere Oberflächensprachen zulässt, können Sie hier wählen in welcher Sprache Sie durch die Seite geführt werden. Menüeinträge und die Kontexthilfe werden in der ausgewählten Sprache angezeigt. Der Inhalt der Portfolios oder der Gruppen wird nicht automatisch in die gewählte Sprache übersetzt.
Bemerkung
It may be that not everything is translated. The Mahara language packs are translated by community members. If you want to help translating Mahara or fix spelling mistakes in a translation, you can join the translation project.
Theme:
If you belong to multiple institutions, you can choose the institution theme with which you wish to browse the site and see all your portfolios in (unless you chose a page theme or skin). Other users will see your pages in their own theme as this setting is not for choosing page themes.
If the site administrator allowed it, you can choose any theme that is available to you as your browse theme.
Multiple journals: By default, you have one journal. If you set this switch to „Yes“, you will be able to create more journals. Once you have created a second journal, you cannot switch this setting back to „No“.
Bemerkung
Wenn Sie Moodle zum Export der Daten nach Mahara verwenden, sollten Sie mehrfache Blogs aktivieren. Inhalt, der mit der Leap2A Option übertragen wird, wird häufig in einen neuen Blog eingetragen.
Maximum tags in cloud: Decide how many tags you wish to display in your personal tag cloud in the sidebar in Pages and collections and Files.
Maximale Anzahl der Gruppen anzeigen: Entscheiden Sie wie viele Gruppen Sie gerne in Ihrer Seitenleiste anzeigen wollen. Wenn Sie hier keinen Wert eingeben, wird Ihnen keine Gruppe angezeigt.
Gruppen sortieren: Entscheiden Sie in welcher Reihenfolge Ihre Gruppen sortiert und in der Seitenleiste angezeigt werden sollen:
Zuletzt beigetreten: Gruppen werden in chronologisch umgekehrter Reihenfolge angezeigt, um Ihnen an erster Stelle anzuzeigen, welchen Gruppen Sie zuletzt beigetreten sind.
Zuerst beigetreten: Diese Option zeigt Ihnen Ihre Gruppen in der Reihenfolge an, in welcher Sie den Gruppen beigetreten sind.
A bis Z: Alphabetisch von A bis Z. Dies ist die Standardoption.
Hide real name: You see this option if the site administrator allowed users to hide their real name. If you switch this to „Yes“, others can only search for you using your display name.
Dashboard-Information: Wählen Sie diese Option, wenn Sie die Verlinkungen auf Ihrem Dashboard anzeigen wollen.
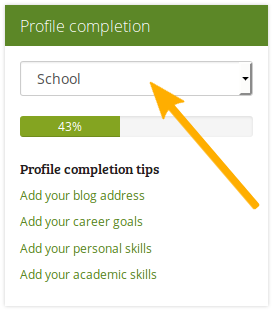
Profile completion progress bar: Switch this setting to „Yes“ if you want to display the progress bar set up by your institution and tips on how to complete your profile.
Bemerkung
You only see this option if the administrator of your institution set up the profile completion.
Als Mitglied in mehreren Insitutionen können Sie zwischen den einzelnen Institutionen echslen und dann die verschiedenen Sidebars sehen.
Große Bilder automatisch anpassen: Aktivieren Sie die Funktion, um Bilder beim Upload so anzupassen, dass Breite und Höhe einen festgelegten Höchstwert nicht überschreiten. Beim Upload einzelner Bilder kann die Einstellung deaktiviert werden. Siesehen die Option nur wenn der Siteadministrator es zulässt.
Geräteerkennung: Wenn Sie diese Funktion aktivieren und die Seite mit einem Smartphone oder Tablet-PC sehen Sie nur die Funktionen, die bequem mit einem solchen mobilen Gerät genutzt werden können. Wenn Sie die Funktion nicht aktivieren sehen Sie die Funktionen genauso wie auf einem nornalen PC im Browser. Bei kleinen Bildschirmen wird das Menu leicht angepasst. Sie sehen die Option nur wenn ein Siteadministrator es zulässt.
 Confirm before changing the page layout: Set this option to „Yes“ if you want to see a warning every time you change an existing page (created prior to Mahara 19.10) to the new page layout. The layout change is required to be able to edit a page.
- Accessible page layout: Set this option to „Yes“ if you navigate Mahara with a keyboard only or with a screenreader. It will allow you to create pages that you can navigate with the keyboard alone and not via drag-and-drop.
Klicken Sie auf den Speichern-Button, um die Änderungen abzuspeichern.
8.1.5. Zugang löschen
You can delete your own account by clicking the Delete account button on the top of the Settings page.
Bemerkung
Every account can be deleted. It is up to the administrators to decide whether a review is required before the content of a user account can be deleted fully.

Löschen Sie Ihren Account und Ihre gesamten Inhalte
Warnung
Wenn Sie Ihren Nutzeraccount löschen, werden alle von Ihnen angelegten Artefakte und Ansichten gelöscht. Die Dateien und Informationen können nicht wieder hergestellt werden. Machen Sie also unbedingt vor dem Löschen des Accounts ein Backup aller Inhalte über Portfolio exportieren. Der Export enthält Ihre eigenen Inhalte, nicht jedoch Inhalte von Gruppenseiten. Das Löschen eines Nutzeraccounts sollte nur dann vorgenommen werden, wennn Sie sich absolut sicher sind.
If no account deletion review is required, you must provide your current password as a security measure before you can delete your account.
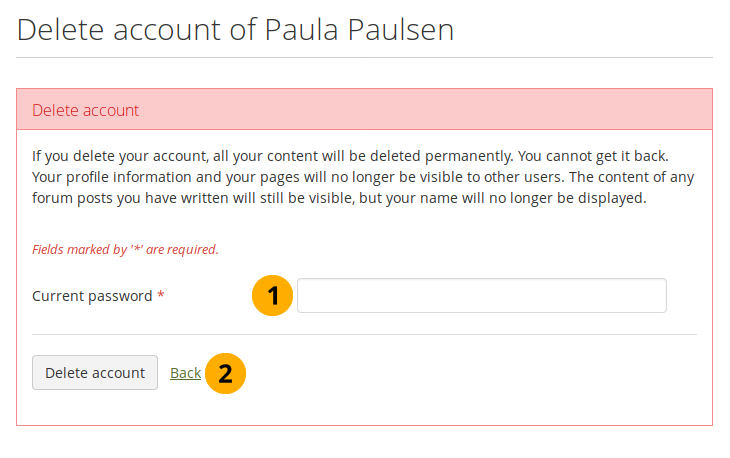
Provide your password to delete your account
Current password: Enter your password to approve the deletion of your account.
Click the Delete account button to complete the deletion.
If the site or the institution administrator decided that a review is required before you can delete your account, you will need to provide a reason for wanting to delete your account.
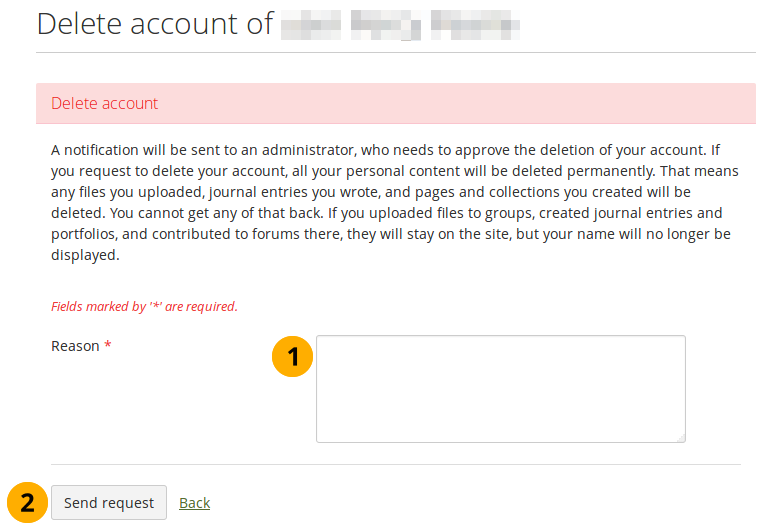
Reasons for deleting your account
Enter the reason for deleting your account.
Click the Send request button to request that your account be deleted.
The site administrator or institution administrator if you are a member in an institution receives a notification about your request and can approve or deny it.
On your account settings page, you can cancel or resend your account deletion request.
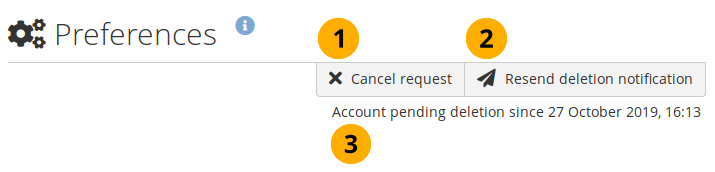
Cancel or resend your account deletion request
Click the „Cancel request“ button if you want to keep your account.
Click the „Resend deletion notification“ button if your administrator hasn’t deleted your account yet and hasn’t been in touch with any questions.
The date is displayed when you requested that your account be deleted.