8.4. Groups
In the Groups menu of the Site administration you can:
- add administrators to groups
- delete groups
- manage group categories
8.4.1. Overview
The first page you see when you click on the Groups menu is the Administer Groups page.
- Search a group by its name or category.
- Group name. The table is sorted alphabetically according to the group names.
- Number of group members
- Number of group administrators
- Group type
- Group category
- Visibility
- Click the Manage button
 to add or remove group administrators.
 - Click the Delete button
 to delete a group.
8.4.2. Add / remove group administrators
You can add to or remove administrators from a group by clicking on the Manage button on the Administer Groups page.
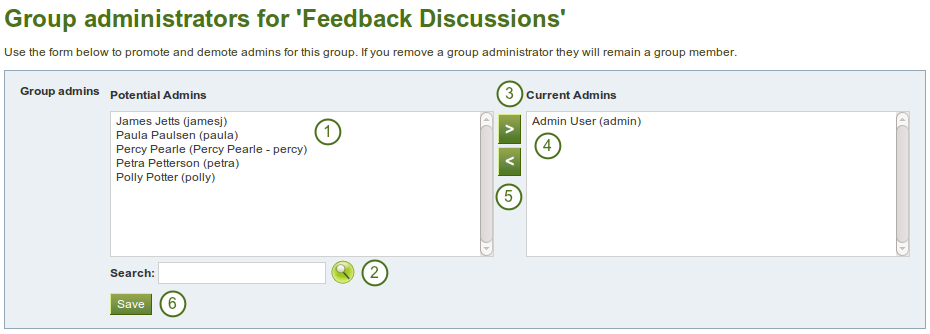
Add or remove group administrators
- From the list under Potential Admins, select the group members you wish to make group administrators. You can also select multiple users at once using Ctrl and Shift click.
- If you have too many users on your site and you cannot see / find the user you want, you can search for him in the Search box.
- Add the potential administrator to the right-hand side - Current Admins - by clicking on the right-arrow button
 .
. - If you want to remove an existing or accidentally added group administrator, you can remove him from the list on the right-hand side by clicking on him.
- Then click on the left-arrow button
 , and he is removed from the list.
 - When you have chosen all members you wish to make group administrators, click the Save button.
8.4.3. Manage group categories
Group categories help you to filter your groups more easily on the My groups and Find groups pages. A group administrator can always assign one group category to a group if categories are enabled.
Site administrators can manage group categories on the Group Categories page under Groups in the Site Administration.
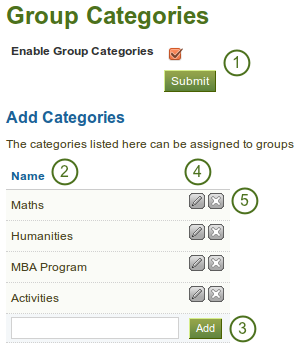
Manage group categories
- Enable group categories for the entire site by placing a checkmark into the check box and then click the Submit button.
- Existing group categories are listed.
- Create a new group category by typing its name and then clicking on the Add button.
- Edit a group category name by clicking on the Edit button
 , change the name and then click on the Update button. If you want to abort the action, click on the Cancel button.
 - Click on the Delete button to permanently delete a group.
Note
Group categories are not hierarchical and are available to everybody on the site. Any user who can create groups can assign a group category.