4.9. Files
Main menu → Create → Files
The Files area is a repository, i.e. a document storage for folders and files, that you can use within your portfolio. Both folders and files are considered artefacts and as such can be added to a page. You may create any number of folders or sub folders. To view which subfolders and files sit within a folder, click on the folder name. Use the Home link to return to the top level folder directory.
You can arrange files and folders by dragging and dropping the icon in front of the file / folder name onto another folder icon. A suitably named and organised filing structure will help you with the long-term organisation and retrieval of your artefacts. If you want to move a file or folder out of a subfolder, move it onto the parent folder icon .
You will find that some folders are automatically created by the system such as viewfiles or images. The viewfiles folder includes files from imported pages whereas the images folder includes your uploaded profile pictures. As with any other file, you can move them out of this folder and store them in a different folder.
Note
You can move files and folders to your heart’s content without having to re-link them in the pages where you use them. Also renaming them will not have a negative impact on links.
4.9.1. File browser
In the Files area you have a file browser in which you can organise your files so you can find them. You can sort your files into folders and also create subfolders.
Your file browser
Click a file or folder icon and drag and drop it onto a folder to move the file or folder within that folder.
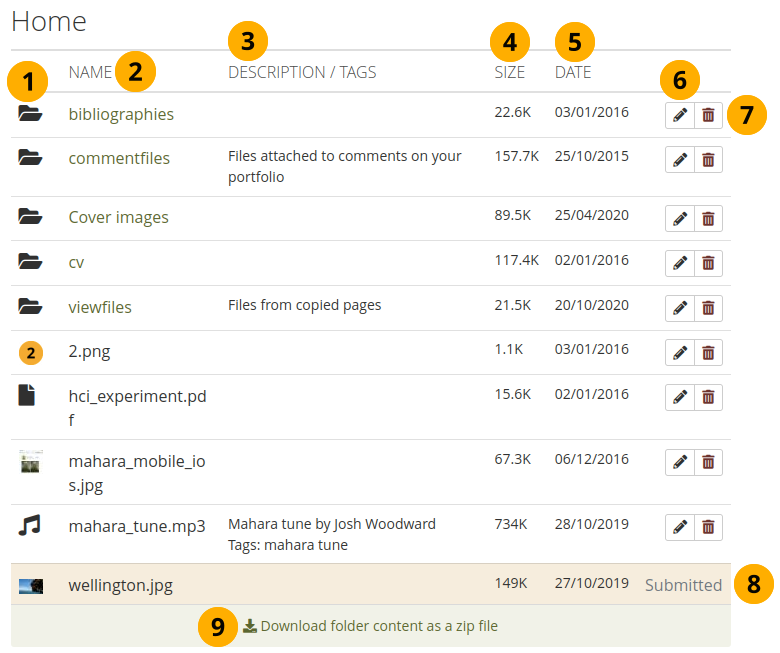
Name: You see all your folders and files that are not in folders listed to access them.
Note
When you click on the name of an image, you see a preview of it. You are presented with a download option when you click on another file.
Description / Tags: View the description and tags of your folders or files to know quickly what the content of them is.
Note
If you do not give an image a description, the file name is used as
alt tagto identify the image when you place it into an image block or display it embedded in text.Size: The size of your files and folders is displayed.
Date: The date you created a folder or uploaded a file is shown.
Click the Edit button to edit folder or file properties. Continue with editing a file.
Click the Delete button to delete a file or folder.
Warning
A pop-up window requires you to confirm the deletion because you will not be able to recover the file once it is deleted. If you use a file in a journal entry and / or on a page, the warning message tells you that this file is in use elsewhere so that you don’t delete it by accident.
If a folder or file is used in a portfolio that has been submitted, you are not able to edit or delete it.
Click the Download folder content as a zip file link in order to get a zip file which contains all files and folders of the current folder.
See also
Site administrators decide in the Artefact type: File settings for how long the zip file is kept on the server.
4.9.2. Upload a file
Before you upload a file, make sure that you are allowed to do so. For any artefacts that you publish in your portfolio, you must have the sufficient rights. That means:
the artefact is your own or
you are allowed to reproduce and distribute it, i.e. it does not violate any copyright legislation and
the artefact also adheres to the Terms and Conditions of the Mahara site you are using
Note
It can be that you have to agree to an upload agreement before you can upload any files to your Files area. The site administrator decides about that in Administration menu → Extensions → Plugin administration → Plugin type: artefact: file.
Upload a file
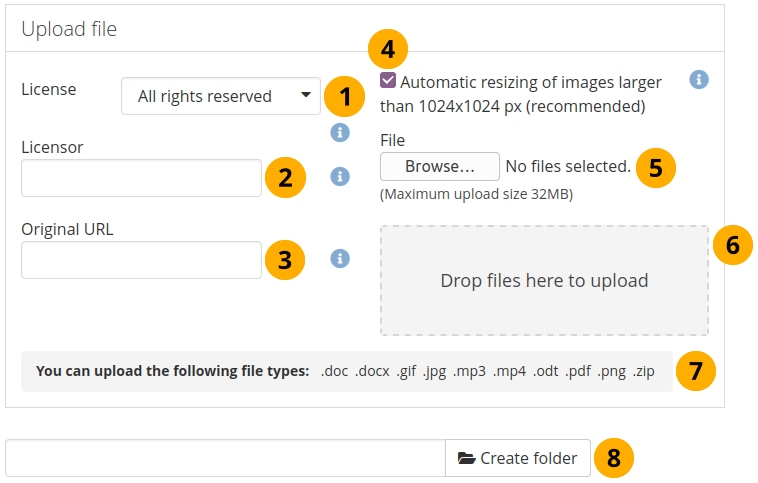
License: You see this field if the site administrator turned on license metadata. Choose the license for the artefact that you are about to upload. You can set your default license in your account settings.
Licensor: You see this field if the site administrator turned on license metadata. If you are uploading a file that somebody else created, you can attribute the work to them here and provide their name for example.
Original URL: You see this field if the site administrator turned on license metadata. If you are uploading somebody else’s file, provide a link to the original Internet address so that others can go there and view the original file.
If the site administrator turned on the image resizing option, you can decide whether you want to have your images resized if they are larger than the specified dimensions. This option is recommended to save space in your portfolio.
Upload file: Upload a file by clicking on the Browse button to search for the file on your computer. Make sure that it is not larger than the maximum upload size that is shown in the parentheses.
Instead of clicking the Browse button to upload files, you can drag and drop files from your computer directly onto the ‘drop zone’. You must still observe the maximum file size upload for each file and the maximum total file size cannot be exceeded either.
Note
You can drag and drop an entire folder without zipping it into the Files area using Chrome. The files are uploaded, but not the folder itself. So if all files should be in a separate folder, create a folder in Mahara first. This feature does not exist in Firefox and Safari.
If the site administrator restricted which types of files can be uploaded, you see the list of allowed file type extensions. If there is no list, you can upload any file type.
Type the folder name and click the Create folder button if you want to create a folder before uploading files. Click the folder to upload files directly into it.
4.9.3. Upload multiple files
You can upload multiple files at once in three different ways:
You can upload multiple files when you are browsing for them after having clicked the Browse button. Hold down the Ctrl key (or Command key on a Mac) and click on all the files that you wish to upload at once.
You can drag and drop multiple files into the drop zone.
You can also place all files into a compressed file, a .zip file, and upload that to Mahara. This method allows you to upload multiple files from different folders on your computer at once. You can create a zip file from any number of files that you have selected in your document management program by making a right mouse click and selecting Compress… (or something similar).
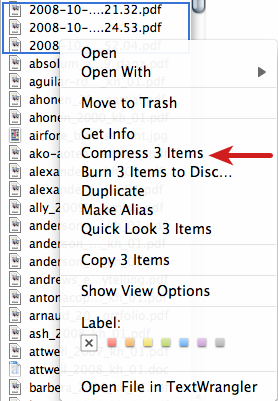
Zip files in the Finder under MacOSX
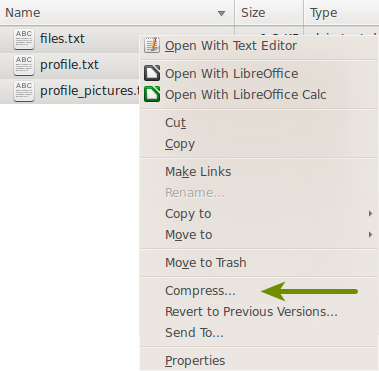
Zip files in Ubuntu’s Nautilus
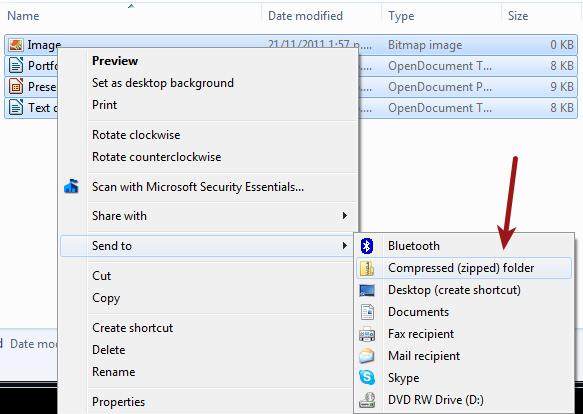
Zip files in Windows Explorer
Once you have uploaded your zip file to Mahara, you can unzip it there. Click on the Unzip button next to the Edit button . Please follow the on-screen instructions.
4.9.4. Edit a file or folder that is not an image
You can edit the properties of a file or folder at any time. The file does not have to be re-linked in portfolio pages, but the properties you changed will be updated automatically.
Note
 Images show different fields due to additional requirements.
Edit a file
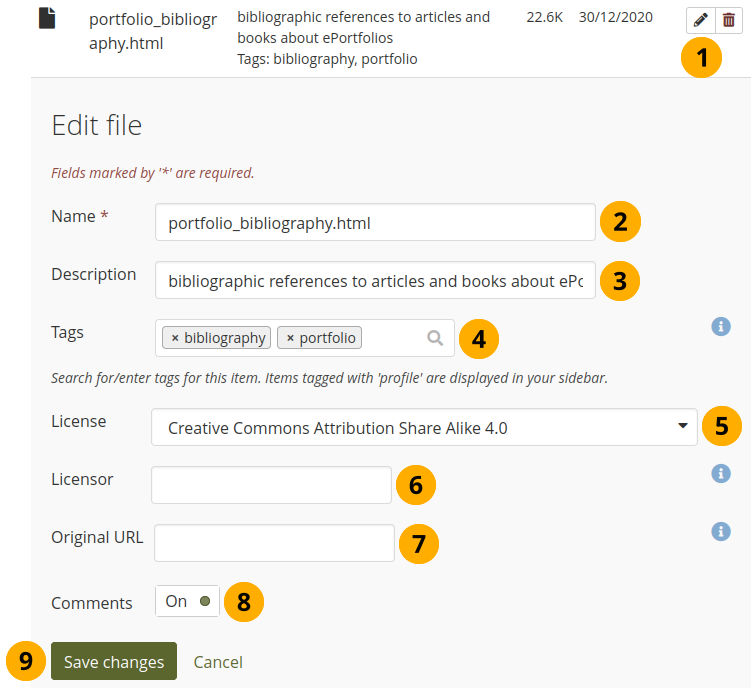
Click the Edit button to edit folder or file properties.
Name: Change the name of the file (or folder). It is not necessary to keep the file extension as Mahara stores it internally. However, it can be good to leave it in case somebody has problems opening the file if no default programme is associated with the file after downloading it. This field is mandatory and each file (or folder) must have a name.
Description: Give the file (or folder) a description.
Note
If you do not give an image a description, the file name is used as
alt tagto identify the image when you place it into an image block or display it in text.Tags: Give the file (or folder) one or more tags. You can choose from your existing tags by starting to type a letter and then selecting the tag you want to use. You can also type a new tag, and it is added to your list of tags.
See also
You can find more information on how to use the tag selector in the ‘Tags’ section.
License: You see this field if the site administrator turned on license metadata. Choose the license for the artefact that you are editing.
Licensor: You see this field if the site administrator turned on license metadata. If you are editing a file that somebody else created, you can attribut the work to them here and provide their name for example.
Original URL: You see this field if the site administrator turned on license metadata. If you are editing somebody else’s file, provide a link to the original Internet address so that others can go there and view the original file.
Comments: Decide if viewers should be allowed to comment directly on the file artefact page when they view it.
Click the Save changes button to keep your changes or click Cancel to abort the action.
4.9.5. Edit an image
You can edit the properties of an image at any time. The image does not have to be re-linked in portfolio pages, but the properties you changed will be updated automatically. The exception are images that you add to text blocks, journal entries, and other text via the visual text editor. Alt text and captions are not updated automatically there.
You can now set separate alt text and captions for images to make your images more accessible.
Edit an image
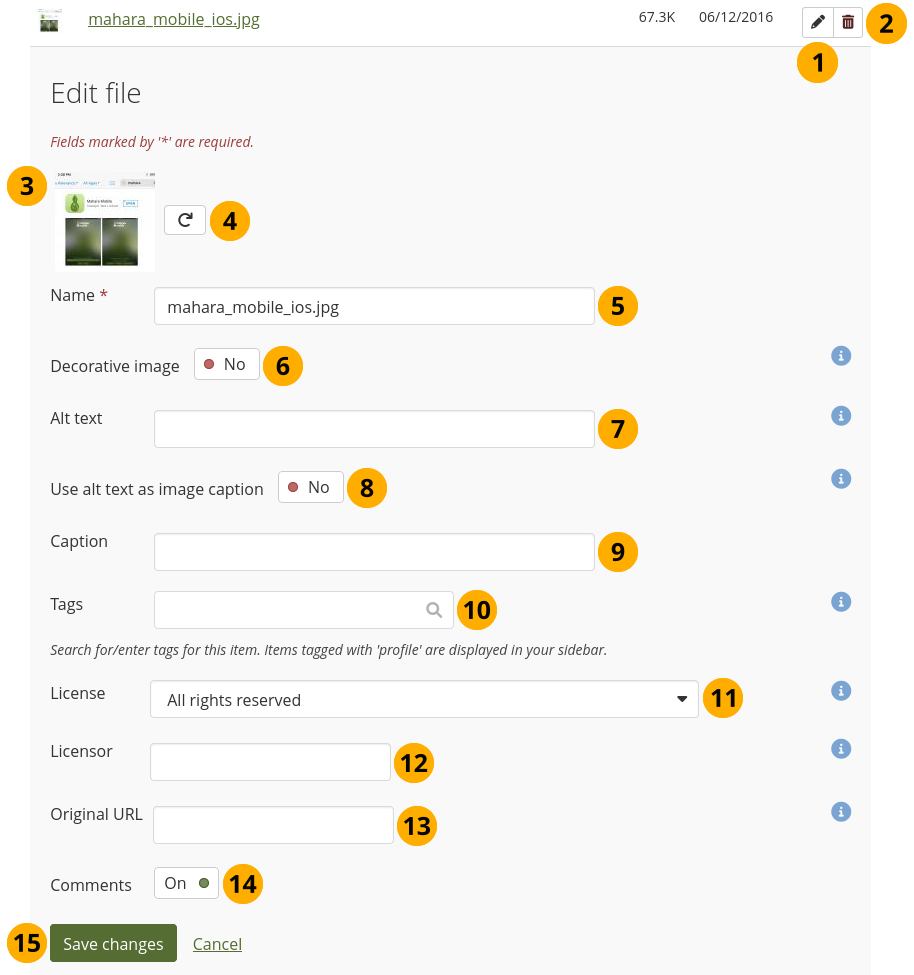
Click the Edit button next to the image that you want to edit.
Click the Delete button if you want to delete the image.
Note
You see a warning if the image is used in a portfolio page.
You see a thumbnail of the image.
Click the Rotate button until you reach the desired orientation. The new orientation is applied wherever that image is used in blocks on a page.
Name: The title of the image.
Decorative image: If you set the switch to ‘Yes’, the other image options are not displayed as your images is only an adornement, e.g. for a skin. Decorative images receive an empty alt text and don’t have a caption.
Note
Typically, images require at minimum alt text to describe the image to people using a screen reader.
Alt text: This is the text used as the tooltip of the image. This text is meant to describe what the image actually shows rather than what it portrays.
See also
For example, the alt text for an image of a sparrow could be “Bird standing on tree branch” whereas the description, the image caption, could be “Sparrow singing at dawn”. WCAG provides information on good and bad alt text.
Use alt text as image caption: If you set the switch to ‘Yes’, your alt text is used as image caption so it’s not doubled up if you decide to display the caption.
Caption: Write the caption for your image that is different from the alt text.
Tags: Give the image one or more tags. You can choose from your existing tags by starting to type a letter and then selecting the tag you want to use. You can also type a new tag, and it is added to your list of tags.
See also
You can find more information on how to use the tag selector in the ‘Tags’ section.
License: You see this field if the site administrator turned on license metadata. Choose the license for the artefact that you are editing.
Licensor: You see this field if the site administrator turned on license metadata. If you are editing a file that somebody else created, you can attribut the work to them here and provide their name for example.
Original URL: You see this field if the site administrator turned on license metadata. If you are editing somebody else’s file, provide a link to the original Internet address so that others can go there and view the original file.
Comments: Decide if viewers should be allowed to comment directly on the file artefact page when they view it.
Click the Save changes button to keep your changes or click Cancel to abort the action.
4.9.6. File quota
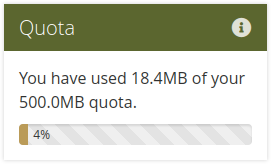
The site administrator of your Mahara site decides how much space you can have to store files. This can vary across institutions. You can check your file quota in the sidebar in your Files area.
File quota