
3.1. Dashboard
3.1.1. Login
3.1.1.1. Regular login form
You always need a login to authenticate yourself and access your personal information, portfolio pages and groups that you belong to. You can log in on the Mahara homepage.
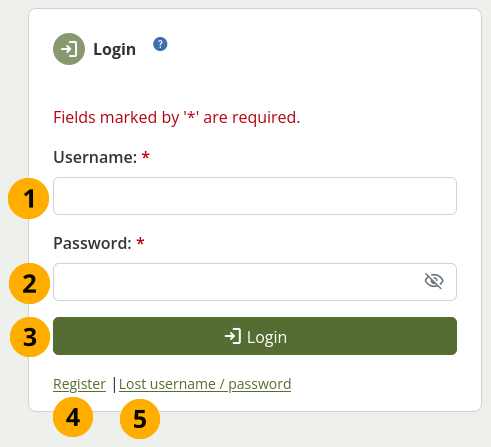
Regular login form
Username: Type your username in this field (not for SSO or Moodle accounts).
Password: Provide your password. If you enter your password incorrectly 5 times in a row during one session, access is locked for 5 minutes before you can try again.
Select the Login button to access your account.
Register: If you do not have an account, and your institution allows self-registration for an account, use this link and follow the instructions on the next page.
Lost username / password: If you do not remember your username or password to your account, select this link to be taken to a page where you can request an email with your details. It will contain your username and a link to change your password.
Note
The regular login form is only available for internal and LDAP accounts. Internal accounts are accounts for which you registered through your Mahara site or that were created by administrators either manually, or by a CSV file upload.
The ‘Lost username / password’ link only works for internal accounts where you use the regular login form.
If you log in via SSO or Moodle for example, you must retrieve your password directly from these services. If you do not know how to do that, please ask your administrator.
You can hide the login form entirely from the homepage if your Mahara instance generally only connects to an external authentication method such as MNet or CAS. In these cases, people will need to log in via a different site and seeing the login form on the homepage may only be confusing.
Once you have hidden the login form, only a link to it is displayed on the homepage for an administrator to log into the site.

Link to the login form
3.1.1.2. SSO login
When you log in via single sign-on, you do not use the regular login form, but you need to log in via the IdP. Therefore, a special SSO button is needed. The SSO button is displayed more prominently to make it easier for people to choose the correct authentication method.
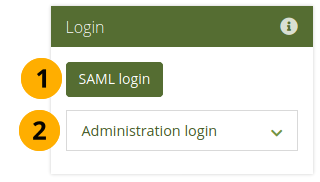
Login form for SSO
SAML login: If you log in via your institution’s SSO (single sign-on) account, please use this button to be taken to the SSO login.
Administration login: When you select this panel, you can see the regular login form to get into Mahara without an SSO account.
The SSO button is labelled with the display name of the institution. If that is too long or you want to display something else on the button for another reason, you can create a /htdocs/local/lang/en.utf8/auth.saml.php file and add it there. The button needs to have the key ‘login’ + shortname of the institution, e.g. for ‘testinstitution’ it would be: $string['logintestinstitution'] = 'Special label';
See also
Find out more about making language adjustments in Mahara.
3.1.2. Login with strict privacy
When the site administrator turned on strict privacy, you need to consent to the terms and conditions and the privacy statement of the site and maybe even an institution if you are a member of an institution before you can enter your account. If you don’t, you have the opportunity to discuss your issues with them with an administrator.
Note
When any of the statements changed, you will be presented with them again and need to make a decision about consenting or not.
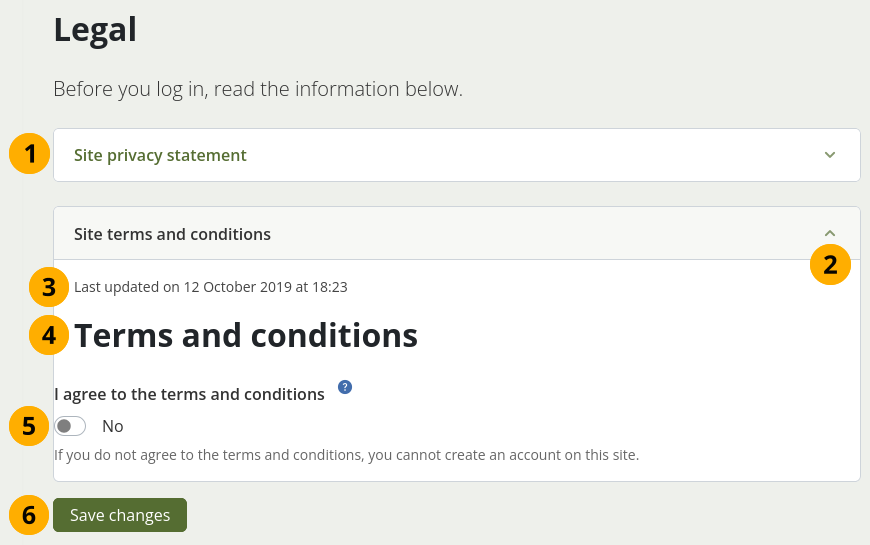
Accept legal statements upon first login
Title of the legal statement.
Note
There can be up to 4 statements that you may need to consent to. This depends on the setup of the site that you use.
Select the Collapsable icon keyboard_arrow_up to close this section. This is helpful if the texts are very long.
The date when the statement was last updated.
The text of the statement.
I agree to the [statement]: Enable the option to give your consent.
Note
Before you consent to a statement, please read it carefully. If you do not understand a section or have questions, do not consent to it but leave it set to ‘No’. When you save your changes, you will have the opportunity to detail why you do not consent and get in touch with the administrator to discuss your concern.
Select the Save changes button to proceed.
3.1.3. Overview
You can change certain aspects of your dashboard, namely the personal information, but a lot of what you see is static to allow you to quickly access other parts of Mahara.
Only you can see your dashboard. Nobody else has access to it.

Your homepage is your dashboard from which you can access a number of areas in Mahara conveniently.
Select the Main menu icon menu_open to only show icons in the main menu. Select it again to show the full navigation with icons and text.
Main menu: The main navigation items that you need regularly are listed.
Reusable content: You have quick access to all content that you can create or upload to manage it before putting it onto portfolio pages.
Search for people: Search for people who have an account to view their profile page and check which portfolios they have made accessible to you. If your site has fulltext search available, you can search for anything on the site using this search box. In that case you only see ‘Search’ instead of ‘Search for people’.
Note
In the People search box you can most often search for a person’s display name. Depending on the settings that the site administrator made, you may also be able to search for their real name and username. If the site administrator allowed account holders to hide their real name, you can do so in your general account options.
To provide you with the most relevant search results, you automatically search only for people within your own institution, but can choose to search for everyone on your Mahara installation on the ‘People’ page you are taken to.
If the site administrator turned on exact people search, you need to provide the correct display name or real name in order to find another person.
Select the Language chooser icon translate to change to another language that is installed on the site.
Note
The icon is only visible when there is more than one language available on the site.
When the icon is selected, the page is reloaded. Thus, if you wrote some text, you’ll be asked if you want to leave the page or not to prevent that your text will be lost.
Inbox: Select the Inbox icon mail to view all your notifications and send messages. If you have unread messages, the icon comes with the ‘unread’ indicator dot
 .
.Account menu: Select your name or the Account menu navigation icon arrow_drop_down to reach your account settings, profile, profile pictures, legal statements, connected apps, notification settings, and the logout link.
Note
Administrators and staff who have access to the administration area, see the Administration menu navigation icon build in addition to the main menu navigation so they can navigate within the administration area.
Your site may have introductory text. This is also an area where you can see alerts about the site.
Quick links: These quick links take you directly to certain areas of Mahara.
Note
You can remove these quick links (or similar elements if the instance of Mahara you are using has some other content in there) in your general account options, option ‘Dashboard information’.
You can customise the rest of your dashboard to add sections that you want to see every time you log in.
Note
To edit your dashboard, find it in the Portfolios area. You cannot add a skin to your dashboard page.
My actions: You see this sidebar section when you should action accepting a friendship or group invitation.
People online: If this sidebar section is enabled, you see people who have been logged in during the last 10 minutes. Depending on the settings for your institution that the administrator chose, you may see everyone, only people from your institution(s), or nobody at all.
Profile completion: You see this sidebar section if your site or institution administrators enabled the profile completion functionality.
Tags: List of tags that you created.
Links and resources: List of links to websites or documents that are visible to all logged-in people or the public if the site administrator added them.
3.1.4. Navigation
The app-style like navigation distinguishes between the main navigation menu, the account menu, and the administration navigation.
3.1.4.1. Main navigation
The main menu is visible to everybody and allows you to navigate to your content, portfolios, and groups.
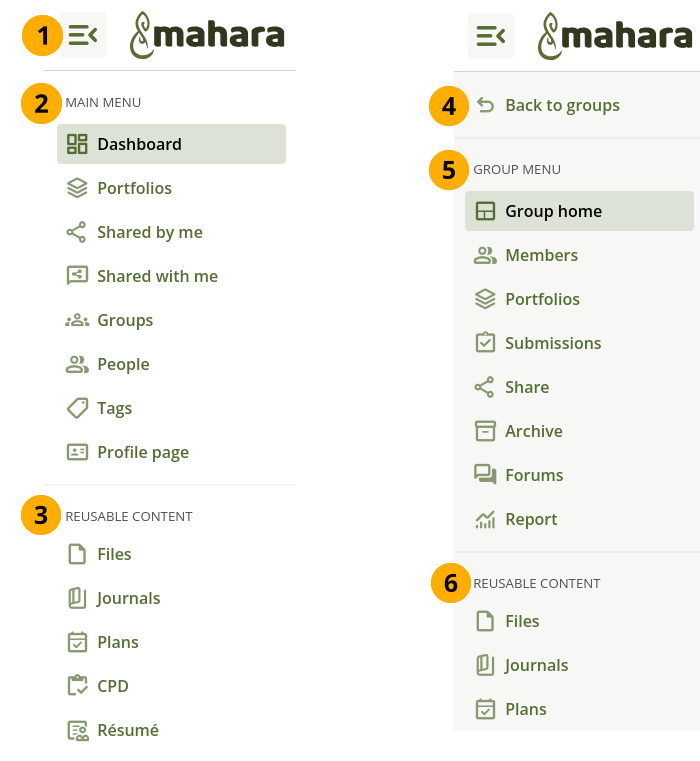
The main menu is the same for everyone
Select the Main menu icon menu_open to only show icons in the main menu. Select it again to show the full navigation with icons and text.
Main menu: The main navigation items that you need regularly are listed.
Reusable content: You have quick access to all content that you can create or upload to manage it before putting it onto portfolio pages.
Back to groups: When you are in a group, you can get back to the list of all groups.
Group menu: When you are in a group, you see the menu items that relate to the group to which you have access.
Reusable content: When you are in a group, you see the content that you can add into that group.
3.1.4.2. Administration navigation
You have access to administration functionality in the administration area if you have one of the following roles:
Site administrator
Site staff
Institution administrator
Institution support administrator
Instititution staff
Note
Depending on your permissions, you may not see all menu items. The menu displayed here is the one of the site administrator who can see everything in the administration menu. Staff and institution administrators see a subset of these items.
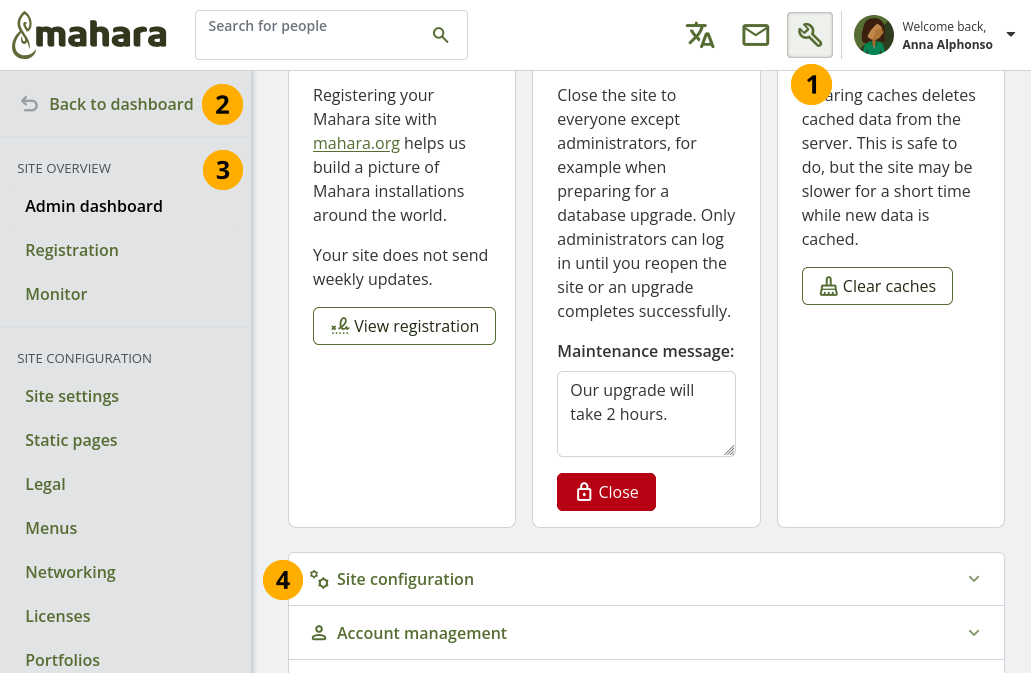
The administration menu is only available to staff and administrators.
Select the Administration area icon build to enter the administration area.
Back to dashboard: Select this option to return to the manin navigation and dashboard. You can also select the site logo to return to the dashboard.
The administration elements to which you have access are listed in the navigation.
Site administrators can also reach the individual parts of the administration area via a collapsable section in the main part of the Admin dashboard.
3.1.4.3. Account navigation
The Account menu is visible to everyone. It allows you to access your account settings, inbox, and profile.
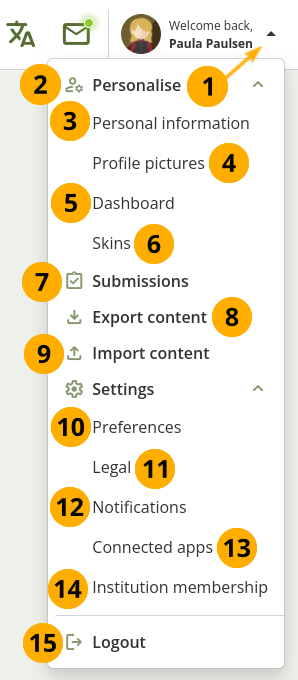
The ‘Account menu’ is available to everybody who has a login on the site
Select your name or the Account menu navigation icon arrow_drop_down.
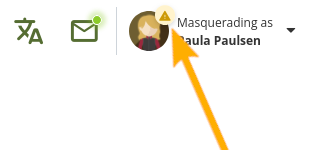
Note
If an administrator masquerades as another person, a small warning symbol indicates the masquerading session and the name of the person the administrator is masquerading as is displayed.
Personalise: You can expand each category using the Arrow down icon keyboard_arrow_down and the Arrow up icon keyboard_arrow_up to close it.
Personal information: Jump to the settings page of your profile where you can change vital basic information.
Profile pictures: Go to the page where you can manage your profile pictures.
Dashboard: Enter Edit mode of your dashboard.
Skins: Create and update skins that you can use on your pages.
Submissions: View the submissions you made to a group and any submissions that are assigned to you to assess.
Export content: Download portfolios and artefacts to keep as a backup on your computer or to transfer to another Mahara instance.
Import content: Upload a previously exported archive to set up your content from another Mahara site easily.
Preferences: Access your account settings.
Legal: The legal texts, i.e. the privacy statement and the terms and conditions, to which you have either actively or implicitly agreed.
Notifications: Change your notification preferences.
Connected apps: See which apps you have connected to your account. Currently, this can be Mahara Mobile and the Badgr Open Badges backpack.
Institution membership: Review in which institution you are. You may be able to change institutions.
Logout: Log out of your current session.
3.1.5. Quick links
When you log in to Mahara, you see three boxes with quick links:
Create: Create your electronic portfolio in a flexible personal learning environment. This takes you to Main menu 🠆 Portfolios.
Share: Share your achievements and development in a space you control. Selecting on this box takes you to Main menu 🠆 Shared by me.
Engage: Engage with other people in groups to create collaborative portfolios and have discussions in forums. This takes you to Main menu 🠆 Groups.

Quick access to main areas of Mahara
Note
If you removed these boxes from your dashboard but want to get them back at a later point, you can re-active them under Account menu 🠆 Settings 🠆 Preferences 🠆 Dashboard information.
If you do not see the dashboard boxes and do not have the option to enable this setting, your site administrator disabled this feature in the site configuration.
3.1.6. Personal information
The default dashboard includes the following sections:
Portfolios shared with me
My portfolios
Inbox
Topics I’m following
These sections are filled with content once you start using Mahara and create pages, receive messages from others, have access to others’ portfolio pages and use the forums for discussions. You can customise these sections by editing your dashboard. Go to Account menu 🠆 Dashboard and change the sections like you do on any page in Mahara.
See also
Refer to the section ‘Add content to a page’ for more information on adding and removing sections from a page.
The site administrator can change the default sections on the dashboard page for new account holders in Administration 🠆 Site configuration 🠆 Portfolios.
3.1.7. Footer
The footer is displayed on every page. If you have a custom theme, you can make changes to the footer. e.g. to add your organisation’s standard footer.

Links in the footer
The default footer in a Mahara site can have links to:
Legal: Terms and conditions and privacy statement(s). When a person is logged in, this page displays the statements that they consented to. They can find that page also via Account menu 🠆 Settings 🠆 Legal.
About: A page that the site administrator can change via ‘Static pages’.
Contact us: A form for anyone on the site to contact the site administrator(s). A site administrator may overwrite this form and point to a different page or even an email address in the menu configuration.
Help: This is a link to the Mahara manual. The link goes to the corresponding page in the manual. The correct version of the manual is selected automatically.
Note
The site administrator can decide in the configuration of the footer whether to display all of these links or not and whether to point to their default destinations or to external pages. For example, if the organisation’s standard ‘Contact us’ form should be used, the site administrator can configure that.