6.2. Journals
You can embed content from your journals in various ways in a page:
- display an entire journal
- display only one journal entry
- show the latest journal entries
- display journal entries with a specific tag
Note
You must create at least one journal in order to see anything in this block.
Warning
You can allow the copying of your journal (entries). Choose this option wisely because once a user copied your journal content into their portfolio, it looks as if they had written the journal entries. This could lead to plagiarism. However, it can be used very nicely to create templates and to scaffold learning.
6.2.1. Display an entire journal

Display an entire journal in your portfolio page.
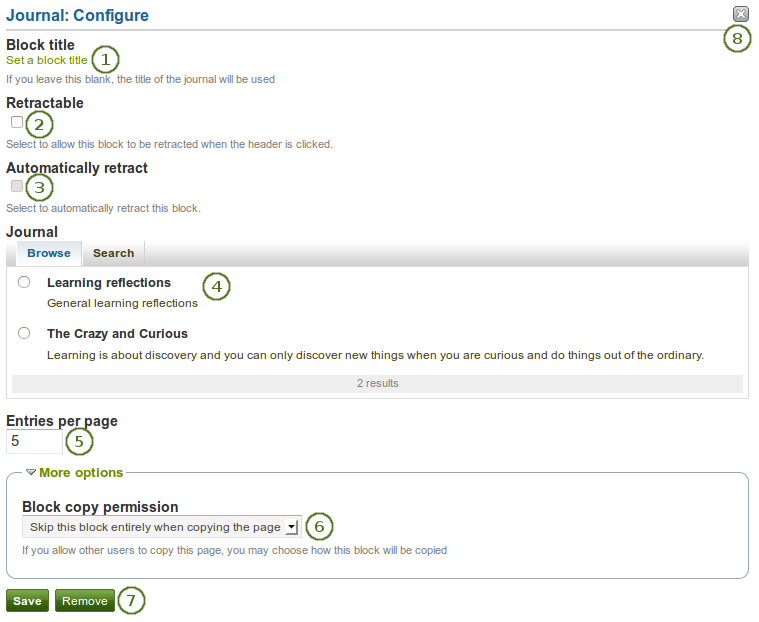
Configure the Journal block
- Block title: The title for the block is chosen automatically from the title of the journal unless you provide a different one.
 Retractable: Tick this checkbox if you want to allow users to reduce the block to its heading on a page. The user can click the Retractable icon
  to just show the heading.
- Automatically retract: Tick this checkbox if you want to show only the block’s heading when a user views the page. The user can click the Retracted icon
 to view the entire block.
 - Journal: Select the journal you wish to display. If you have many journals, you can also search for the one you want to use.
- Entries per page: Decide how many entries you want to display. Entries beyond this number are accessible via a page navigation bar.
- Block copy permissions: You decide what shall happen with this block when you allow other users to copy your page. Options are:
- Skip this block entirely when copying the page
- Others may display your journal in their page
- Others will get their own copy of your journal
- Click the Save button to accept your changes, or click the Cancel button to leave the block’s content as it is. The Remove button is shown only when you place the block into the page for the first time.
- You can also click the Remove / Cancel button
 in the top right-hand corner to either remove a newly created block before it is being saved or to cancel any changes and leave the block’s content as it is.
Note
If you share the page in which you make an entire journal visible to the public, your journal receives an RSS feed address to which your readers can subscribe in their favorite RSS readers.
Once you have included the Journal block into a page, you can create a new journal entry directly from that block when you are in the Edit mode for the page. When you click the New entry button, you will be taken to your journal and a new entry is started for you. It is then added to the journal automatically.
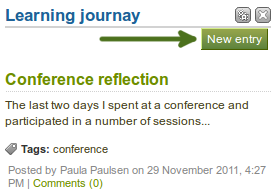
Create a new journal entry directly from the Entire journal block
6.2.2. Display one journal entry

Display one journal entry in your portfolio page.
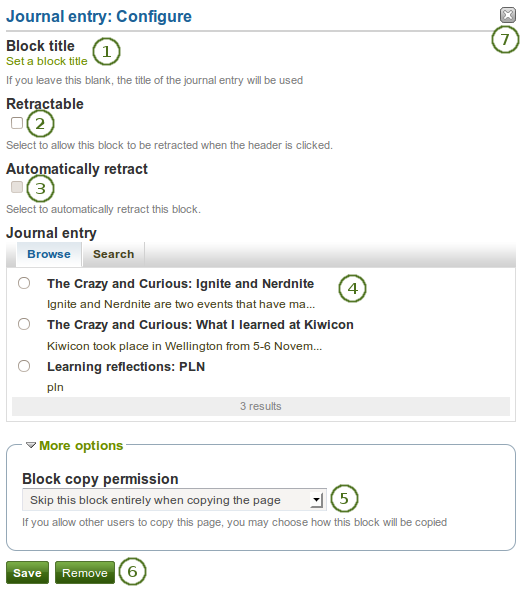
Configure the Journal entry block
- Block title: The title of the journal entry is chosen automatically unless you provide a different one.
- Retractable: Tick this checkbox if you want to allow users to reduce the block to its heading on a page. The user can click the Retractable icon to just show the heading.
- Automatically retract: Tick this checkbox if you want to show only the block’s heading when a user views the page. The user can click the Retracted icon to view the entire block.
- Journal entry: Select the journal entry you wish to display. If you have many, you can also search for the one you want to use. You always also see the title of the journal in which the entry appears.
- Block copy permissions: You decide what shall happen with this block when you allow other users to copy your page. Options are:
- Skip this block entirely when copying the page
- Others may display your journal entry in their page
- Others will get their own copy of your journal entry
- Click the Save button to accept your changes, or click the Cancel button to leave the block’s content as it is. The Remove button is shown only when you place the block into the page for the first time.
- You can also click the Remove / Cancel button in the top right-hand corner to either remove a newly created block before it is being saved or to cancel any changes and leave the block’s content as it is.
6.2.3. Display recent journal entries

Display recent journal entries across all your journals in your portfolio page.

Configure the Recent journal entries block
- Block title: Choose a title for your block.
- Retractable: Tick this checkbox if you want to allow users to reduce the block to its heading on a page. The user can click the Retractable icon to just show the heading.
- Automatically retract: Tick this checkbox if you want to show only the block’s heading when a user views the page. The user can click the Retracted icon to view the entire block.
- Journals: Select the journal(s) from which you wish to display the latest entries. If you have many journals, you can also search for the one(s) you want to use.
- Items to show: Decide how many entries you want to display.
- Click the Save button to accept your changes, or click the Cancel button to leave the block’s content as it is. The Remove button is shown only when you place the block into the page for the first time.
- You can also click the Remove / Cancel button in the top right-hand corner to either remove a newly created block before it is being saved or to cancel any changes and leave the block’s content as it is.
Note
If you have multiple journals, you can display recent entries from all of them.
Once you have included the Recent journal entries block into a page, you can create a new journal entry directly from that block when you are in the Edit mode for the page. When you click the New entry button, you will be taken to your journal and a new entry is started for you. It is then added to the journal automatically.
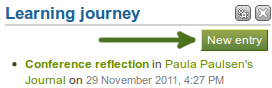
Create a new journal entry directly from the Recent journal entries block - one journal only
If you enabled multiple journals and selected more than one for which to display recent journal entries, you will see a slightly different display. You can choose the journal to which to add your entry from the drop-down menu and then click the Go button to create your new entry.
Create a new journal entry directly from the Recent journal entries block - multiple journals available
6.2.4. Display tagged journal entries

Display tagged journal entries across all your journals in your portfolio page.
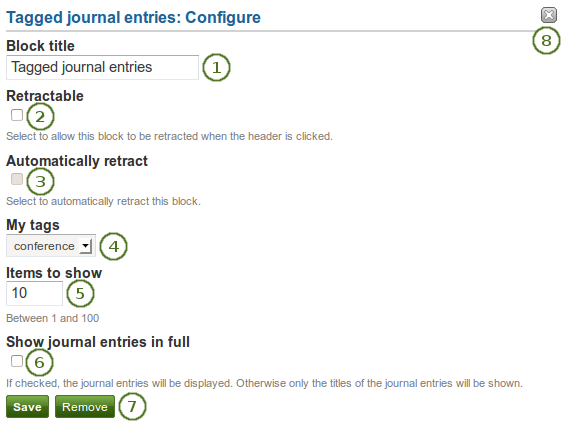
Configure the Tagged journal entries block
- Block title: Choose a title for your block.
- Retractable: Tick this checkbox if you want to allow users to reduce the block to its heading on a page. The user can click the Retractable icon to just show the heading.
- Automatically retract: Tick this checkbox if you want to show only the block’s heading when a user views the page. The user can click the Retracted icon to view the entire block.
- My tags: Select the tag for which you want to display all journal entries. Only tags you used on journal entries are shown in the drop-down menu.
- Items to show: Decide how many entries you want to display.
- Show journal items in full: If you select this option, your journal entries will be displayed. Otherwise, only their titles are shown and people need to click on them to read your entries.
- Click the Save button to accept your changes, or click the Cancel button to leave the block’s content as it is. The Remove button is shown only when you place the block into the page for the first time.
- You can also click the Remove / Cancel button in the top right-hand corner to either remove a newly created block before it is being saved or to cancel any changes and leave the block’s content as it is.
Once you have included the Tagged journal entries block into a page, you can create a new journal entry directly from that block when you are in the Edit mode for the page. When you click the New entry button, you will be taken to your journal and a new entry is started for you. It is then added to the journal automatically with the tag whose journal entries are displayed on the page.
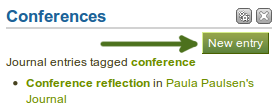
Create a new journal entry directly from the Tagged journal entries block - one journal only
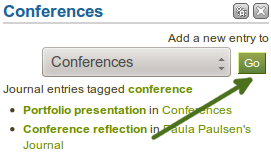
If you enabled multiple journals and have a minimum of two journals, you will see a slightly different display. You can choose the journal to which to add your entry from the drop-down menu and then click the Go button to create your new entry.
Create a new journal entry directly from the Tagged journal entries block - multiple journals available