4.2. Page editor
The page editor is important in Mahara because it allows you to compose your portfolio pages. It consists of a large number of components:
- Editor navigation
- Artefact chooser
- Page layout area
4.2.1. Editor navigation

Page editor navigation bar
- Edit title and description: Add and modify your page title, description and tags.
- Edit content: Place your content on a page. See Artefact chooser, Blocks and Page layout area.
- Edit layout: Change the overall layout of your page.
- Display page: Preview your page to see how others would see it.
- Share page: Decide who shall have access to your page. See Share for more details.
4.2.1.1. Edit title and description
You should give your portfolio page a unique title so that you can find it again later on. The description helps you to see quickly on the overview page why you have created this page. Furthermore, the tags help you to search your portfolio for these keywords and find your content and portfolio pages.
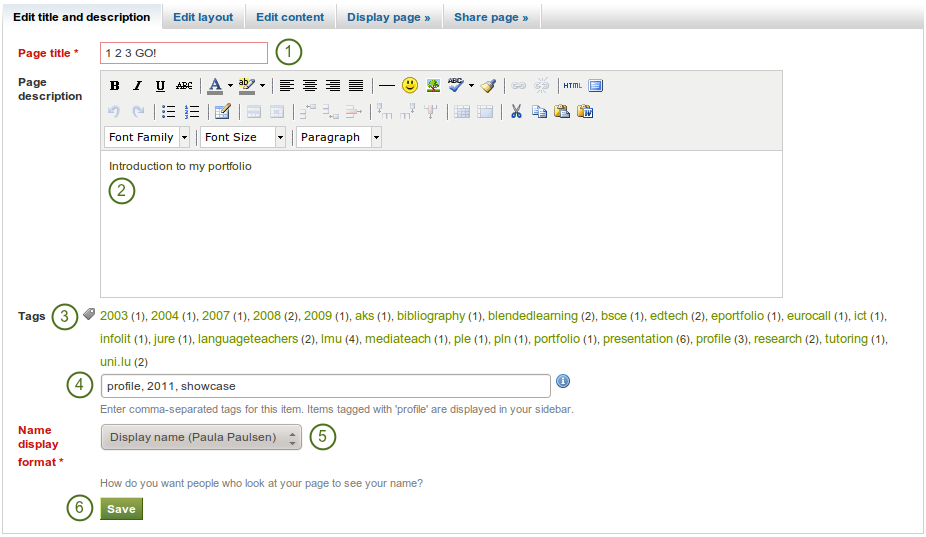
Provide as much information as possible to distinguish and to be able to search your portfolio later on. You can make changes to these settings at any time.
- Page title: You must provide a title for your page. Automatically, every page is called “Untitled”.
- Page description: You can write a brief description for your page, e.g. its purpose. This description is displayed on the overview page and on the portfolio page itself.
- Tags: If you have already tagged artefacts or other portfolio pages, you can choose from your existing tags. This makes it easy to avoid spelling mistakes.
- If you either do not yet have tags or want to use new ones, you can write them into the text box. Separate multiple tags by commas (and a space).
- Name display format: You must choose which name should be displayed when somebody else views your portfolio. You can choose between:
- First name
- Last name
- Full name (first and last name)
- Display name
- Click the Save button to save your changes.
4.2.1.2. Edit layout
You have 10 choices for your column layout from 1 column to 5 columns. The 2-, 3- and 4-column layout options allow you to make certain columns wider than others. The icons assist you in your decision of what the end result looks like. However, you cannot set a specific width of a column.
Note
Be careful when choosing 4 or more columns. Your portfolio page may look very good on your big 21” screen, but a user looking at it on a notebook or tablet may not have the same experience. In most cases, up to 3 columns are the best choices.
Click the radio button above the layout that you wish to apply to your page. You can change it at any time. When you reduce the number of columns, your blocks simply move to the first column. You can then move them around to their correct position (see Page layout area).
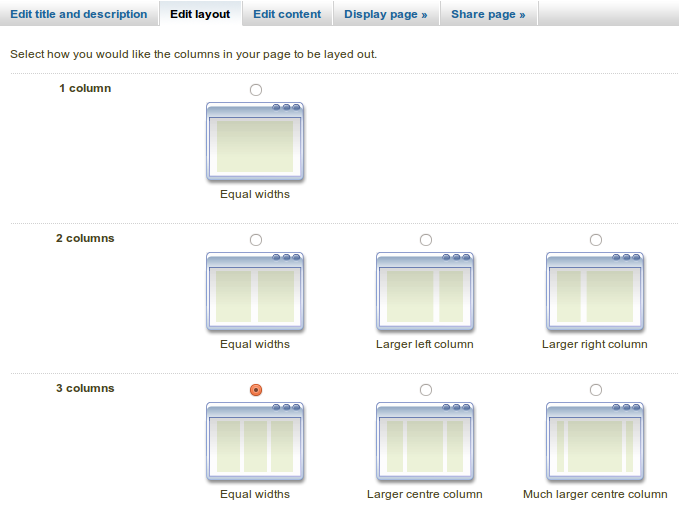
Edit the overall layout of a page by choosing the number of columns
Note
You can add or remove columns directly in the page layout area when you enable the Show controls to add and remove columns when editing a page setting in your account options.
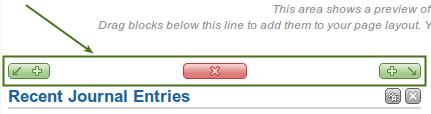
You can use the Add and Remove buttons for quick changes to the layout when you have enabled them.
4.2.2. Artefact chooser
All different types of artefacts as well as blocks that pull in external content into a portfolio page are accessible via the artefact chooser.
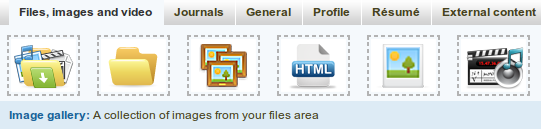
All artefacts are accessible via a number of tabs in the page editor
- Files, images and video: holds blocks for files that can be displayed as links, in folders or in the case of images and videos directly in the page
- Journals: various artefact blocks which allow you to place journals / journal entries into a page
- General: artefacts that are of a general nature
- Profile: choose profile information to display in a block
- Résumé: display your entire résumé or parts of it
- External content: contains blocks to place RSS feeds, external media or GoogleApps documents etc. into a page
See also
The functionality of each block that you can use in your portfolio pages and in group pages, is outlined in the section on the individual artefact blocks.
4.2.3. Page layout area
The page layout area is the place where you arrange all your artefacts for display in a portfolio page. You should know the following about this area:
- All artefacts are placed into it by dragging and dropping their blocks into this space.
- The artefacts are arranged as a series of continuous blocks per column.
- There are no rows, only columns. Blocks are placed beneath each other within a column, but they do not align with blocks in another column to form a single row unless they have the same height.
- You can drag and drop blocks by clicking on their headings.
- You can change the settings of a block by clicking on its Configure button
 .
.
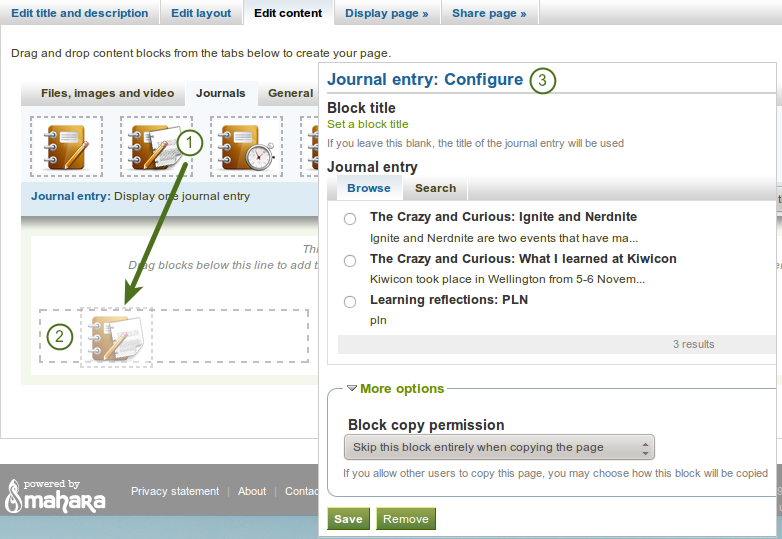
Drag a block into the page layout area and configure its settings
- Click on the block of the artefact that you want to include in your page and drag it into the page layout area.
- When you see the dotted rectangle, drop the block into it to put it onto your page.
- Follow the on-screen instructions on choosing the specific artefact you wish to display. Please refer to the artefact block section for more information on each block’s settings.
See also
Please refer to the section edit layout to learn how to change the number of columns on a page and make certain columns wider than others.
4.2.4. Optional theme chooser
You may be able to choose a theme for your portfolio page. If that is the case, you see a Theme drop-down menu below the artefact chooser. That allows you to select a theme in which that page is displayed to others who view your portfolio page. If the option “Not theme selected” is displayed, the default theme is applied automatically.

Select a theme for your page
See also
The site administrator must allow page themes in the site’s user settings.