7.1. Account settings
The account settings of a user can be accessed via the Settings page. It is located in the top right-hand corner next to Inbox and Logout in a standard Mahara instance.
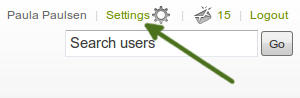
Link to the Settings page
7.1.1. New password
You can change your Mahara password on the Settings page.
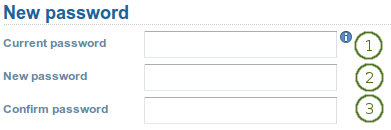
Change your password
- Current password: Enter your current password.
- New password: Enter your preferred new password.
- Confirm password: Re-enter your new password to confirm its spelling.
- Make further changes on the page if you wish.
- Click the Save button at the bottom of the page.
Your password must have a minimum of six characters. Passwords are case sensitive and must be different from your username.
Note
If you do not see the New password box, you cannot change your password. Your login and password are managed elsewhere. This is the case if your institution has set up single sign-on to other applications for example. If you want to change your password, please contact your institution administrators. They will be able to tell you where you can change your password.
7.1.2. Change username
You need a username to log in to Mahara. If your account is not managed by single-sign on or another authentication method, you see this box. You can then change your username at any time.

Change your username
Note
Usernames are 3-30 characters long and may contain letters, numbers and most common symbols excluding spaces.
7.1.3. Change profile URL
Note
You only see the “Change profile URL” part on your accounts settings page if the site administrator activated clean URLs and allowed you to change your profile URL.

Change profile URL
If you see this option, you can choose an identifier for your profile page. Per default, your username is chosen, but you may change that if the site administrator allowed it. Your identifier must be 3-30 characters long. You can only use lowercase letters from a-z, numbers and - (hyphen).
Your profile page is then accessible via the URL http://url-to-your-mahara-site/user/your-chosen-name. For example: http://mahara-university.org/user/paula.
Warning
Though you can change the URL to your page at any point, you shouldn’t do that because people who already know the URL to your page will not be able to access it anymore after you have changed it.
The original, internal Mahara URL, e.g. http://mahara-university.org/user/view.php?id=123 will still work.
7.1.4. General account options
The general account options are visible to all users no matter whether you can change your username and password or not. However, some options are only available if the site administrator turned them on.
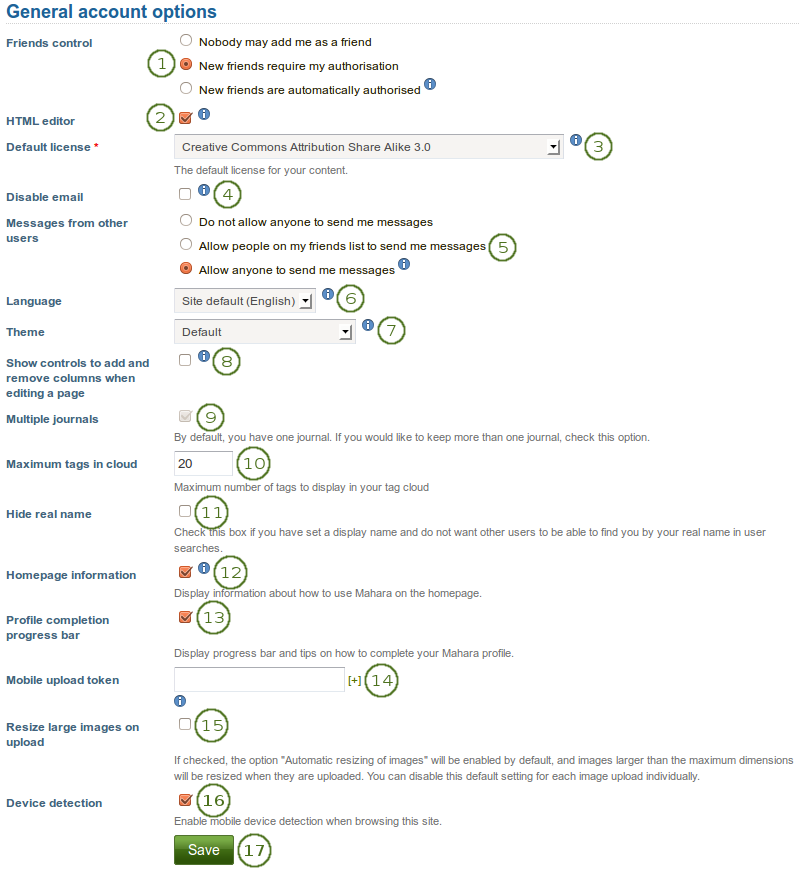
View and change your general account options
Friends control: Choose whether other users may add you to their friends list. If you are added to a friends list, the owner of that list is added to your list as well. When you remove someone from your friends list, you are also removed from their list. Your settings options are:
- Nobody may add me as a friend: Other users do not see the option to add you as a friend.
- New friends require my authorisation: Before someone can add you to their friends list, you must give your approval.
- New friends are automatically authorised: You accept all friend requests automatically.
HTML editor: An HTML editor is available for use in some sections of the site. This is known as a ‘What you see is what you get’ (WYSIWYG) editor. It allows you to apply formatting to your text like in a word processor. If the editor is turned off, you can only enter plain text without any formatting like making text bold or colorise your text. If you do not have this option, the site administrator may have disabled it.
Default license: When the site administrator enabled License metadata in the general site settings, you can select your default license for your content that you create or upload. The default setting is “None selected”, which means that you reserve all copyright.
If your institution administrator requires you to specify a license, you must set a license other than “None selected”.
You can choose any license from the drop-down menu that suits most of your content best. If you upload an artefact by another person that was published under a different license, you can choose that particular license on the artefact’s settings. If the site administrator allowed custom licenses, you can enter one using the drop-down menu option “Other license (enter URL)”.
Note
If you are not sure which default license to choose, please check with your organisation as it may require you to use a specific license. You can also consult a copyright lawyer (at cost).
If you are a member in multiple institutions and choose “Use institution default”, you will not be able to select the institution whose license you want to make the default one. One will be chosen by the system randomly.
Disable email: Use this setting to stop the site from sending you emails. It is advised that you generally regulate what is sent via email and what is not in the notifications.
Warning
If you disable your email address, you cannot reset your password as that requires the sending of an email to your address. You will have to contact an administrator and have your password reset.
Messages from other users: Use this setting to choose who you wish to receive messages from. Use the notifications area to decide how you will receive these messages. Your options are:
- Do not allow anyone to send me messages: Other users are not able to send you any messages.
- Allow people on my friends list to send me messages: Only your friends can contact you in the system and send you a message.
- Allow anyone to send me messages: Any user, no matter whether they are your friends or not, can contact you.
Note
These restrictions do not apply to users with ‘administrator’ or ‘staff’ access.
Language: If your Mahara instance is offered in multiple languages, you see this option and can choose in which language you want to navigate the site. The menu items and the contextual help appear in the language you have chosen. However, the content of portfolios or groups does not switch to that language automatically.
Theme:
- If you belong to multiple institutions, you can choose the institution theme with which you wish to browse the site. Other users will see your pages in their own theme as this setting is not for choosing page themes.
- If the site administrator allowed it, you can choose any theme that is available to you as your browse theme. The following setting must be made in
config.php:$cfg->sitethemeprefs = true;.
Show controls to add and remove columns when editing a page: You can add the Add and Remove buttons in the page editor to change the number of columns in a portfolio page quickly, see edit layout.
Multiple journals: By default, you have one journal. If you check this box, you will be able to create more journals. Once you have chosen this option, it will disappear from your accounts settings page unless you only have one journal again.
Note
If you are using Moodle to export data to Mahara, you should enable multiple journals as content that is transferred using the Leap2A option is often placed into a new journal.
Maximum tags in cloud: Decide how many tags you wish to display in your personal tag cloud in the sidebar in Content and Portfolio.
Hide real name: You see this checkbox if the site administrator allows users to hide their real name. If you tick it, others can only search for you using your display name.
Homepage information: Choose this option if you want to display the quick links on your dashboard.
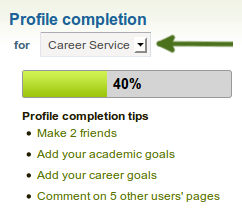
 Profile completion progress bar: Tick the checkbox if you want to display the progress bar set up by your institution and tips on how to complete your profile.
Note
You only see this checkbox if the administrator of your institution set up the profile completion.
If you are a member of multiple institutions, you can switch between the individual institutions in order to view the respective sidebar.
Mobile upload token: Enter a token, e.g. a word, here and on your Android phone or iPhone to enable uploads from MaharaDroid and PortfolioUp. Your token changes automatically after each upload. See the mobile Mahara section for more information on using Mahara with a mobile device. The site administrator must have allowed mobile uploads for this option to be displayed. You can enter multiple mobile upload tokens allowing you to use all your mobile devices to upload to one Mahara site.
Resize large images on upload: If you enable this option, all large images will be resized to the maximum dimensions per default. You can disable this setting for the upload of individual images. You only see this option if the site administrator allowed it.
Device detection: If you enable this option and browse the site via a smartphone or tablet, you will only see functionality that can be handled comfortably on a mobile device. If you do not enable this option, you will see the site as it is on a mobile device. On small devices, the menu will change to a mobile-friendly one though. You only see this option if the site administrator allowed it.
Click the Save button when you have finished making your changes.
7.1.5. Delete account
If your Mahara site allows self-registration, you can delete your own account by clicking the Delete account button on the top of the Settings page.

Delete your account and your entire content
Warning
Be absolutely sure that you want to delete your account. Your artefacts and portfolio pages cannot be restored once you deleted your account. Everything will be gone. You can make a backup of all your things (excluding group content) by exporting your portfolio.