4.3. Skins
Portfolio → Skins
Warning
Skins is an experimental feature for theming pages. While you can change a lot of style elements, changing all of them is not advised depending on the theme that is underlying your page.
This feature is only available when the following parameter is added to the config.php file of your Mahara site: $cfg->skins = true;
Once this parameter has been added, you will see the menu item Skins under Portfolio and can also choose a skin when creating or editing a page.
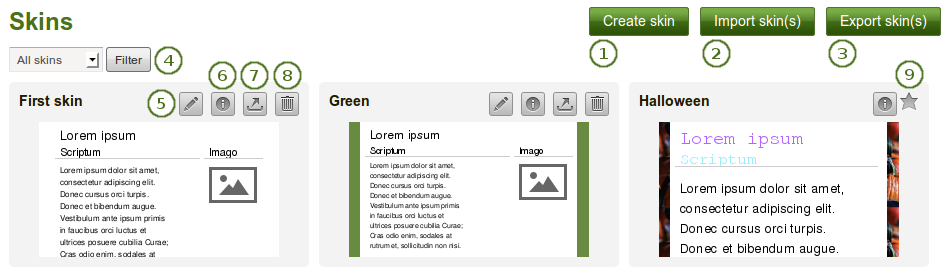
Your Skins overview page
Click the Create skin button to design a new skin.
Click the Import skin(s) button to import skins that others have shared online.
Click the Export skin(s) button to export all your personal skins.
You can decide which skins you want to display:
- All skins: All skins that you have access to
- Site skins: Only skins created by a site administrator
- My skins: Skins created by yourself
- Public skins: Other people’s skins that they shared publicly on the site
Click the Edit button
 to make changes to this skin.
 Click the View skin information button
  to see metadata in a pop-up window about the skin such as:
- Title
- Owner
- Description
- Creation date
- Modified date
Click the Export button
 to export only this one skin.
Click the Delete button
 to remove this skin.
Note
You only see the Edit, Export and Delete buttons when you have the permission to perform these actions for a skin.
Click the Favourite button
 to mark someone else’s skin as a favourite one so you can choose it for your own pages. It will turn yellow. Clicking the button again will allow you to remove the skin from your list of favourite skins.
Note
You can only favourite another user’s skin, but not site skins. You can always select a site skin for a page, but only see other people’s skins when you favourited them.
4.3.1. Create a skin
You can create skins as:
- individual user
- site administrator
Depending on the settings of your skin, it will be available only to you or others.
In the following, the individual skin settings will be described. You do not have to change all settings for a skin but can pick and choose which elements of the theme that your page has you would like to change.
See also
Watch this video demonstrating the page skin feature.
4.3.1.1. General

General settings for your skin
- Skin title: Give your skin a title. You will see that on the Skins overview page.
- Skin description: Describe your skin here and add any details that will help you in the future to remember why you created the skin, what is special about it etc. You can expand the text box if you need to enter a long description by dragging its bottom right corner.
- Skin accessibility: Decide here who shall have access to your skin. The default is This is a public skin.
- This is a private skin: Only you can use this skin on pages.
- This is a public skin: Others can see your skin and use it.
- Click the Save button to accept your changes or click the Cancel button to abort your changes.
4.3.1.2. Skin background

Choose the background for your skin
- Skin background colour: You can tick the checkbox to have no special skin background but use the theme’s background. Alternatively, you can click into the field and select the colour you would like to use or type the colour code in.
- Skin background image: You can choose to use an image as background. Click the Select a file button to choose an image from your files area.
- Background image repeat: Decide whether you want to repeat the background image. This setting is useful if your image is smaller than your page. If you do not choose a repeat option, the background will not be filled with the image entirely. Your options are:
- Don’t repeat: No repetition of the image. This option should only be used if you have a very large image or if the image is larger than your page.
- Repeat only horizontally: Your image will only be repeated horizontally, but not vertically. This setting can work for a very wide but short page.
- Repeat only vertically: Your image will only be repeated vertically, but not horizontally. This setting can work for a narrow but long page.
- Repeat both directions: Your image will be repeated both horizontally and vertically. This setting is the most flexible for your page.
- Background image attachment: Decide whether your background should scroll or stay fixed.
- Fixed: If you select this option, your background stays in place and does not move. Only the page content will scroll.
- Scroll: If you select this option, your background will scroll together with the page.
- Background image position: Decide where your background image shall be anchored. Click one of the arrows to select the position.
- Click the Save button to accept your changes or click the Cancel button to abort your changes.
4.3.1.3. Page background
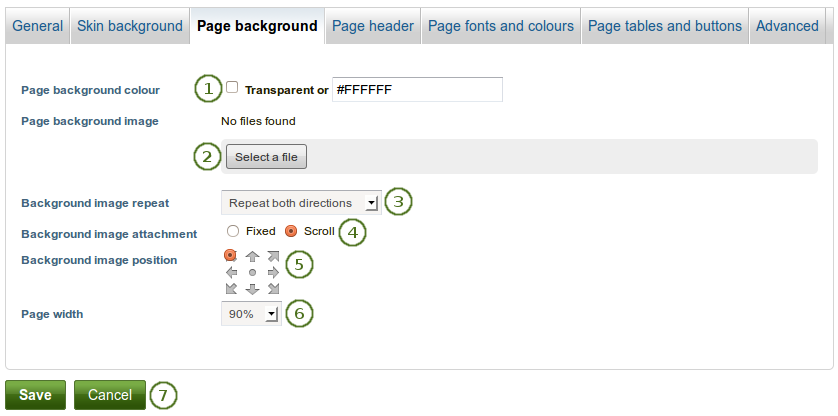
Choose the background for your page content
- Page background colour: You can tick the checkbox to have no special page background but use the theme’s background. Alternatively, you can click into the field and select the colour you would like to use or type the colour code in.
- Page background image: You can choose to use an image as background. Click the Select a file button to choose an image from your files area.
- Background image repeat: Decide whether you want to repeat the background image. This setting is useful if your image is smaller than your page. If you do not choose a repeat option, the background will not be filled with the image entirely. Your options are:
- Don’t repeat: No repetition of the image. This option should only be used if you have a very large image or if the image is larger than your page.
- Repeat only horizontally: Your image will only be repeated horizontally, but not vertically. This setting can work for a very wide but short page.
- Repeat only vertically: Your image will only be repeated vertically, but not horizontally. This setting can work for a narrow but long page.
- Repeat both directions: Your image will be repeated both horizontally and vertically. This setting is the most flexible for your page.
- Background image attachment: Decide whether your background should scroll or stay fixed.
- Fixed: If you select this option, your background stays in place and does not move. Only the page content will scroll.
- Scroll: If you select this option, your background will scroll together with the page.
- Background image position: Decide where your background image shall be anchored. Click one of the arrows to select the position.
- Page width: Decide how wide you would like your page content to be. You can only choose from the given values.
- Click the Save button to accept your changes or click the Cancel button to abort your changes.
4.3.1.4. Page header
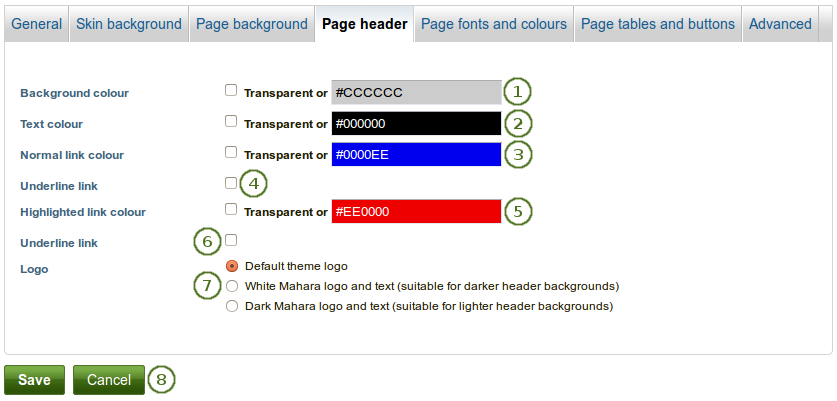
Choose the page header properties
Background colour: Choose the background colour of your header (and footer).
Text colour: Decide on the colour for text that appears in the header.
Normal link colour: Choose the colour in which links shall be displayed.
Underline link: Tick this checkbox if you want your links to be underlined.
Highlighted link colour: Choose the colour of your links when you hover over them.
Note
Wherever you have a colour field, you can either click into the field and select the colour you would like to use or type the colour code in.
If you do not want to use a custom colour but retain the theme colour, tick the checkbox Transparent.
Underline link: Tick this checkbox if you want your highlighted link to be underlined.
Logo: Decide which logo you wish to use.
- Default theme logo: Display your theme’s logo. This can be a custom logo.
- White Mahara logo and text: Choose this logo if you want to display the Mahara logo in white. This is suitable for dark backgrounds.
- Dark Mahara logo and text: Choose this logo if you want to display a dark Mahara logo. This is suitable for light backgrounds.
Click the Save button to accept your changes or click the Cancel button to abort your changes.
4.3.1.5. Page fonts and colours
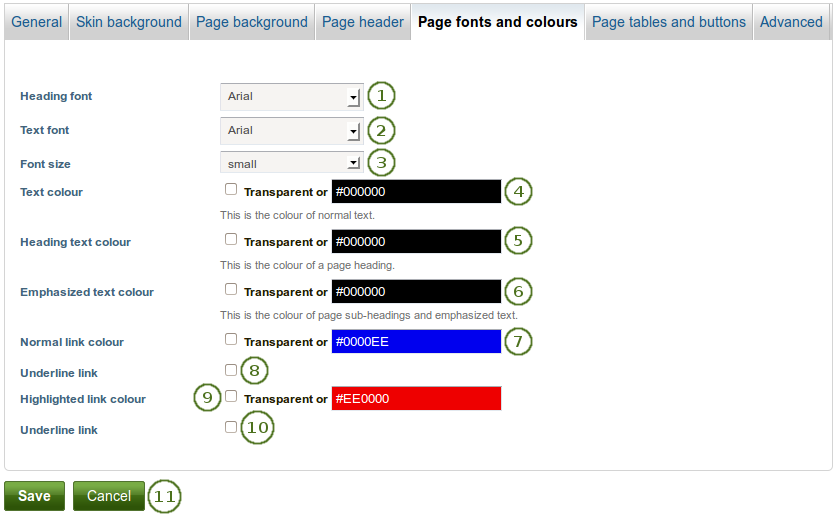
Change font properties
- Heading font: Choose the font for your headings. You can choose from any of the installed fonts. The font will be applied to all your headings, e.g.
- page title
- block titles
- headings in the text if you marked them as headings
- Text font: Choose the font for all other text. You can choose from any of the installed fonts.
- Font size: Choose a relational font size. Headings will be changed proportionally.
- Text colour: Decide on the colour for text that appears on the page.
- Heading text colour: Choose the colour of your page heading.
- Emphasized text colour: Choose the colour of your block titles and other emphasized text.
- Normal link colour: Choose the colour in which links shall be displayed.
- Underline link: Tick this checkbox if you want your links to be underlined.
- Highlighted link colour: Choose the colour of your links when you hover over them.
- Underline link: Tick this checkbox if you want your highlighted link to be underlined.
- Click the Save button to accept your changes or click the Cancel button to abort your changes.
Note
Wherever you have a colour field, you can either click into the field and select the colour you would like to use or type the colour code in.
If you do not want to use a custom colour but retain the theme colour, tick the checkbox Transparent.
4.3.1.6. Page table and buttons
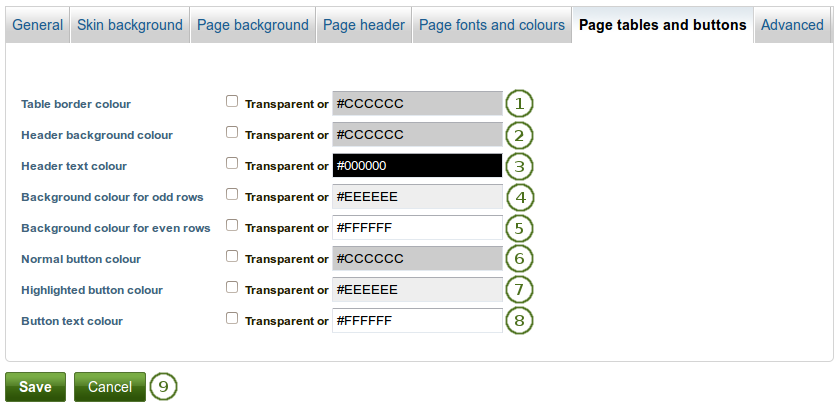
Change table and button properties
- Table border colour: Choose the colour for your table border.
- Header background colour: If you set up a table with a header row, you can pick the background colour here.
- Header text colour: If you set up a table with a header row, you can choose the header text colour here to go with the header background colour.
- Background colour for odd rows: Choose the background colour for odd rows in a table. You do not need to specify which rows are odd.
- Background colour for even rows: Choose the background colour for even rows in a table. You do not need to specify which rows are even.
- Normal button colour: Choose the colour of your buttons that are displayed on a page.
- Highlighted button colour: Choose the colour of your buttons when you hover over them.
- Button text colour: Choose the colour for the text displayed on your buttons. Please note that this colour needs to work for both the normal button and the highlighted button.
- Click the Save button to accept your changes or click the Cancel button to abort your changes.
Note
Wherever you have a colour field, you can either click into the field and select the colour you would like to use or type the colour code in.
If you do not want to use a custom colour but retain the theme colour, tick the checkbox Transparent.
4.3.1.7. Advanced
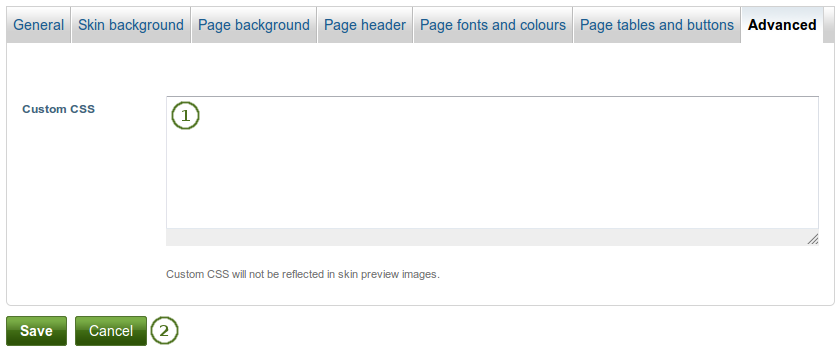
Add custom CSS
- Custom CSS: If you know how to change CSS, you can change other styles for your skin here and overwrite other elements on a page. You can expand the “Custom CSS” text box if you need to enter a a lot of custom CSS code by dragging its bottom right corner.
- Click the Save button to accept your changes or click the Cancel button to abort your changes.
4.3.2. Choose a skin
Portfolio → Pages → Edit a page
When the Skins feature is turned on, you see another item in the page editor navigation: Choose skin.
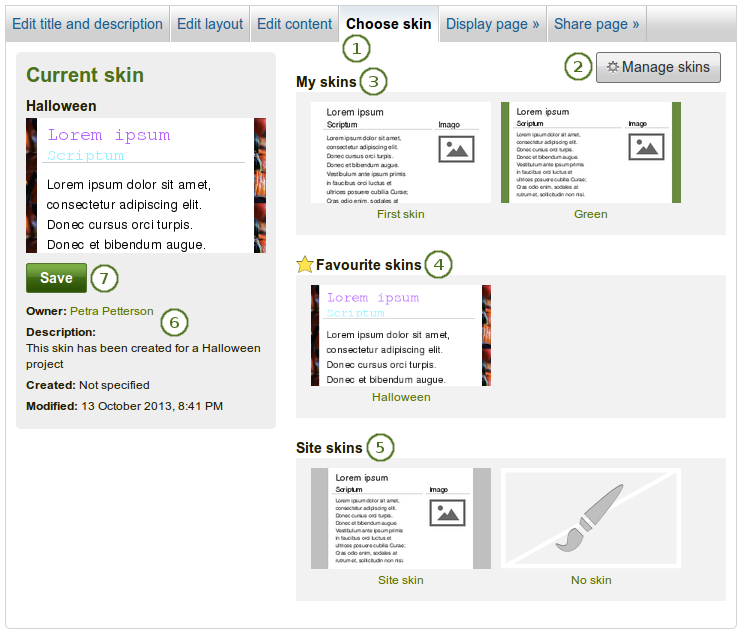
Choose a skin
Click the Choose skin navigation item to see all skins that are available to you for this page.
If you do not see a skin that you are looking for, click the Manage skins button. You will be taken to Portfolio → Skins where you can add or remove skins.
My skins: Skins that you created are displayed in this area. Click the title of a skin or the preview image to select it.
Favourite skins: Skins from other people that you like are displayed here. If you do not see a skin, click the Manage skins button. You will be taken to Portfolio → Skins where you can favourite more skins. Click the title of a skin or the preview image to select it.
Site skins: Skins created by site administrators on the site level are displayed. Click the title of a skin or the preview image to select it.
Note
If you had selected a skin, but do not want to use it on your page anymore, click the “No skin” image and you will use the regular theme only.
- You can see skin information such as:
- Title
- Owner
- Description
- Creation date
- Modified date
Once you have selected your skin, click the Save button to select it for your page. You are taken out of the edit mode because you can only view your skin when the page is displayed.
If you want to make further changes to your page content, click the Edit this page button.
Note
The skin is only shown when you display your page. When you edit your page, you see the standard theme.
4.3.3. What is the difference between themes and page skins?
Themes
Have been present in Mahara in their current form since 1.2.
Must be uploaded directly onto the web server by a system administrator.
Can override the page template for every single screen in Mahara, giving total control over how everything is displayed.
Depending on site and institution settings, there may be:
- a single theme for the whole site
- a theme for every institution
- the possibility for users to choose their own theme for browsing the site
- the possibility for users to apply a particular theme to each portfolio page, the page themes
Skins
- Can be created, shared, exported and uploaded by users via Portfolio → Skins.
- Are less powerful than themes. They can only change page colours, fonts and background images, and add extra CSS. Basically they add one additional user-controlled CSS stylesheet to a page.
- Can only be applied to user-created portfolio pages. They don’t change the way any other part of Mahara is displayed.
When skins and themes collide
- If users apply a skin to one of their pages, it adds one additional CSS stylesheet to the page. This is in addition to the CSS from the theme.
- Naturally, any particular skin might not look good in all themes, especially if the theme has changed the underlying page templates for portfolio pages.
- If you’re a theme designer, the good news is that the skin stylesheet is itself a page template (
skin/style.tpl). So, you can specify which page elements each of the skin settings should apply to by overriding that page template.
4.3.4. Disallow skins on a theme
If you use Mahara at an institution, you may wish to prevent anyone making changes to your institution theme with a skin so that your corporate design is preserved and that portfolios created for assessment purposes or as showcases of work done at your institution for example are easily recognizable as belonging to your institution. However, at the same time, you do want to give portfolio authors in your institution the freedom to create personal portfolios with other themes and apply skins to them.
Themes are allowed to use skins per default. If you want to change that, you need to add the parameter $theme->skins = false; to the file themeconfig.php in your theme folder. Once done, users of this theme will see the following message:
“Your Mahara site theme “Name of the theme” does not support page skins. This means the skin you select will have no effect on how you see this page, but it may affect the page’s appearance for other users viewing the site with a different theme.”
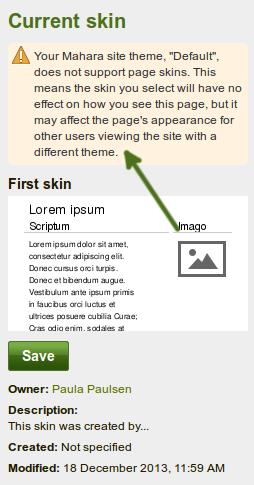
Warning that skin cannot be applied
Note
This option works best when users cannot choose the theme in which they want to browse the site. If they do and choose a different theme from the institution theme, then they could see the skin applied to the page because then the underlying theme is their personal one which may allow skins.