8.2. サイト設定
サイト設定 において、あなたは:
- あなたのMaharaサイトに関して、一般的なパラメータを設定します。
- サイトページを編集する
- 特定のメニューアイテムの表示を決定します。
- Moodleとのネットワーキングを許可する
- ページを作成および共有する
- ファイルをアップロードする
8.2.1. サイトオプション
サイトオプション において、あなたはサイト全体を通して適用されるグローバルオプションを設定することができます。
注釈
One or more fields in may be disabled if overridden by a setting in your config.php file.
あなたが1つまたはそれ以上の設定を完了した場合、ページ下部の サイトオプションを更新する ボタンをクリックしてください。
8.2.1.1. サイト設定
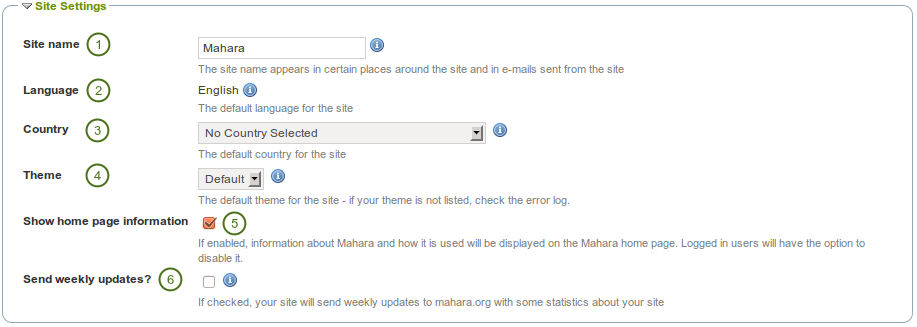
サイト設定
- サイト名: あなたのMaharaインスタンスの名称を選択してください。これはサイトの特定の場所に表示されます。例えば、ブラウザのタイトルバーおよびサイトから送信されたメールに表示されます。ですから、長過ぎないようにしてください。
- 言語: あなたのサイトのデフォルト言語を設定してください。複数言語パックをインストールしている場合、あなたにはドロップダウンメニューが表示されます。そうでない場合、標準言語の「英語」が表示されます。
- 国: 選択された国は、あなたのMaharaインストレーションをとおして、デフォルトの国となります。例) 連絡先情報.
- Theme: Mahara comes with a number of themes that you can use. Choose one from the drop-down menu to make it the default theme for your site. If you have institutions set up, they can choose their own theme.
- Show homepage information: If enabled, information about Mahara and how it is used is displayed on the Mahara homepage for logged-out and the dashboard for logged-in users. Logged-in users can disable this. See also Quick links.
- Send weekly updates?: If checked, your site send weekly updates to mahara.org with some statistics about your site. See also Register your Mahara site.
注釈
あなたはさらに言語パックをインストールすることができます。言語パックに関するWiki <https://wiki.mahara.org/index.php/Language_Packs>` および言語パックに関する完全なリスト <http://langpacks.mahara.org/> があります。
8.2.1.2. ユーザ設定
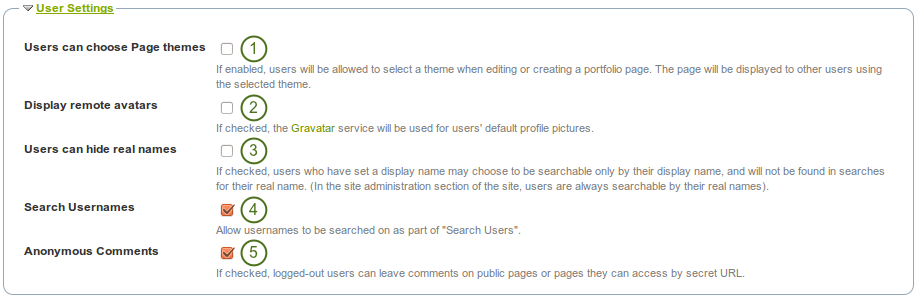
ユーザ設定
- Users can choose page themes: If this setting is enabled, users can select a theme for their portfolio page. The page is displayed with this theme to other users. Thus, an institution or site theme can be overwritten.
- Display remote avatars: If checked, users』 default profile pictures will be their Gravatar pictures (remote avatar). Users will need an account with Gravatar for this to work.
- Users can hide real names: If checked, users who have set a display name may choose to be searchable only by their display name, and will not be found in searches for their real name. In the site administration section of the site, users are always searchable by their real names. An administrator (site and institution) always sees the display name, first and last name and username.
- Search usernames: If checked, usernames can be searched on as part of 「Search Users」 on the dashboard and via Find friends.
- Anonymous comments: If checked, logged-out users / users without a login can leave comments on public pages or pages they can access via secret URL.
8.2.1.3. 検索設定
Maharaにはあなたがユーザおよびページを検索することのできる検索プラグインが同梱されます。別の検索プラグインをインストールした場合、あなたのサイトにどの検索プラグインを使用するか選択することができます。
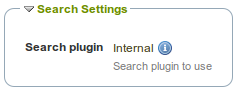
検索設定
注釈
プラグイン管理 にて、内部検索プラグインを設定することができます。
8.2.1.4. グループ設定
Maharaは個人の作業のためのみではなく、グループの共同作業にも使用することができます。グループエリアではいくつかの設定を使用できます。
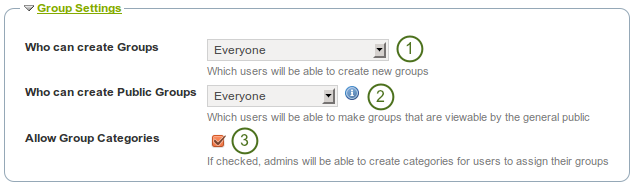
グループ設定
- Who can create groups: You decide whether administrators, administrators and staff or everyone can create groups. The default setting is the most permissive 「everyone」 because Mahara is user-centered and gives the individual users a great deal of control over what they want to do. If you choose to limit the group creation to administrators (and staff), these need to be contacted to set up groups. There is no internal group request system.
- Who can create public groups: Choose whether everyone or only administrators can create public groups. These are groups for which you do not need to be a member of the group or even have a login to Mahara to view the group homepage, member listing and discussion forums.
- Allow group categories: If checked, administrators can create categories for users to assign to their groups. These categories can be used to filter groups in My groups and Find groups.
8.2.1.5. インスティテューション設定
あなたは複数のインスティテューションでMaharaを使用することができます。また、管理目的でそれらを分けることもできます。例) ユーザ管理およびパーミッションを分けて、それぞれに異なるテーマを設定します。
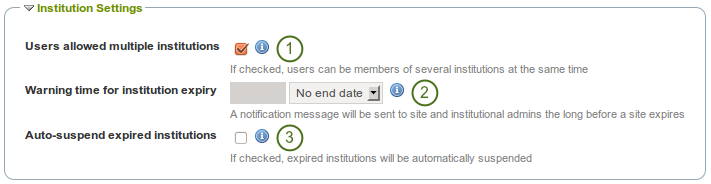
インスティテューション設定
- ユーザに複数インスティテューションを許可する: チェックした場合、ユーザは同時に複数のインスティテューションのメンバーになることができます。
- 利点: 1つまたはそれ以上のインスティテューションに属しているユーザは1つのアカウントのみ必要とします。
- 欠点: 1つまたはそれ以上のインスティテューションがカスタムテーマを持っている場合、ユーザは表示するテーマを選択することができません。
- Warning time for institution expiry: If set, a notification will be sent to site and institution admins this amount of time before an institution is due to expire and be suspended. This time may be specified in days, weeks, months, years or 「No end date」. If the latter option is chosen, institutions will not expire by default.
- Auto-suspend expired institutions: If set, this option will allow Mahara to automatically suspend an institution that has expired automatically. This means that users of that institution will not be able to log in until the institution has been unsuspended.
8.2.1.6. アカウント設定

アカウント設定
- セッションライフタイム: セキュリティ上の理由から、指定された時間を経過した時点でユーザはサイトから自動的にログアウトされます。このフィールドではこの時間を指定します。デフォルト値は1440分 (24時間) です。
- Default account lifetime: If set, user accounts will expire after this amount of time from when they were created. When a user account is expired, the user cannot log in. This time may be specified in days, weeks, months, years or 「No end date」. If the latter option is chosen, accounts will not expire by default.
- Default account inactivity time: If set, users who do not log in for this amount of time will be considered 「inactive」 and will not be able to log in anymore. This time may be specified in days, weeks, months, years or 「No end date」. If the latter option is chosen, users are not set to 「inactive」 by default.
- Warning time for inactivity / expiry: If set, a warning message will be sent to users this amount of time before their accounts are due to expire or become inactive. This time may be specified in days, weeks, months, years or 「No end date」. If the latter is chosen, users do not receive a warning before their account expires or they are flagged as having an inactive account.
8.2.1.7. セキュリティ設定
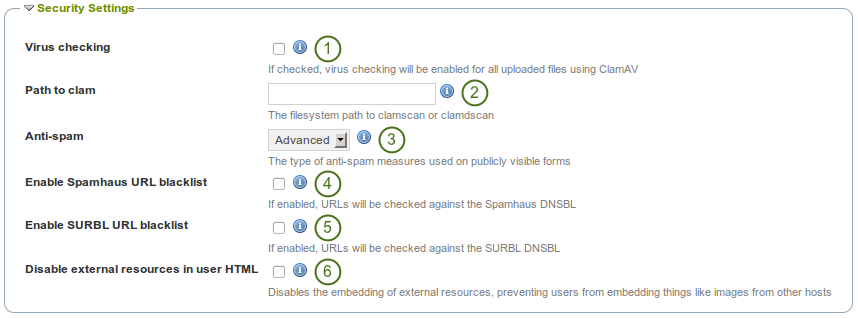
セキュリティ設定
- Virus checking: If you want all files uploaded by users to be run through a ClamAV virus scan, you should select the virus checking option. You have to have ClamAV installed on your server.
- Path to clam: The filesystem path to clamscan or clamdscan for virus checking. It is assumed that a failure of ClamAV to run will mean that a file should be treated as a virus, and a quarantine directory will be automatically set up by your Mahara installation.
- Anti-spam: There are three levels of anti-spam protection available for publicly visible forms, such as the contact and registration forms. A form submission is never silently rejected. Rather, an error message is displayed asking the user to try again if the submission is classified as spam. The three choices are:
- なし: フォーム送信で実行されるアンチスパムチェックはありません。
- シンプル: 基本的なチェックが実行されます。フォームからの送信に正しくない形式のメールアドレスを含む場合、または過度のURLを含む場合に拒否されます。
- Advanced: Performs additional checks to determine whether email addresses are real or contain URLs that are blacklisted. This requires an internet connection.
- Enable Spamhaus URL blacklist: If enabled, URLs will be checked against the Spamhaus DNSBL. The Spamhaus Project provides a URL blacklist that is free for non-commercial, low-traffic use. A professional use datafeed service is also available but not supported in Mahara. Please read the Spamhaus DNSBL usage terms before enabling this option.
- Enable SURBL URL blacklist: If enabled, URLs will be checked against the SURBL DNSBL. SURBL provides a URL blacklist that is free for organizations with fewer than 1000 users. A professional use datafeed service is also available, but not supported in Mahara. Please read the SURBL usage terms before enabling this option.
- Disable external resources in user HTML: Turning this option on will prevent users from embedding external resources such as images from remote sites into their forum posts and other HTML content. It is however a good thing to do from a security standpoint since it does neutralise a few clever phishing attacks. See the HTML Purifier documentation for more details.
8.2.1.8. プロクシ設定
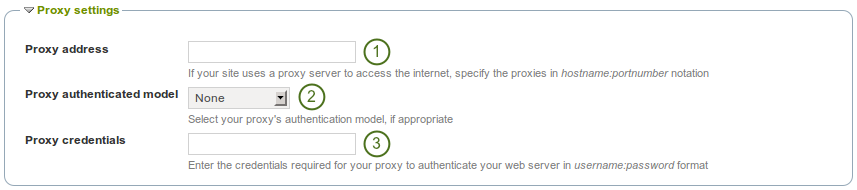
プロクシ設定
- Proxy address: If your site uses a proxy server to access the internet, specify the proxies in
hostname:portnumbernotation. - プロクシ認証モデル: 適切な場合、あなたのプロクシ認証モデル (「なし」または基本[NCSA]) を選択してください。
- プロクシ証明書: あなたのプロクシがウェブサーバに認証するため必要な証明書を「ユーザ名:パスワード」のフォーマットで指定してください。
8.2.1.9. Eメール設定
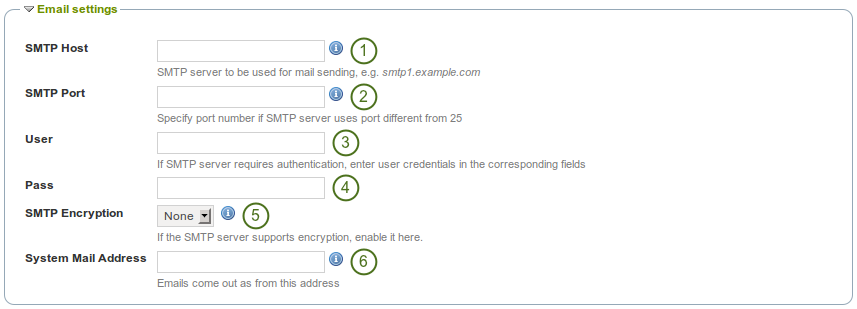
Eメール設定
- SMTP host: If you want to force Mahara to use a specific SMTP server instead of the system one, enter its hostname here, e.g.
smtp.example.com. It is possible to specify more than one host by separating them with semicolons, e.g.smtp1.example.com;smtp2.example.com, but keep in mind that all other settings, e.g. authentication credentials and port numbers, will apply to all listed servers. It is not possible to specify different credentials for each server in this list. This feature is useful when SMTP host authentication is not required or you list different frontends for the same mail server in which case other settings will work. - SMTP port: If your SMTP server uses a port number different from 25, you may specify it here. When encryption is enabled, the default ports are 465 for SSL and 587 for TLS. You only need to specify a port number if it is different from these. Check the correct settings with your mail service provider.
- ユーザ: あなたのSMTPサーバに認証が必要な場合、ここにユーザ名を入力してください。
- パスワード: あなたのSMTPサーバが認証を必要とする場合、ここにパスワードを入力してください。
- SMTP暗号化: あなたのSMTPサーバが暗号化をサポートしている場合、ここで有効にしてください。
- System mail address: This email address is the address that emails are sent from when using Mahara.
8.2.1.10. 一般設定
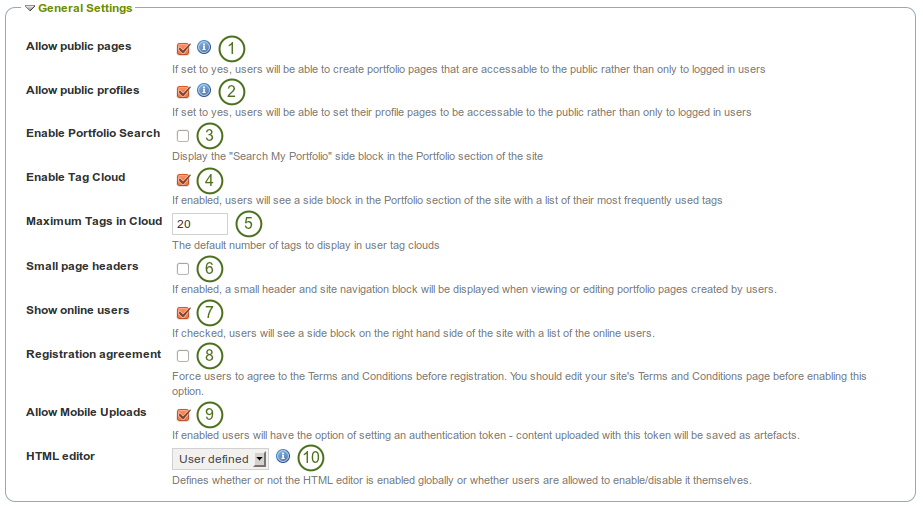
一般設定
- パブリックページを許可する: チェックした場合、ログインユーザだけではなく、その他のユーザからもアクセス可能なポートフォリオページを作成することができます。
- Allow public profiles: If checked, users can set their profile pages to be accessible to the public rather than only to logged-in users. However, only logged-in users can use interactive features such as the wall.
- Enable portfolio search: If checked, the 「Search My Portfolio」 side block is displayed in the Content and Portfolio sections of the site.
- Enable tag cloud: If checked, users see a side block in the Content and Portfolio sections of the site with a list of their most frequently used tags.
- クラウド中の最大タグ数: ユーザのタグクラウドに表示されるタグのデフォルト数を入力してください。ユーザはこの数を:ref:`アカウント設定 <general_account_options>`で変更することができます。
- Small page headers: If checked, a small header and site navigation block are displayed when viewing or editing portfolio page instead of the standard header. This option gives more space for the portfolio content itself.
- オンラインユーザを表示する: チェックした場合、ユーザに対してサイドブロック上に10分内にログインしたユーザの一覧が表示されます ( ダッシュボード)。
- Registration agreement: If checked, you force users to agree to the 「Terms and Conditions」 before registration. You should edit your site’s 「Terms and Conditions」 page before enabling this option. You can do so under Edit site pages.
- モバイルアップロードを許可する: この設定を有効にした場合、ユーザは アカウント設定 で認証トークンを設定することができます。これにより :ref:`モバイルデバイス <mobile_mahara>`からファイルをアップロードすることができるようになります。
8.2.2. サイトページを編集する
ここであなたはフッタにリンクされているサイトおよびページ近くのページコンテンツを編集することができます。
- About
- ホーム (ダッシュボード)
- ログアウトホーム
- プライバシー保護方針
- 使用条件
注釈
Due to a quirk in the system, you do not see the text on the first page that is displayed in the editor - generally 「Home (Dashboard)」. In order to edit it, you need to click on a different page in the dro-down menu first and then select it again to see its text.
すべてのページでは、あなたが完全に変更できるデフォルトのテキストが入力されています。すべてのページにはテキストを含む必要があります。ページスタイルを変更するため、あなたはビジュアルエディタを使用することができます。
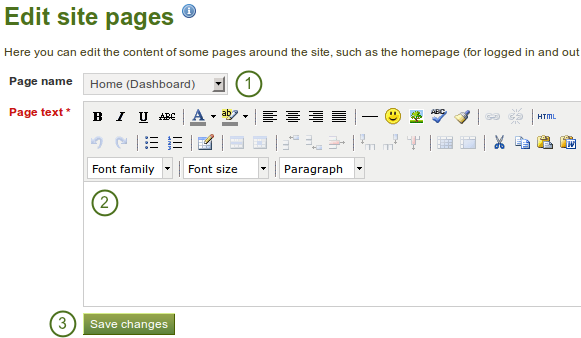
サイトページを編集する
- Choose the page you want to edit from the drop-down menu.
- Change the text in the editor window. Some text is obligatory.
- 変更を保存する ボタンをクリックしてください。
8.2.3. メニュー
Maharaには2つのメニューがあります:
- リンクおよびリソース
- フッタ
8.2.3.1. リンクおよびリソース
The Links and resources menu appears to all users on most pages. You can decide which links or files are available to everybody - also those without a login - and which ones only logged-in users shall see.
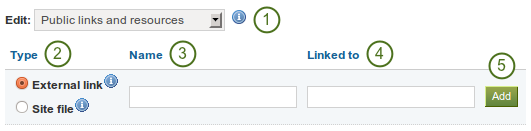
Add external links to the Links and resources menu
- あなたが編集したい リンクおよびリソース メニューを選択してください: パブリックまたはログインユーザ
- タイプ 外部リンク を選択してください。
- メニューに表示されるリンク名を入力してください。
http://またはhttps://を含むリンクの完全なURIを提供してください。- 追加 ボタンをクリックしてください。
あなたは :ref:サイトファイルエリア<site_files>にアップロードしたファイルにもリンクすることができます。
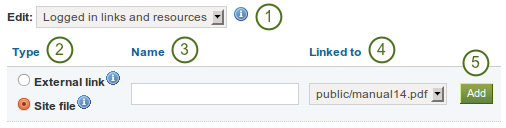
Add a site file to the Links and resources menu
- あなたが編集したい リンクおよびリソース メニューを選択してください: パブリックまたはログインユーザ
- タイプ サイトファイル を選択してください。
- メニューに表示されるサイトファイル名を入力してください。
- Choose the file you want to display.
- 追加 ボタンをクリックしてください。
あなたのメニューにリンクおよびファイルを追加した後、編集または削除することができます。
注釈
後で順番を変更することができないため、あなたのリンクおよびリソースを特定の順番に表示したい場合、リンクおよびファイルを追加する前に並べてください。
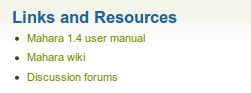
Links and resources menu result
8.2.3.2. フッタメニュー
あなたはそれぞれのフッタにどのリンクを表示するのか、コントロールすることができます。
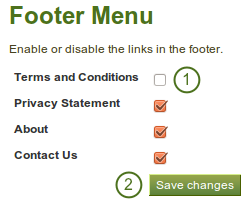
フッタメニュー
- Select which pages shall appear in the footer on each page. You can change the text of 「Terms and Conditions」, 「Privacy Statement」 and 「About」 in Edit site pages.
- Click the Save changes button to save your selection.
8.2.4. ネットワーキング
Mahara’s networking features allow it to communicate with Mahara or Moodle sites. If networking is enabled, you can use it to configure single sign-on (SSO) for users who log in at either Moodle or Mahara or allow users from another Mahara instance to access yours.
Moodle 2.0以降、あなたがMoodle内で作成したコンテンツを保存するため、ポートフォリオ機能 <http://docs.moodle.org/22/en/Portfolios> を通して、MaharaおよびMoodleに接続することができます。
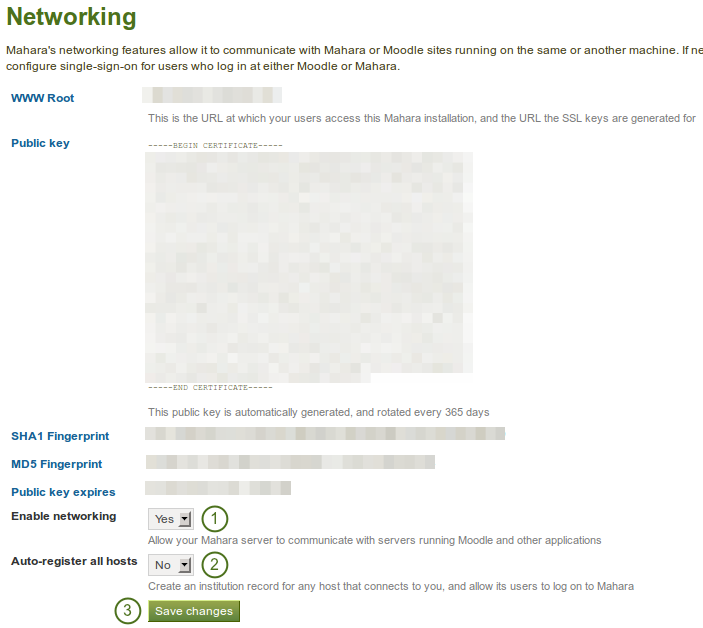
Networking overview
すべてにインスティテューションにおいて、サイト全体でネットワーキングを使用するには:
- Choose 「Yes」 from the drop-down menu at Enable networking.
- Decide whether you wish to auto-register all hosts or not. If you choose 「Yes」, an institution is created for any host that connects allowing these users to log in to your Mahara site. We recommend you leave the default 「No」 because that gives you more control over which Moodle or Mahara instances can connect.
- 変更を保存する ボタンをクリックしてください。
接続したいサイトに応じて、特に*WWWルート*および*パブリックキー*等、あなたはページで他の情報を提供する必要があります。
参考
The comprehensive guide for setting up a Mahoodle can be consulted when connecting Mahara and Moodle.
8.2.5. ページ
You create and copy site pages like regular portfolio pages. You do not have all blocks available. Check the blocks in various contexts for blocks that you can use in site pages.

Site pages
サイトページを作成した後、あなたはMahara上で他のユーザと共有することができます。
8.2.6. 共有
あなたは他のページのようにサイトページを共有することができます。
参考
Refer to the share options for regular portfolio pages for further information.

Share site pages
8.2.7. ファイル
Here you can upload files that you can include in the links and resources menu or in site pages. You can add files that are in the home directory to the menu with resources for logged-in users. Files that you save in the public folder can be used in the menu for users who are not logged-in.
参考
The process of uploading and managing files is very similar to files in your personal files area.

Site files